In this final article of the series, we will learn how to deploy your application on the device and touch base on the things you should know about app distribution.
It is not enough to test your application on the simulator alone. The performance and memory issues can be identified only when you test the application on the device. To test and distribute your application, you should sign your code.
Code signing confirms that the application is from a trusted source and has not been modified after it is signed.
It is done through the process of asymmetric cryptography. In this cryptography method, there will be two keys: Private and Public key. The private key is with the owner and the public key, as its name suggests, is distributed to everyone.
You can encrypt a message with the private key and distribute it to anyone along with the public key. The one who receives the message can decrypt it with the public key and he also receives the trust that, you are the one who encrypted the message, as only you know the private key.
We build our application with the help of the Provisioning profile. To understand code signing, you should know the following items:
- UDID: This is a unique identifier of the device. Connect the device and look for the identifier field in the XCode organizer. We can also get the UDID from iTunes by clicking on the serial number in the Summary screen.
- AppID: The company identifier and the product name form the Bundle identifier. The bundle identifier prefixed with some random characters forms the App Id.
- Certificates: Apple issues a certificate and identifies you as the developer of the application. Certificate can be obtained by raising a Certificate signing request from the Keychain access. (KeychainAccess -> Certificate -> Request a certificate from a certificate authority).
- Provisioning profile: The combination of all the above things is the Provisioning profile. A provisioning profile specifies that the application identified by its App Id can run on the restricted set of devices (UDIDs) with the trust from the developer certificate.
Register yourself in the Apple Developer Program and then use the iOS provisioning portal option to create a provisioning profile. Detailed instructions on how to get the Provisioning profile can be found on the Apple developer site. We can build, test, deploy and distribute the application only with the help of this Provisioning profile.
To run the app on the device, follow the steps below.
Select the project name in the Project navigator. Select the target.
In the summary tab, enter the app version and build version. Select the minimum iOS version support as the deployment target.
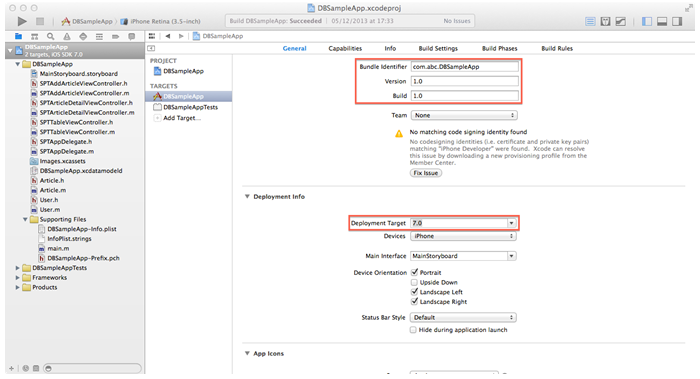
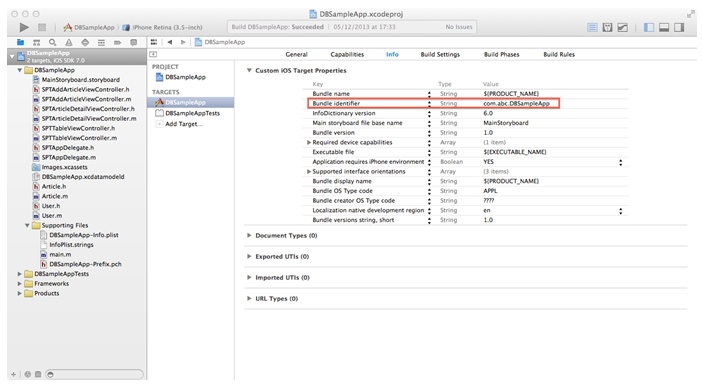
In the info tab, enter the bundle identifier properly. The bundle Id should match with the one used to create the provisioning profile
In the Build Setting tab, select the provisioning profile under the code Signing identity.
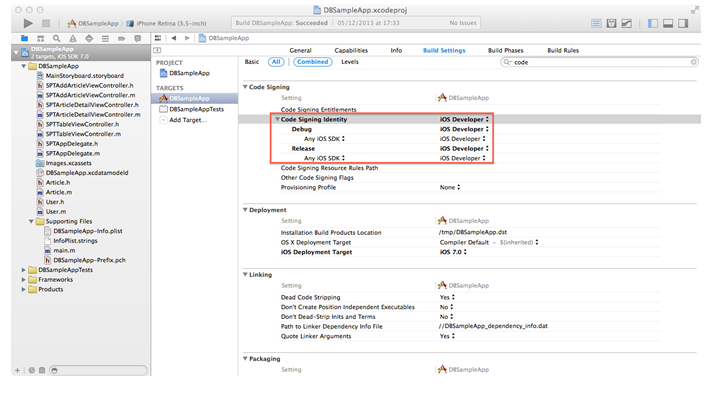
In the above figure, the Provisioning profile name will be displayed correctly if it is created and downloaded properly.
Select iOS device in the tool bar and click on run. The app will run on the connected iOS device.
Conclusion
The aim of this tutorial has been to give you a very basic understanding of how an application can be compiled, deployed in the device and distributed.
Hope this series has helped you to get off to a flying start in your iOS journey.
Please share your thoughts in the comments.
 Kanya Srinisavan