- Introducing DevKinsta
- How to Create a Local WordPress Site with DevKinsta
- How to Manage Multiple Sites in DevKinsta
- How to Push Changes to a Kinsta Staging Environment
- How to Use DevKinsta’s Database Management Tool
- How to Inspect Outgoing Emails With DevKinsta’s Email Inbox Tool
- Where to Learn More About DevKinsta
- Frequently Asked Questions (FAQs) about Developing WordPress Locally with DevKinsta
- You can work on your own code (or your client’s code) from anywhere.
- You can debug plugins and themes within different environments with a few clicks.
- You can expedite your development and web design workflow by tweaking things locally as you need and pushing them to a staging environment.
Introducing DevKinsta
DevKinsta is Kinsta’s free suite of tools for local WordPress development that lets you create local instances of WordPress with a complete hosting stack consisting of PHP, Nginx, and MySQL in just a few minutes. DevKinsta comes with a solid and ever-growing list of features such as:- one-click WordPress site creation
- PHP 7.x and 8.x support
- local email management
- built-in database manager
- seamless integration with MyKinsta
- a community of WordPress experts
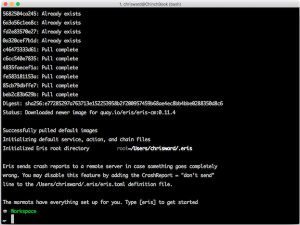
How to download DevKinsta
DevKinsta is available for macOS, Windows, and Ubuntu/Linux. Here’s how to get started:- Visit kinsta.com/devkinsta and click the Download button.
- Add your name and email address in the modal window, then click the button.
- The download process will initiate automatically and, based on your operating system, you’ll be downloading either the
.dmg,.exefile, or.deb. - Click the file and kick off the installation process.
System requirements
To successfully install DevKinsta, you’ll need to make sure your local machine meets the following requirements:- at least 5 GB of disk space. 20 GB+ is recommended
- at least 1 GB of RAM. 2 GB+ is recommended
- a stable internet connection for the download
- virtualization enabled in BIOS
How to Create a Local WordPress Site with DevKinsta
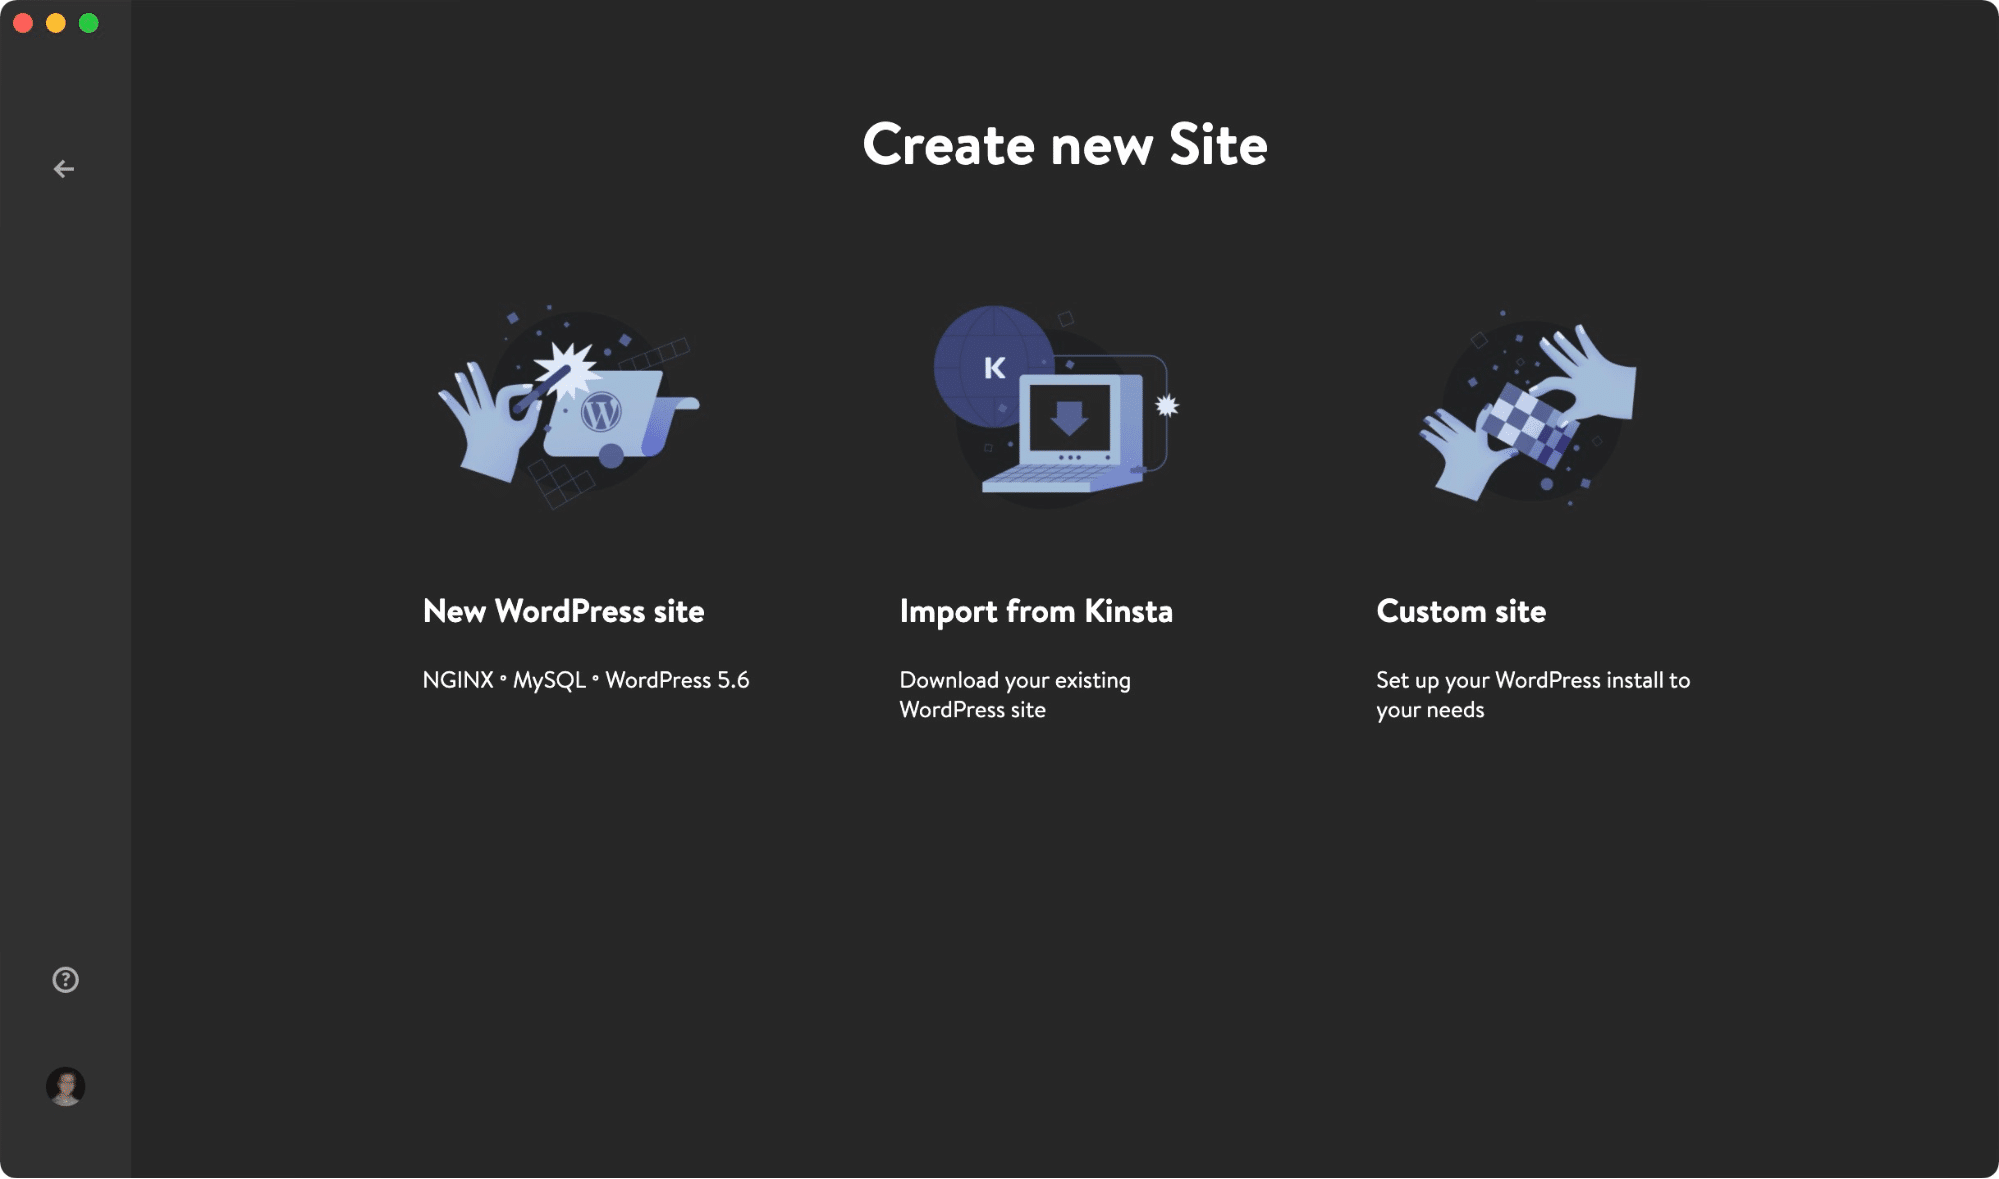
DevKinsta supports three methods for creating local WordPress sites:- New WordPress Site lets you create a local site with the default hosting stack consisting of Nginx, MySQL, PHP 7.4, and the latest version of WordPress.
- Import from Kinsta lets you clone a site hosted on Kinsta to your local computer with just a few clicks. After you’re finished with your work, you can even push changes back to a Kinsta staging environment!
- Custom Site lets you create a local site with a customized hosting stack. This option allows you to choose your PHP version, specify your database name, and enable WordPress multisite.
 Creating a new site with DevKinsa
New WordPress Site
To get started, select the New WordPress Site option. For this site creation method, all you have to do is specify a site name, WordPress admin username, and WordPress admin password. After you’ve filled in these three fields, click Create Site.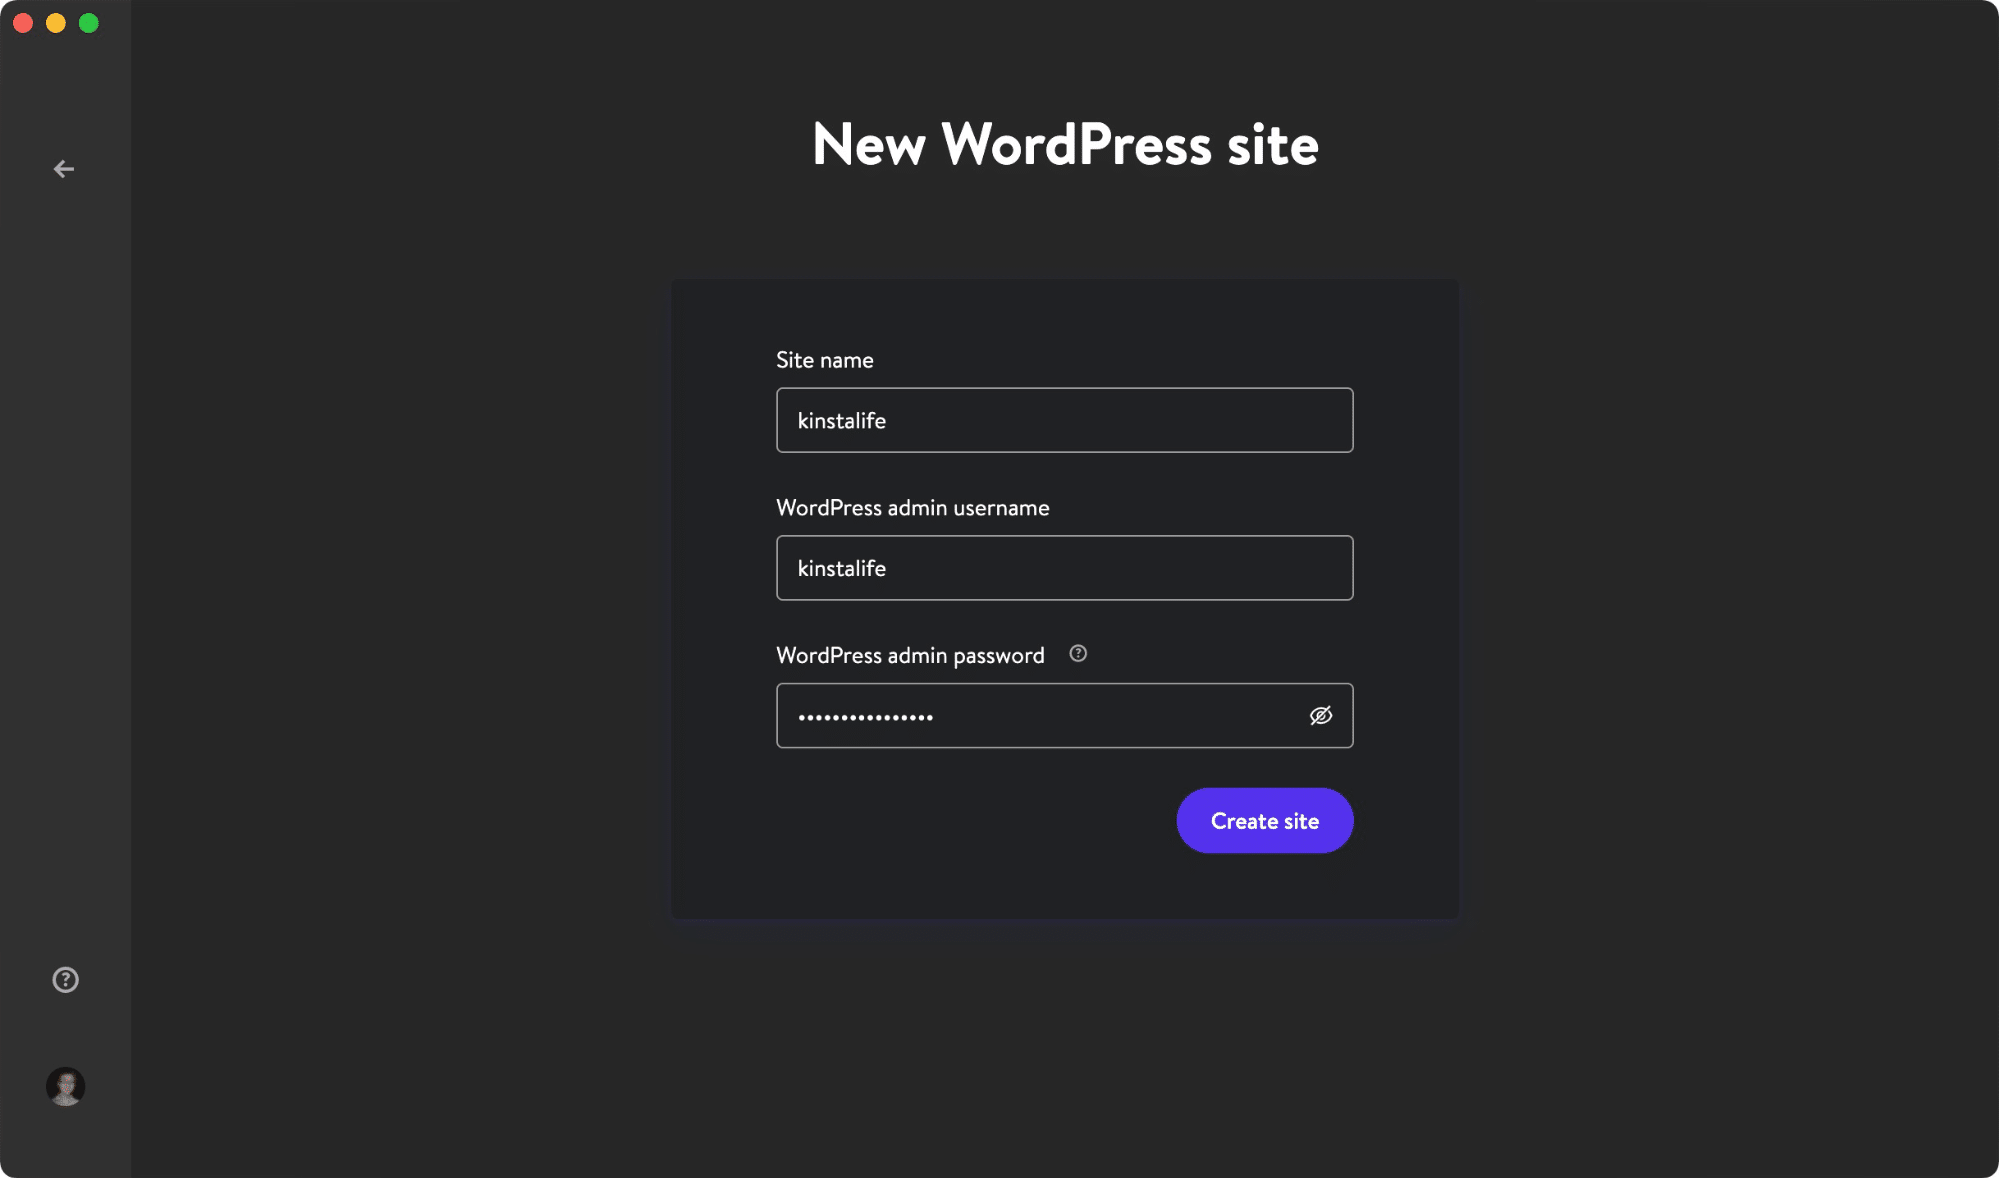 Create a new WordPress site in DevKinsta
Import from Kinsta
The second option is to import a site environment that’s already hosted on Kinsta. To do this, click Import from Kinsta and provide your MyKinsta login details. After logging in, select the Kinsta environment you’d like to clone to your local computer. DevKinsta supports both live and staging environments on Kinsta, so be sure to choose the correct one. After clicking on an environment, specify whether or not the site is a multisite installation and click Import Site to start cloning your site.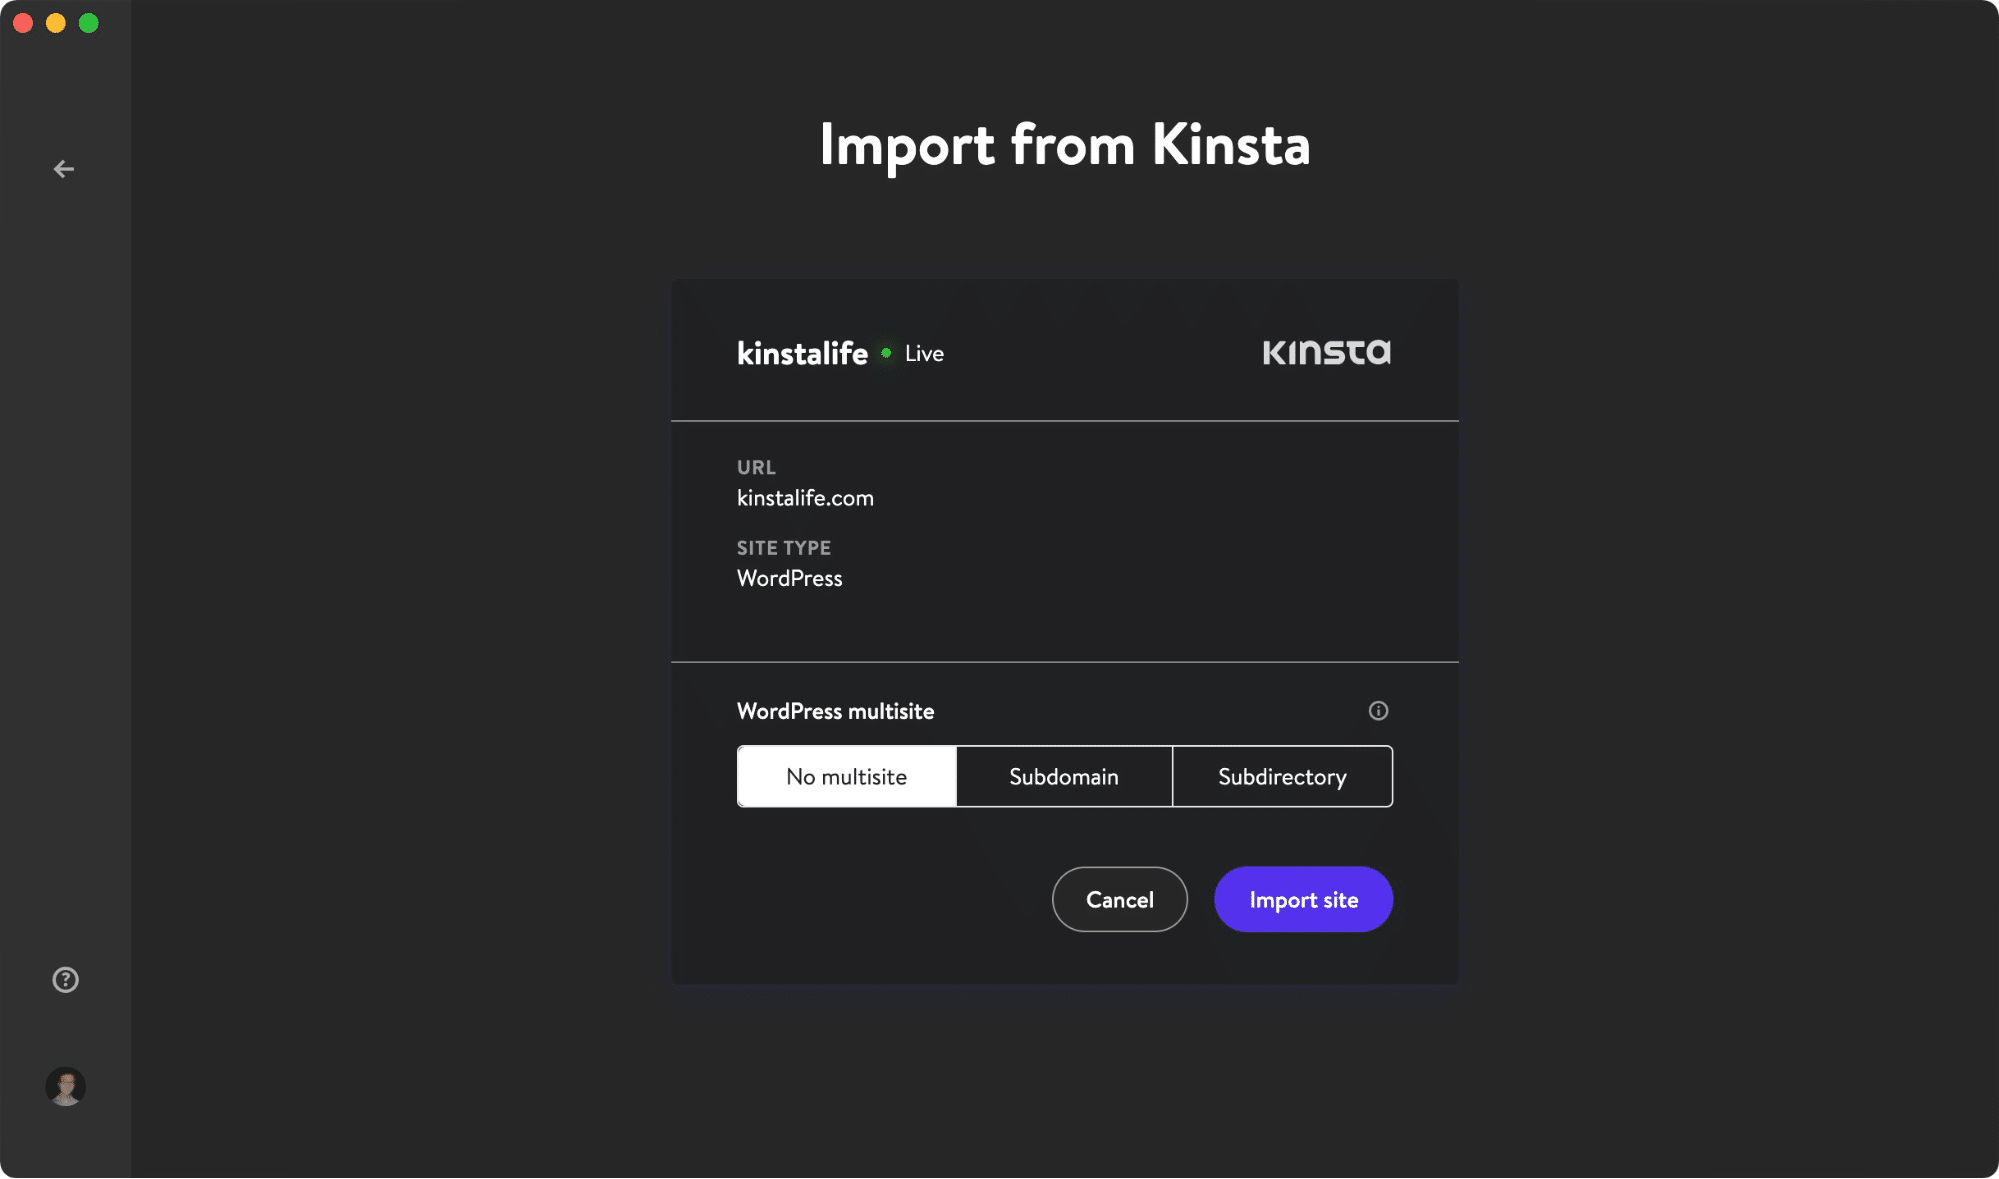 Clone your live site with the Import from Kinsta feature
Custom Site
The third and last option, Custom Site, lets you configure specific settings for your local WordPress installation. Here are the settings you can tweak with this site creation method:- Site Name
- PHP Version (PHP 7.2, 7.3, 7.4, and 8.0)
- Database Name
- Enable HTTPS
- WordPress Site Title
- WordPress Admin Email
- WordPress Admin Username
- WordPress Admin Password
- WordPress Multisite Mode
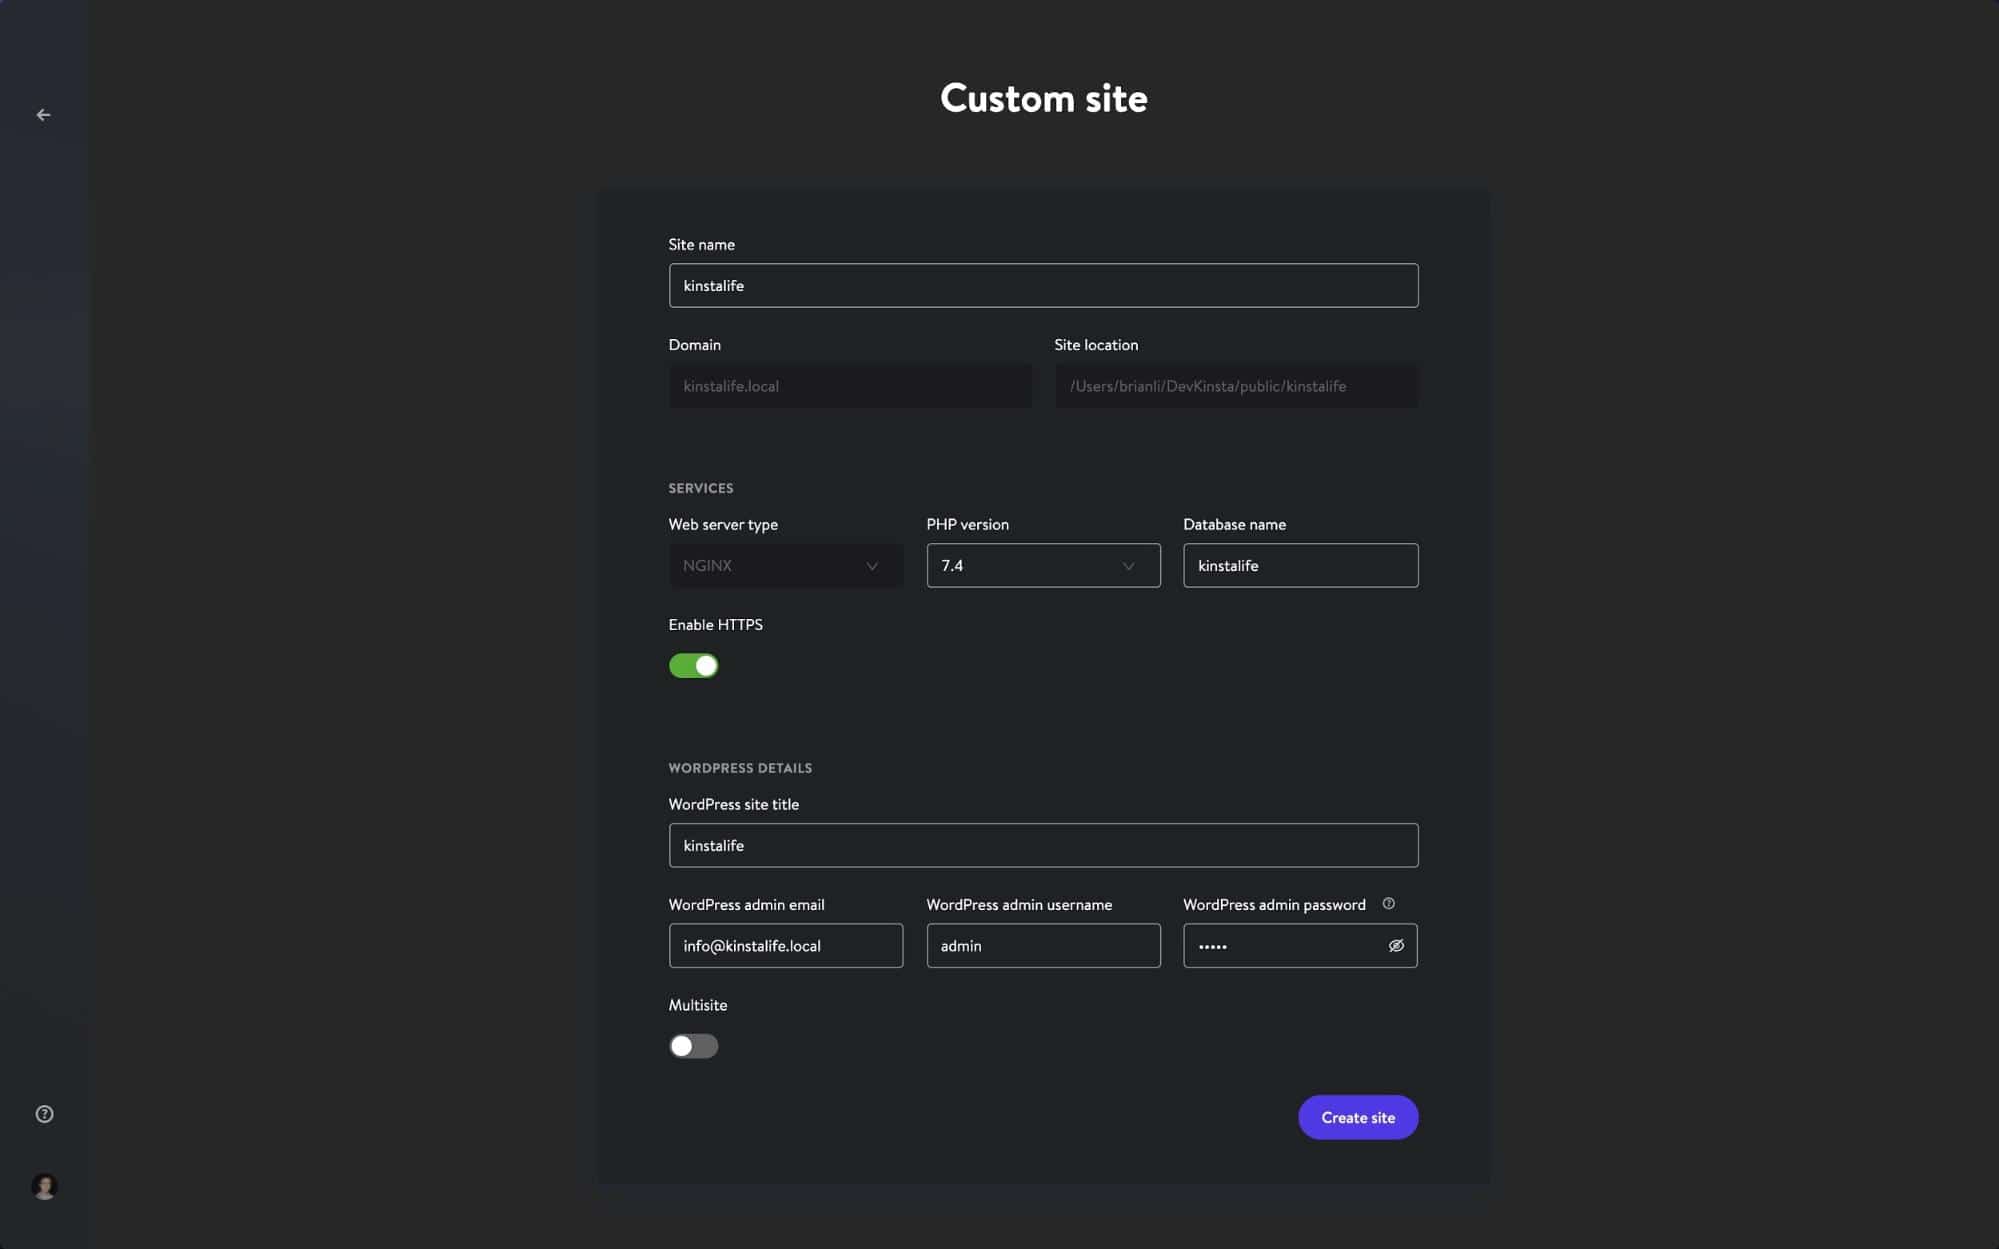 Customize a local WordPress installation with DevKinsta
How to Manage Multiple Sites in DevKinsta
For agencies and developers working on multiple projects at once, DevKinsta lets you deploy and manage multiple local WordPress sites! Every local WordPress site managed by DevKinsta runs in its own containerized environment. This means every site has its own customizable PHP version, WordPress version, email inbox, and more. To view your DevKinsta site list, click on the site’s icon in the left-hand sidebar.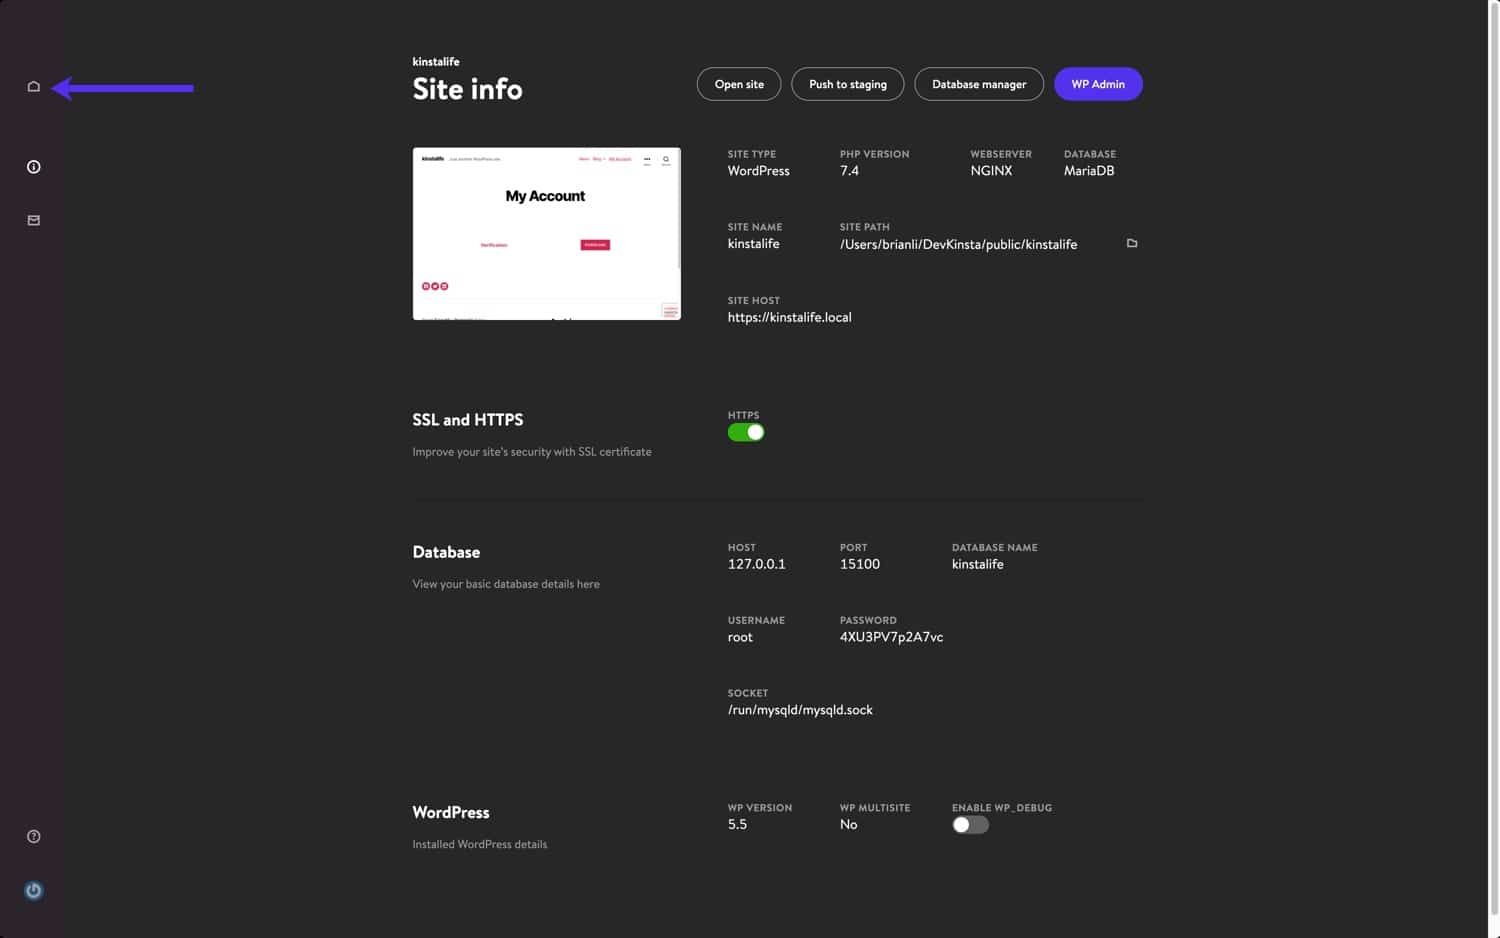 Deploy multiple WordPress local environments with DevKinsta
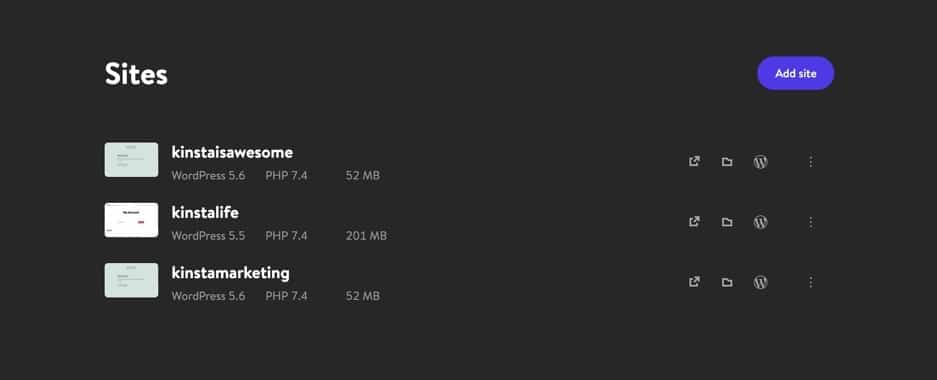 Manage multiple WordPress sites with DevKinsta
How to Push Changes to a Kinsta Staging Environment
For users with WordPress sites hosted on Kinsta, DevKinsta makes it easy to push changes online to a Kinsta staging environment. To push a local site to Kinsta, just click the Push to Staging button on your “Site Info” page.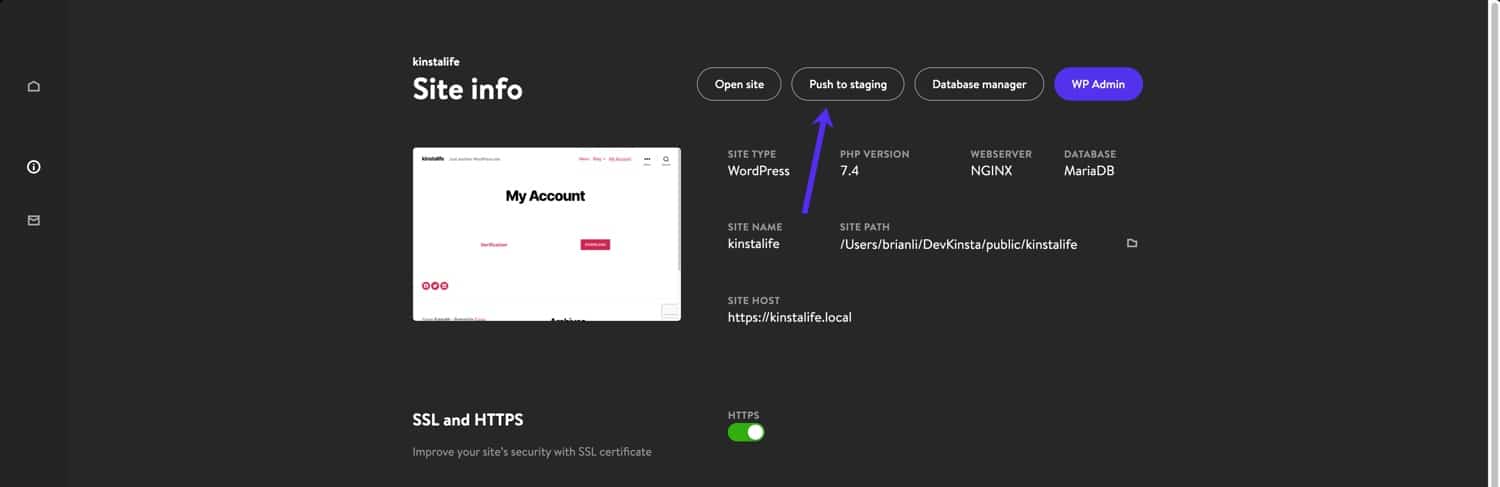 Push your local WordPress site to a Kinsta staging environment
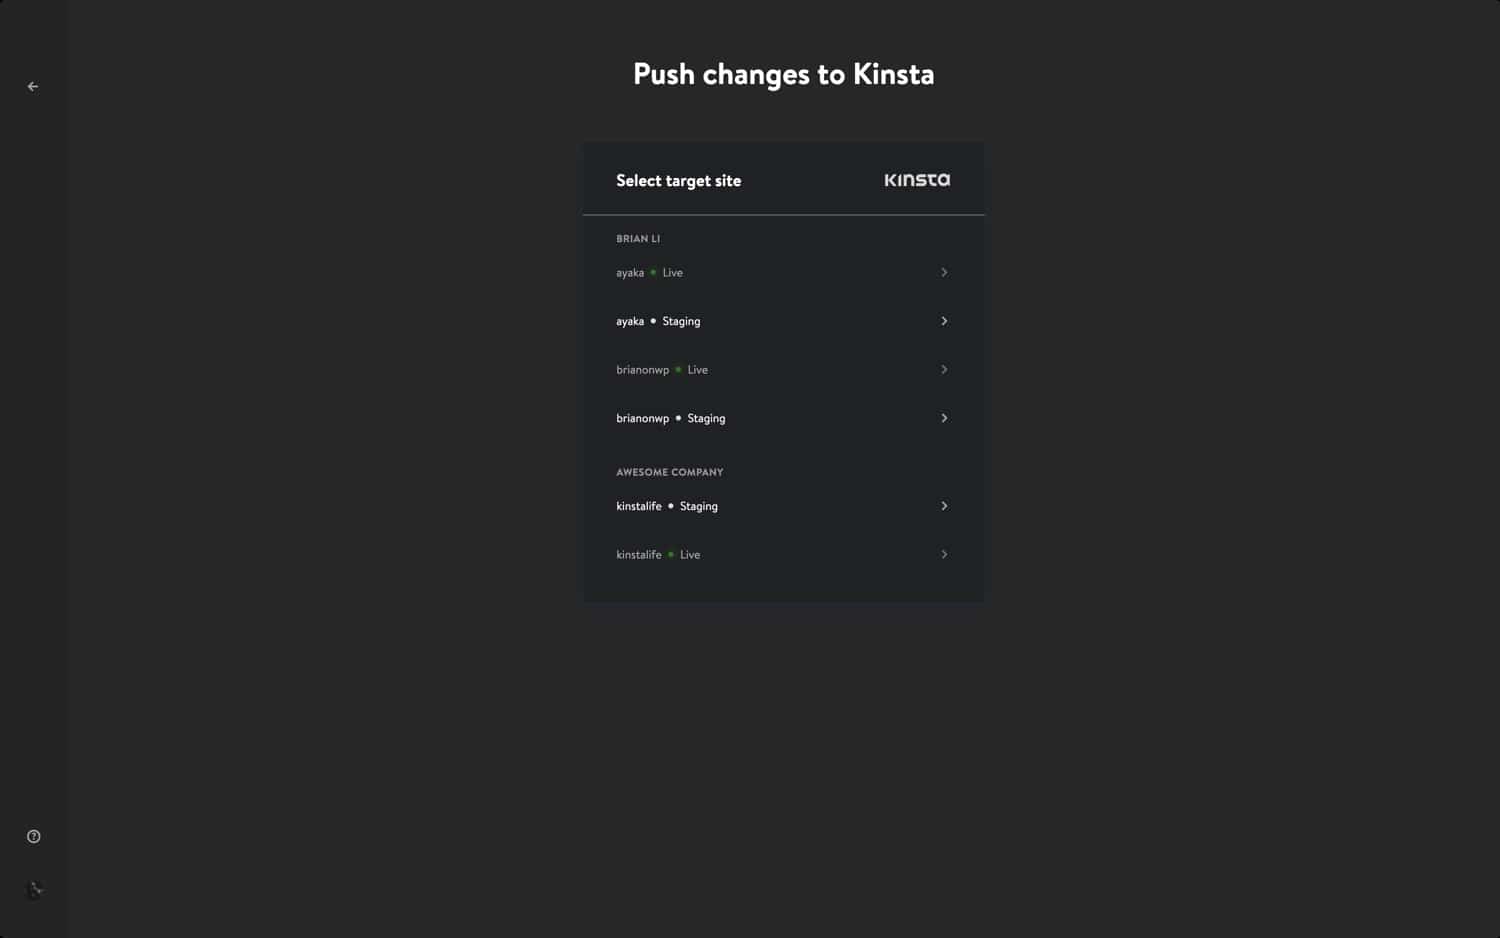 Choose a staging environment to push changes to
 Confirm the Push to Staging action
How to Use DevKinsta’s Database Management Tool
DevKinsta ships with a lightweight database management tool called Adminer. Like phpMyAdmin, which we use for sites hosted on Kinsta, Adminer provides you with a web interface to edit database tables, run database queries, import and export backups, and more. To launch Adminer, click the Database Manager button at the top of the “Site Info” page. Adminer will then open in your default web browser.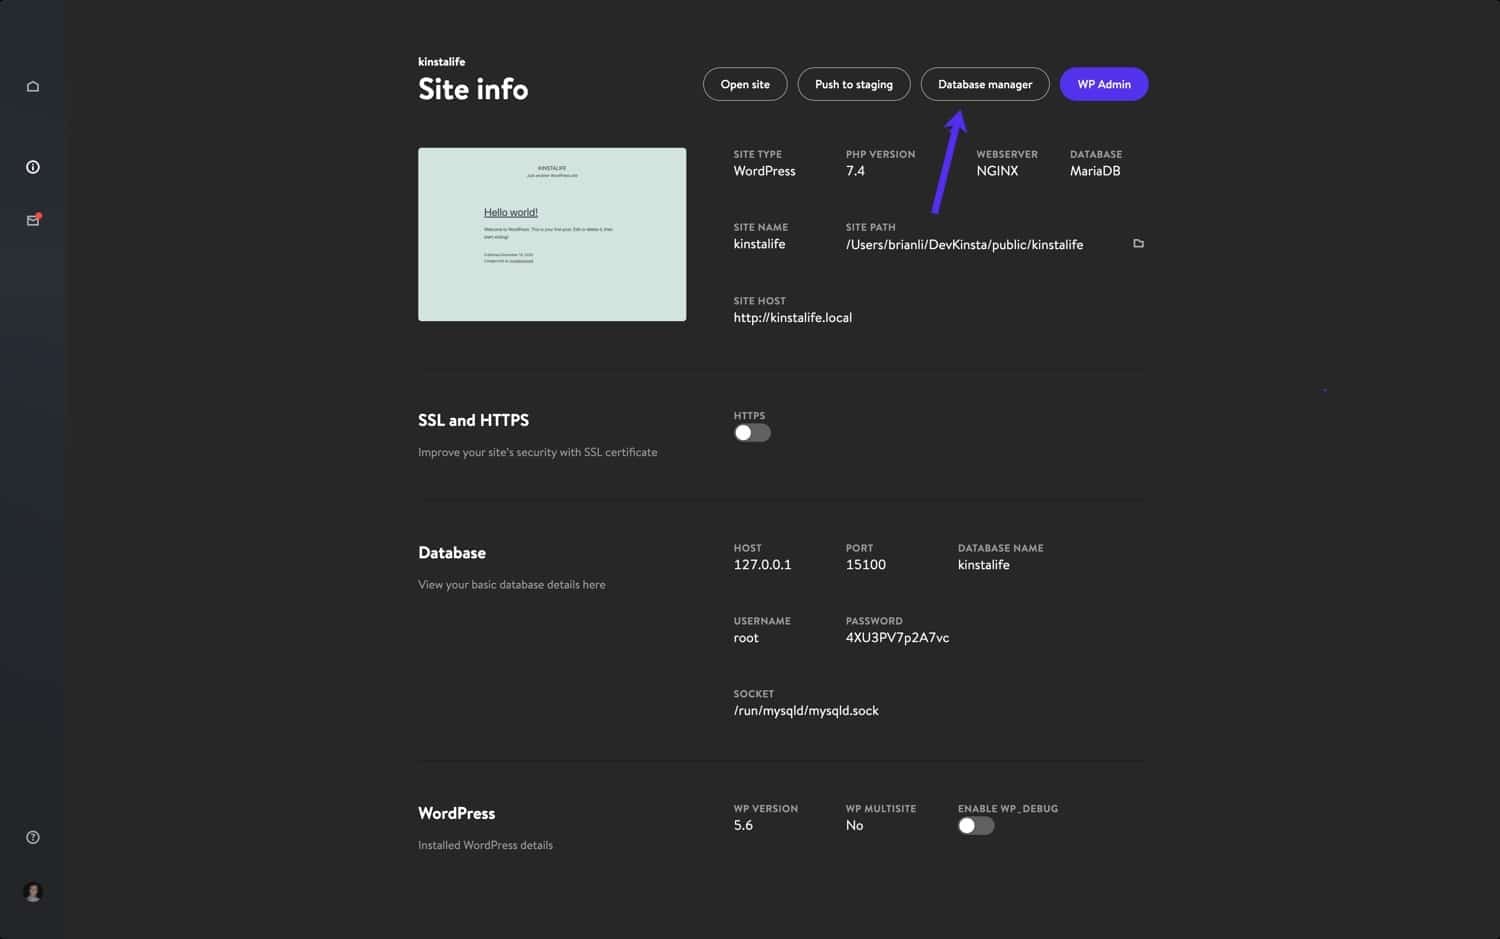 Click Database Manager to access Adminer in DevKinsta
wp_comments, wp_posts, etc.
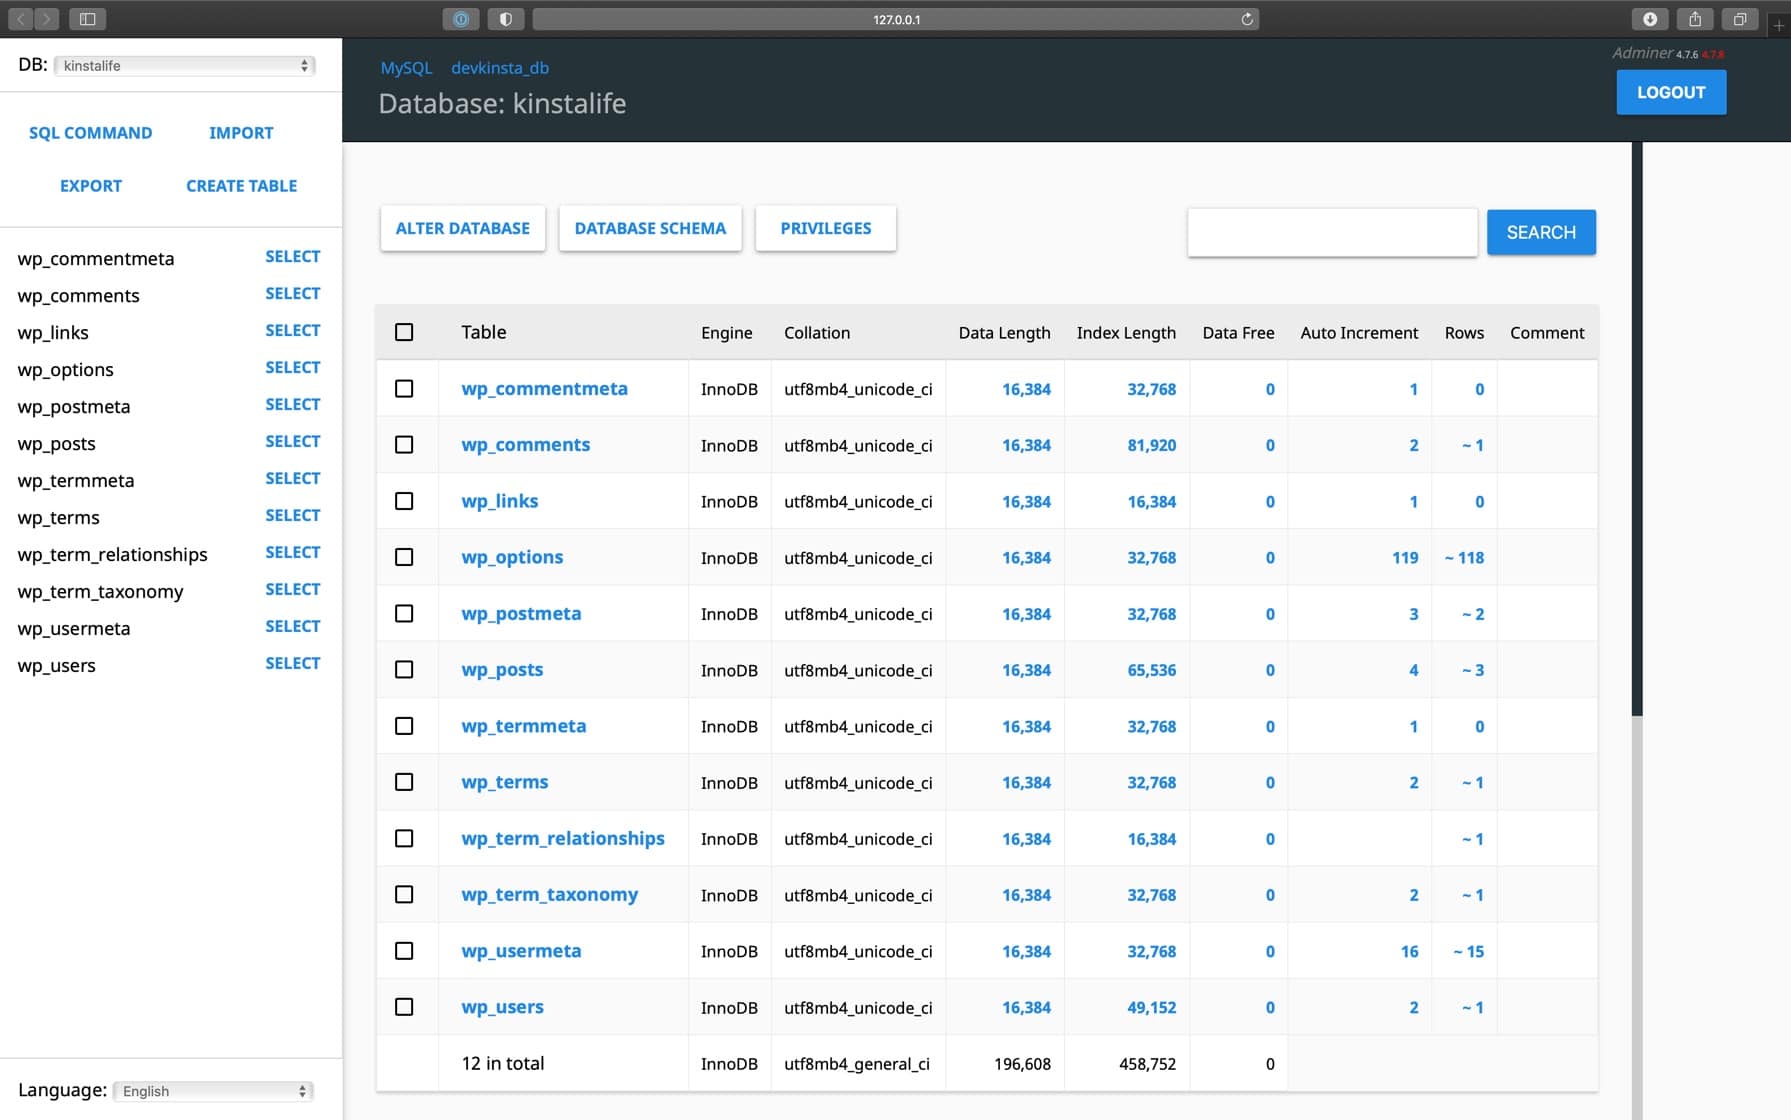 WordPress database in Adminer
wp_options table.
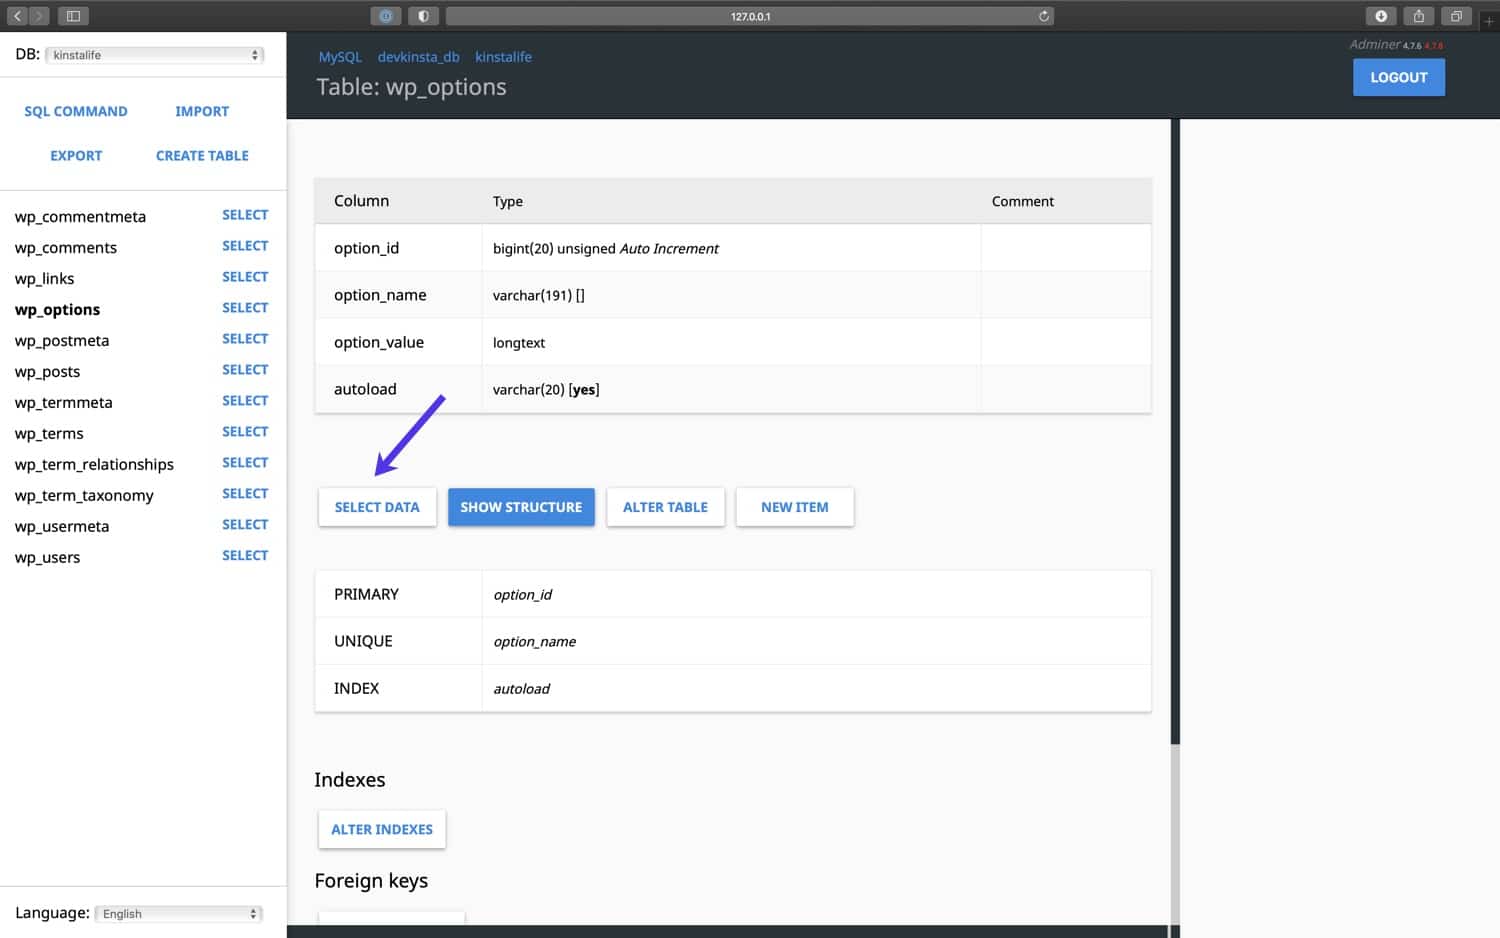 Click Select Data to edit your WordPress database tables
option_value for siteurl to update the site URL of our WordPress site, and the same can be done for the home URL as well.
 Edit a WordPress database option_value with Adminer
.sql files as well compressed .sql.gz files.
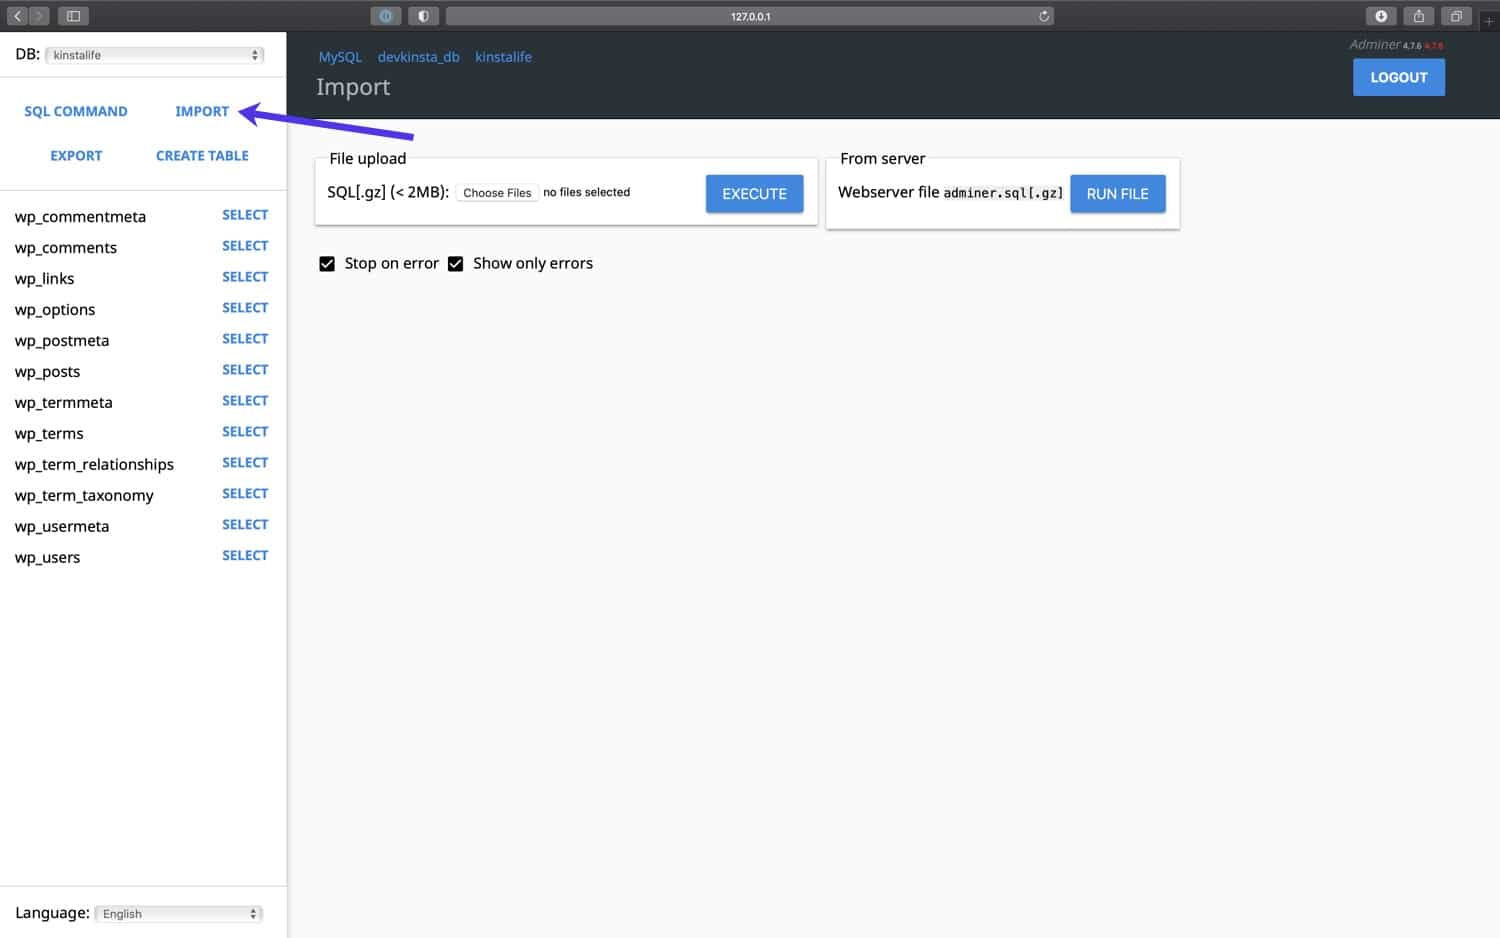 Import a database backup with Adminer
.sql.gz file.
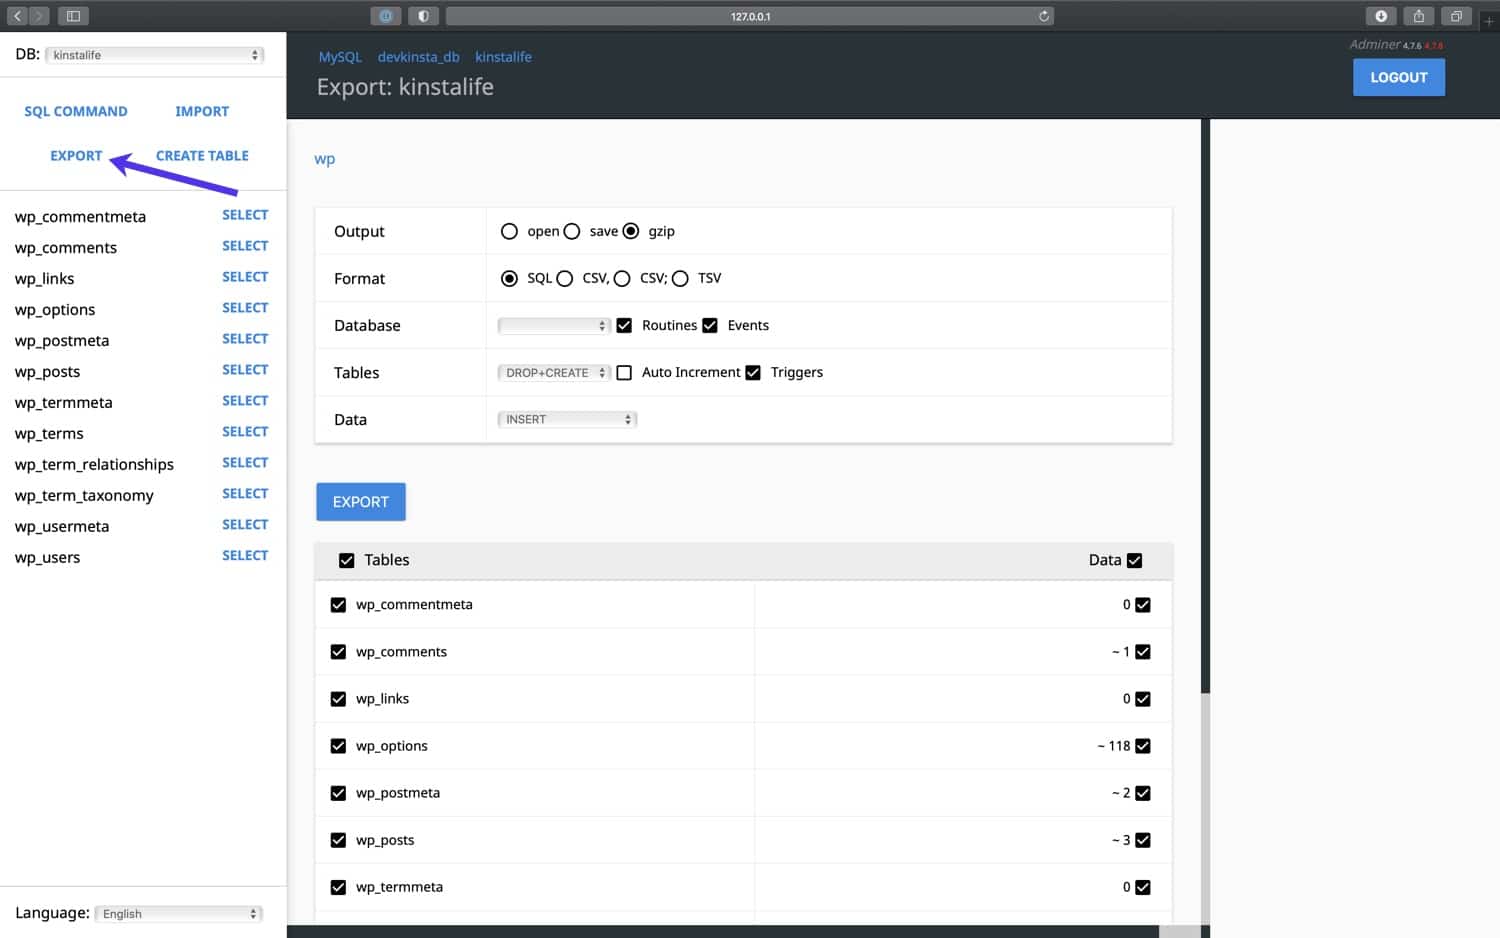 Export a database backup from Adminer
SELECT SUM(LENGTH(option_value)) as autoload_size FROM wp_options WHERE autoload='yes';
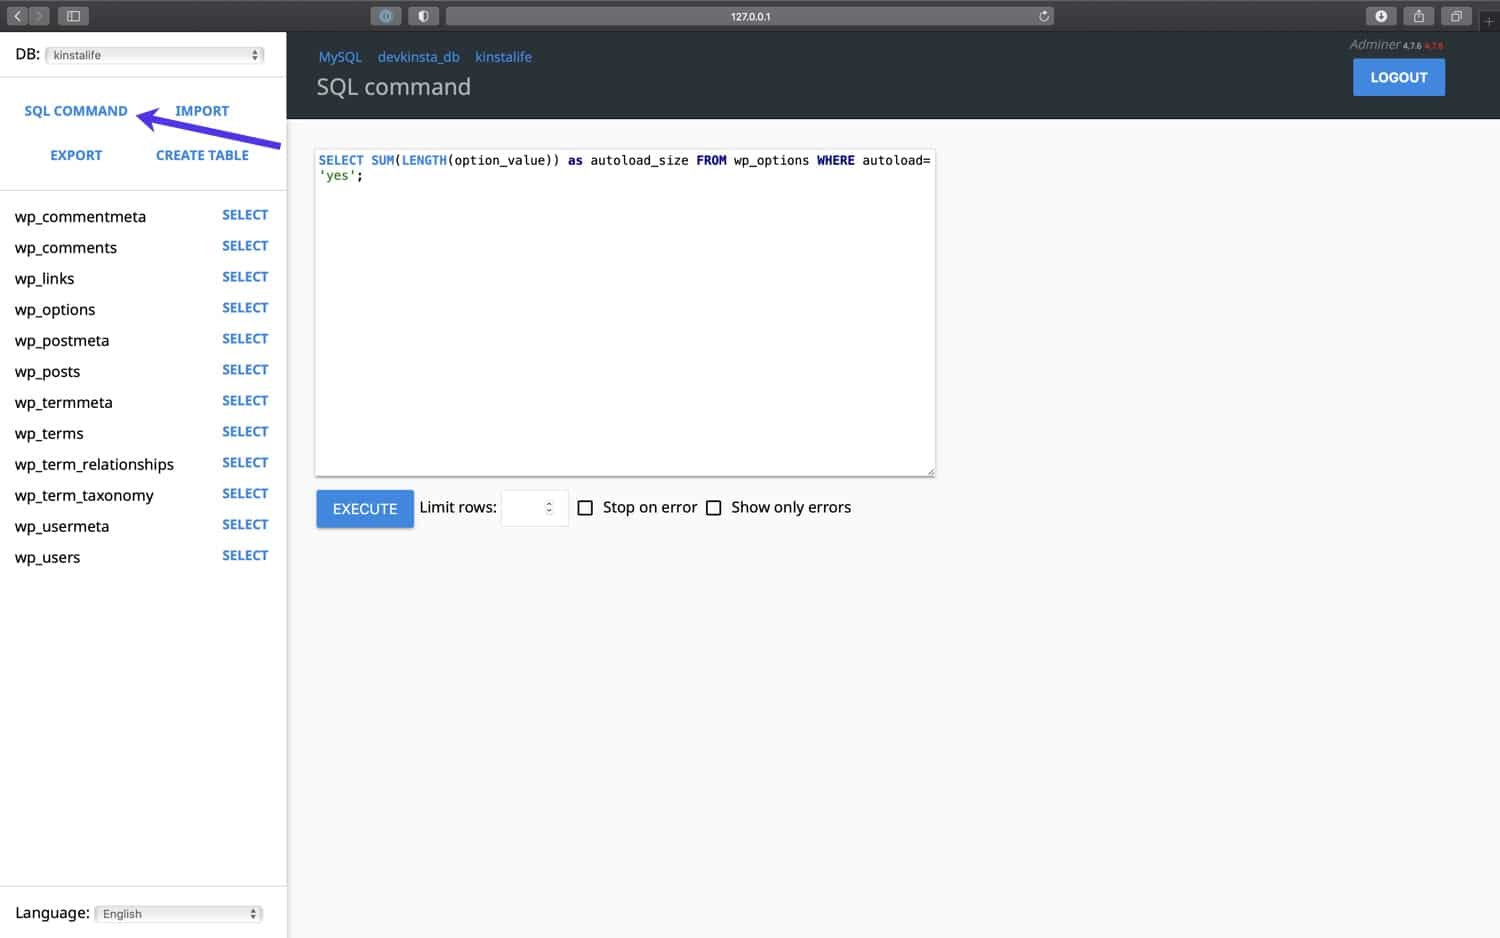 Query your database with a SQL command in Adminer
How to Inspect Outgoing Emails With DevKinsta’s Email Inbox Tool
DevKinsta includes a built-in SMTP server and email capture tool. This allows your local WordPress sites to send outgoing emails like a live production site. However, sent emails will be captured and stored in DevKinsta’s email inbox. This gives you the best of both worlds. You can use DevKinsta to test outgoing email functionality for marketing automation workflows, WooCommerce order confirmations, and more, without spamming the email inboxes of your visitors and customers. To access DevKinsta’s email inbox, click on the mail icon in the left-hand sidebar.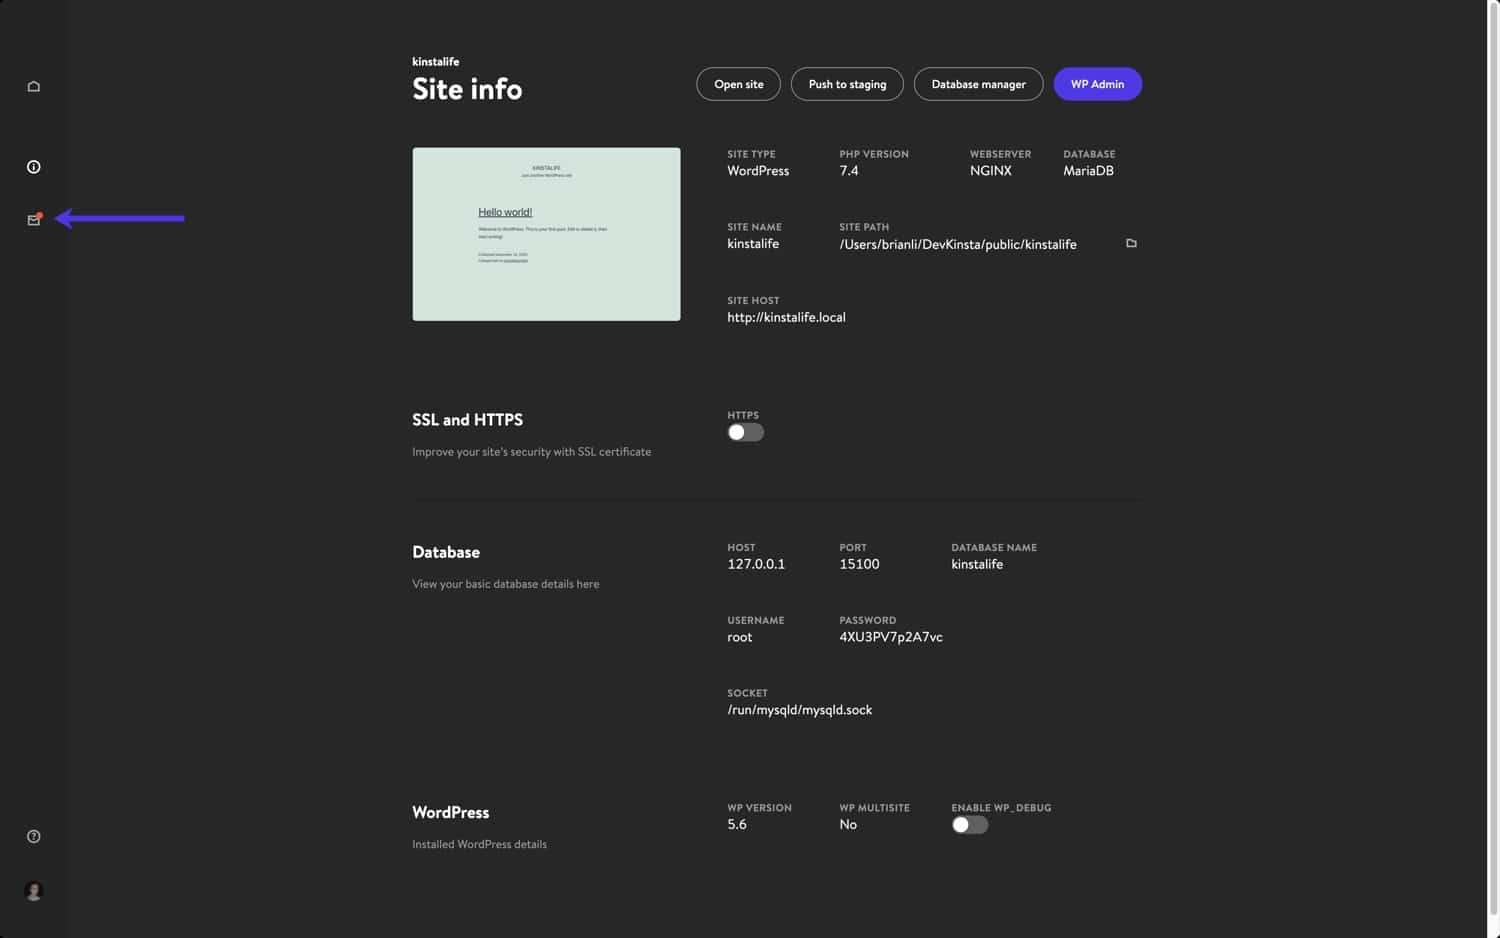 DevKinsta includes a built-in SMTP server and email capture tool
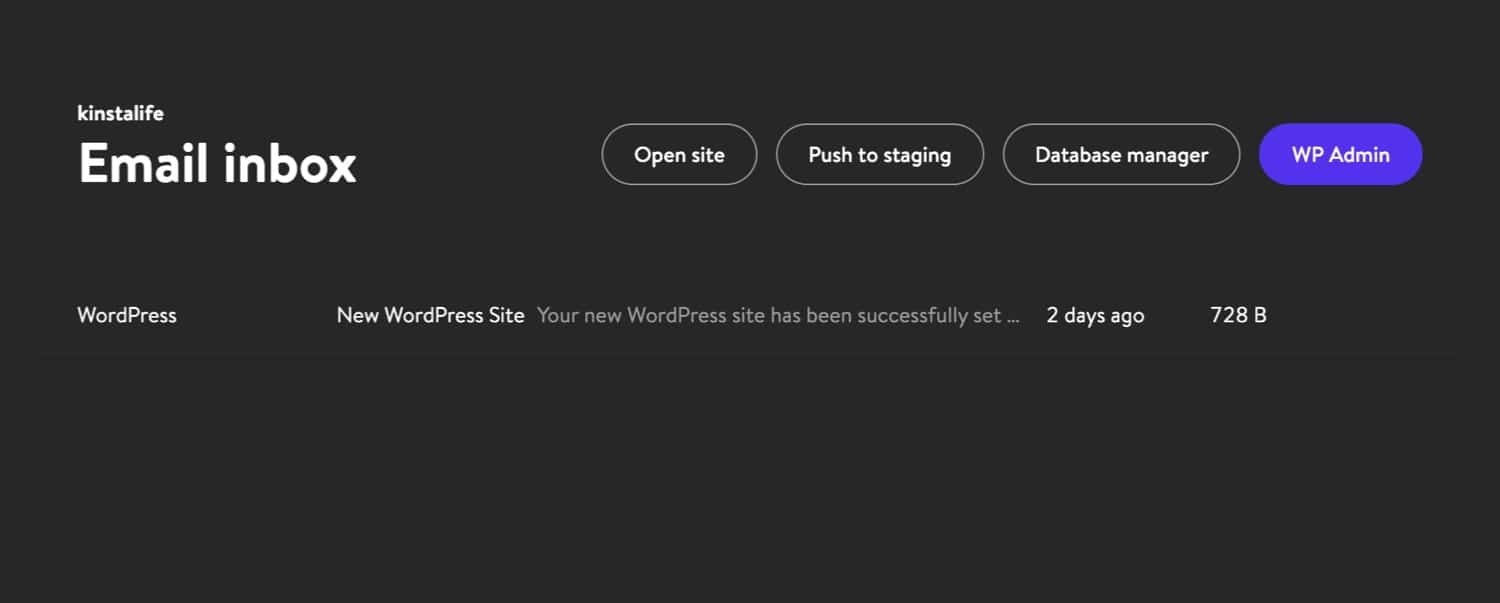 An outgoing email in DevKinsta’s email inbox
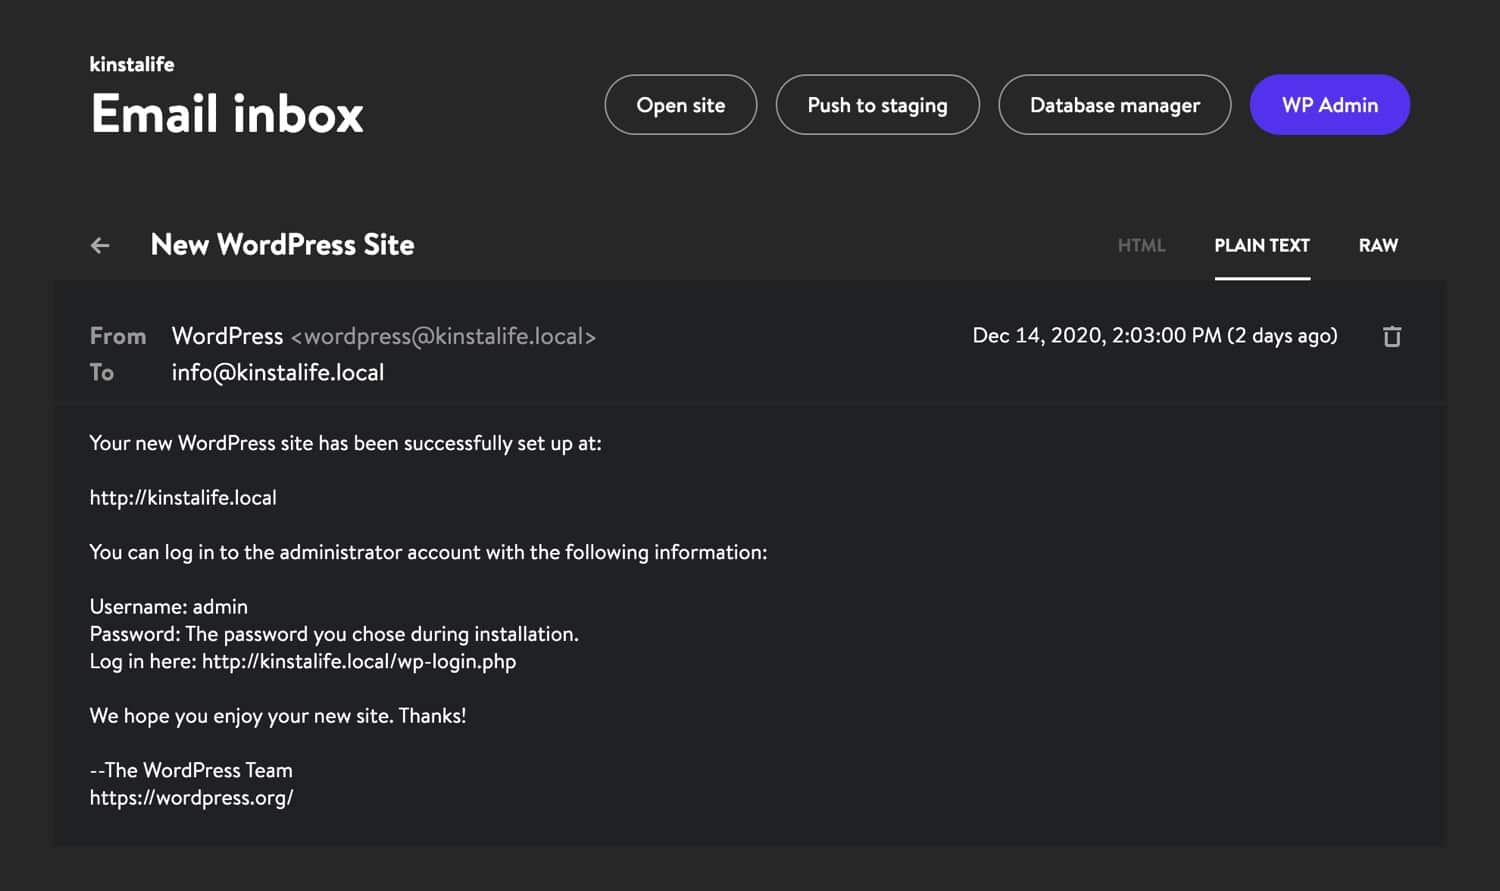 DevKinsta email inbox display modes
MIME-Version and X-Mailer directly.
Where to Learn More About DevKinsta
To learn more about DevKinsta, be sure to join the official community forum and read the DevKinsta documentation. We look forward to seeing what you create!Frequently Asked Questions (FAQs) about Developing WordPress Locally with DevKinsta
What are the system requirements for DevKinsta?
DevKinsta requires a 64-bit version of Windows 10, macOS 10.14 or later, or Ubuntu 18.04 or later. It also requires Docker Desktop to be installed on your system. Docker Desktop requires at least 4GB of RAM, but 8GB is recommended for optimal performance.
How do I install DevKinsta on my computer?
To install DevKinsta, you need to download the installer from the official DevKinsta website. Once downloaded, run the installer and follow the on-screen instructions. The installation process is straightforward and doesn’t require any technical knowledge.
Can I use DevKinsta for commercial projects?
Yes, DevKinsta is free to use for both personal and commercial projects. It’s a powerful tool that can help you develop and test WordPress websites before deploying them to a live server.
How do I create a new WordPress site with DevKinsta?
To create a new WordPress site with DevKinsta, open the application and click on the “Create New Site” button. You’ll be asked to provide some details about the site, such as its name and the version of WordPress you want to use. Once you’ve filled in these details, click on the “Create” button and DevKinsta will set up the new site for you.
Can I import an existing WordPress site into DevKinsta?
Yes, DevKinsta allows you to import existing WordPress sites. To do this, you need to create a new site as described above, but instead of setting up a new WordPress installation, you choose the “Import Site” option. You’ll then be asked to provide the details of the site you want to import.
How do I update WordPress and plugins in DevKinsta?
Updating WordPress and plugins in DevKinsta is the same as updating them on a live site. You can do this from the WordPress dashboard by going to the “Updates” section.
Can I use DevKinsta to test changes before deploying them to a live site?
Yes, one of the main benefits of DevKinsta is that it allows you to test changes in a safe, local environment before deploying them to a live site. This can help you avoid potential issues and ensure that your site is always running smoothly.
How do I deploy a site from DevKinsta to a live server?
To deploy a site from DevKinsta to a live server, you need to export the site from DevKinsta and then import it into your live server. This process may vary depending on your hosting provider, so it’s best to check their documentation for specific instructions.
What should I do if I encounter problems while using DevKinsta?
If you encounter problems while using DevKinsta, you can check the DevKinsta documentation or the Kinsta knowledge base for solutions. If you can’t find a solution, you can contact the DevKinsta support team for help.
Can I use DevKinsta on multiple computers?
Yes, you can install and use DevKinsta on multiple computers. However, keep in mind that each installation of DevKinsta is separate, so you’ll need to manually transfer sites between computers if you want to work on them from different machines.
 SitePoint Team
Sharing our passion for building incredible internet things.