
This article was created in partnership with Alibaba Cloud. Thank you for supporting the partners who make SitePoint possible.
Do you have a tip for making the most out of Alibaba Cloud Services? If so, tell us about it in our SitePoint Community.
Mina is a deployment automation tool and a deploy Bash script generator from the Rails world, which came into the spotlight after development companies noticed its advantages over Capistrano. Mina, in contrast to Capistrano, uses only one SSH connection to the deployment server, and executes a batch of bash commands there. This makes it a lot faster than Capistrano, which opens a separate SSH session for every command.
In this article we will go through setting up Mina for the deployment of a basic Django app – an unorthodox toolset for the Django world, which tends to use Docker or Fabric more. Given Mina’s simplicity and flexibility, we feel it is worth exploring its use in the deployment of Python web apps.
Django, a “web framework for perfectionists with deadlines,” has been around for some time now. It started off as a content-management oriented web framework, created in-house by web developers at Lawrence Journal World for its news web portal. It was published in 2005, and from there it took off and the rest is history. It became one of the most serious, widely adopted web frameworks, competing with Ruby on Rails. It is in use by Instagram, Disqus, the Washington Times, Mozilla, Bitbucket and others. It’s still thriving.
Django docs suggest Apache with mod-wsgi as the first-choice, and it may be a prevalent option. But since we are performance-obsessed, for this tutorial we decided to cover the deployment of a Django application to Alibaba’s ECS cloud instance with an NGINX and uWSGI stack.
NGINX is a web server notorious for its efficiency, being event-based, and it includes caching options, so it is often an ideal solution. uWSGI is an application server container – an implementation of WSGI, Python’s standard web interface. It plays along with NGINX very well.
Getting Started
Before we get started, you’ll need to sign up for an Alibaba Cloud account. It’s really easy to get started with Alibaba Cloud and decide whether it’s the right choice for you, because its free trial provides US$300 in credit to new users. Once you’ve signed up and received your credit, you can explore Getting Started resources on a number of topics.
The first thing we will do once our account is set up, is create an ECS instance in the Alibaba Cloud backend console.
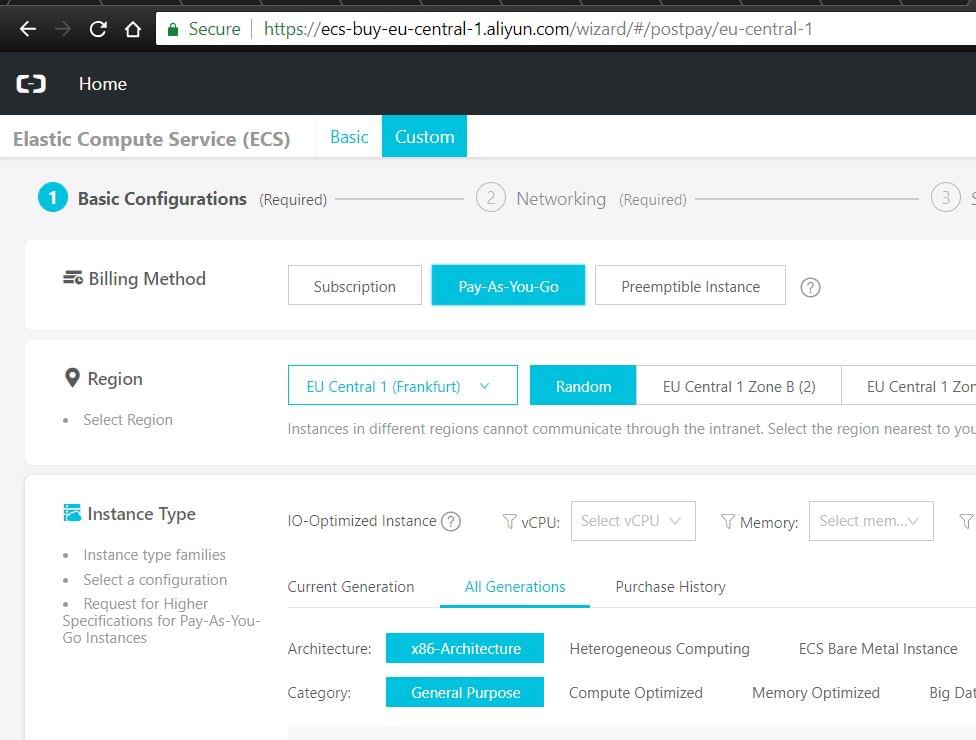
The process is straightforward. We will choose Ubuntu 16.04 LTS for our operating system / OS image. Upon creation, we will want to make sure our instance is assigned to proper security groups. In Alibaba terminology, these are firewall rules for different ports. This is usually something that works by default, but in case of any issues with web access to our instance later on, make sure to check this off.
The security groups page can be accessed through the Elastic Compute Service submenu on the left.
The next thing to do upon creation of our instance is to set it up for SSH key access.
Perhaps the most straightforward way to do this is to set the instance up, at creation, with a password. Then we can just do the standard ssh-copy-id from our starting system – presumably a local device.
ssh-copy-id root@xxx.xxx.xxx.xxx, executed from our local device (where we will replace the xxx… sequence with our Alibaba ECS instance public IP address) will prompt us for the password, and upon typing it, our key-based access should be set up.
When we log into our instance via ssh, we will do apt-get update to make sure our apt sources are up to date, and then we install git, curl, wget: apt-get install git curl wget -y
Installing the Server Environment
The default Python version that comes as default with Ubuntu 16.04 LTS is the ancient 2.7. In order to run the latest version of Django, we need Python 3+. One of the less painful ways to fix this is to install pyenv, a Python version manager.
It allows us to change the Python version used globally, or per-project. Before we install pyenv, as per the pyenv wiki, we will install prerequisites:
apt-get install -y make build-essential libssl-dev zlib1g-dev libbz2-dev libreadline-dev libsqlite3-dev llvm libncurses5-dev libncursesw5-dev xz-utils tk-dev liblzma-dev zlib1g-dev libffi-dev
Then we can install pyenv:
curl -L https://github.com/pyenv/pyenv-installer/raw/master/bin/pyenv-installer | bash
Upon completion, the pyenv installer will prompt us to add a couple of lines to the ~/.bash_profile, which we will do:
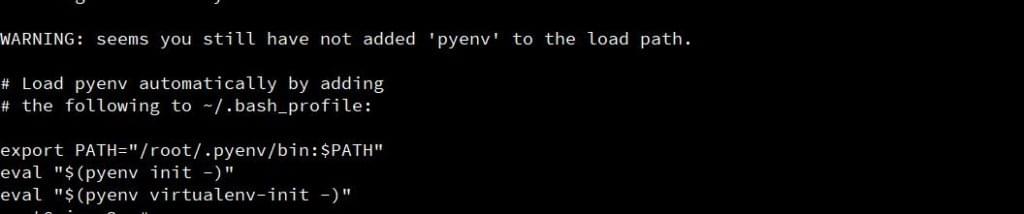
Now we update the PATH in our working session by doing source ~/.bash_profile in our terminal.
Provided that we did this correctly, we should now be able to install Python version 3.7.0:
Doing pyenv versions in the server terminal should show us two items now: system and 3.7.0, presuming that we installed the 3.7.0 version successfully.
pyenv global 3.7.0 will make our 3.7.0 version the global python version on our system. Should you have issues with pyenv, this is the url to visit.
Server stack
The usual default with Ubuntu images is Apache server, which comes preinstalled. If it is running, we should stop it with service apache2 stop, and then install nginx with apt-get install nginx -y. This should install and start the NGINX server, which should be visible when we visit our server’s public IP address.
We will also install uWSGI: pip install uwsgi (Python pip is presumably installed when we installed pyenv).
We will also make sure we have Django installed: pip install django. We could be using virtualenv here to ensure a contained isolated environment for our app, but for the sake of keeping this tutorial simple, we will skip it.
In more complex cases, though, it is probably a wise choice.
This guide presumes we have directed our domain’s A records to our server IP address, so myxydomain.com is presumed in the rest of this guide to be pointed to our ECS server’s public IP.
Now we will create the NGINX virtual host for our website. The file can be found here. We will just go over couple of things:
server unix:///tmp/minaguide.sock;
Here we are connecting – with NGINX – to the Unix socket that uWSGI will create in the /tmp directory, and /tmp is recommended for otherwise possible permissions complications that may arise from a more complex directory tree. This is what /tmp is for.
include /root/project/minaguide/uwsgi/uwsgi_params;
This (/root/project/minaguide) is a directory of our django project on the server, and within it, we will have a uwsgi subdirectory with a uwsgi_params file, which will hold some uWSGI variables. We will come back to this later, and to setting up our uWSGI app.
We now have the base server environment we need for deployment.
Setting Up Mina
We are setting up Mina on the machine from which we are doing the deployment. Presuming the device is also Linux / Ubuntu (and things shouldn’t be much different for Mac users – nor for Windows users, as long as they use Windows Subsystem for Linux ), we will want to make sure we have Ruby and rubygems installed – apt-get install ruby -y should do the trick.
When we have done this, we will have the gem command available, so we will do gem install mina.
Now – also on our local machine – we will create a directory dedicated to our project, and do mina init there.

This creates a config/deploy.rb file in our project directory, which we will edit to configure Mina:
require 'mina/rails'
require 'mina/git'

# we fill our base variables here. In this case, using
# ENV['domain'], we dont really need to enter the domain into the file, as
# we will be passing it when we call mina in command line.

# the script presumes we have set up ssh-key access to server, and that it won't ask us
# for password (for 'root' user)
set :application_name, 'minaguide'
set :domain, ENV['domain']
set :deploy_to, '/root/project/minaguide'
set :repository, 'https://github.com/tyaakow/django-uwsgi-starter.git'
set :branch, 'master'
set :user, 'root'


# we have left this empty, but this can be used for choosing pyenv python version, like we
# did manually
task :remote_environment do

end

# here we put any custom commands you need to run at setup
# directory structure from :deploy_to will be created
task :setup do
  # we are pulling rc.local from a gist, in order to make daemonize uWSGI
  # and make it boot with the system
  comment "pulling rc.local to /etc/ ..."
  command %{wget -P /etc/ https://gist.githubusercontent.com/tyaakow/62a5f91dbf59b32e088ec15c8375ca76/raw/c0c864317888419cbb9f2c4311149649cea2be1a/rc.local}
  comment "making it executable..."
  command %{sudo chmod 755 /etc/rc.local}
  comment "removing existing virtualhosts from /etc/nginx/sites-enabled/ ..."
  command %{rm /etc/nginx/sites-enabled/*}
  comment "fetching the virtualhost file from github gist..."
  command %{wget -O /etc/nginx/sites-enabled/#{ENV['domain']} https://gist.githubusercontent.com/tyaakow/1cd0a30095000c11301d3359b13a3537/raw/197eb92160588c2e61818a90e28782a344e5fbae/myxydomain.conf }
  comment "replacing the myxydomain.com with the actual domain specified in deploy.rb..."
  command %{sed -i 's/myxydomain.com/#{ENV['domain']}/g' /etc/nginx/sites-enabled/#{ENV['domain']}}
end

desc "Deploys the current version to the server."
task :deploy do
  deploy do
    invoke :'git:clone'

    on :launch do
      command %{sed -i 's/myxydomain.com/#{ENV['domain']}/g' /root/project/minaguide/current/minaguide/settings.py}
      command %{uwsgi --emperor /root/project/minaguide/current/uwsgi/vassals --daemonize /var/log/uwsgi-emperor.log}
      command %{service nginx restart}
    end
  end

end
We can see in this file that we are using Ruby string interpolation (the #{} syntax).
We also use sed to programmatically replace text in files ( sed -i 's/myxydomain.com/#{ENV['domain']}/g' /root/project/minaguide/current/minaguide/settings.py ) – and we use the ENV['domain'] which needs to be passed to Mina at the command line. This is to illustrate techniques for building some (possibly more sophisticated) scenarios with Mina.
task :setup do is the syntax we can use to define an arbitrary number of tasks.
As specified in the Mina docs, we can use the symbol-syntax variables assigned with set at the beginning of the file – with fetch(:deploy_to) syntax.
The file can be found here.
In this tutorial, we pulled our Django app from the GitHub public repo we created for this purpose, but we could have used a local repo, with:
task :deploy do
  run(:local) do
… where we would run rsync or scp – or we could have fetched it from a private repo that required ssh-key access.
We could have gone more advanced, creating tasks to install our whole environment, bu we would quickly grow out of the scope of this guide.
We added the uwsgi directory to our standard Django app in the repo – created by django-admin startproject minaguide:

… where uwsgi_params are from this page, and uwsgi.ini contains basic uWSGI settings.
We are pulling – in our deploy.rb script – the virtual host file for NGINX from this GitHub gist and placing it in /etc/nginx/sites-enabled/:
# the upstream component nginx needs to connect to
upstream django {
    server unix:///tmp/minaguide.sock; #this file will be created by uWSGI
}

# configuration of the server
server {
    # the port your site will be served on
    listen      80;
    # the domain name it will serve for
    server_name myxydomain.com; # will be substituted, with sed, with actual domain name provided
    # to mina at command line
    charset     utf-8;

    # max upload size
    client_max_body_size 75M;   # adjust to taste

    # Django media
    location /media  {
        alias /root/project/minaguide/current/media;  # your Django project's media files - amend as required
    }

    location /static {
        alias /root/project/minaguide/current/static; # your Django project's static files - amend as required
    }

    # Finally, send all non-media requests to the Django server.
    location / {
        uwsgi_pass  django;
        include     /root/project/minaguide/current/uwsgi/uwsgi_params; # the uwsgi_params file
        # from https://github.com/nginx/nginx/blob/master/conf/uwsgi_params
    }
}
More details about deploying Django with uWSGI and NGINX can be found here.
Deployment
Now, when we want to deploy, we will call from our local / development system mina setup domain=myfabulousdomain.com – where we will substitute myfabulousdomain.com with the URL of our actual server, where we will deploy. This will then be used by Mina as the aforementioned ENV['domain'].
This will execute the setup task on our server.
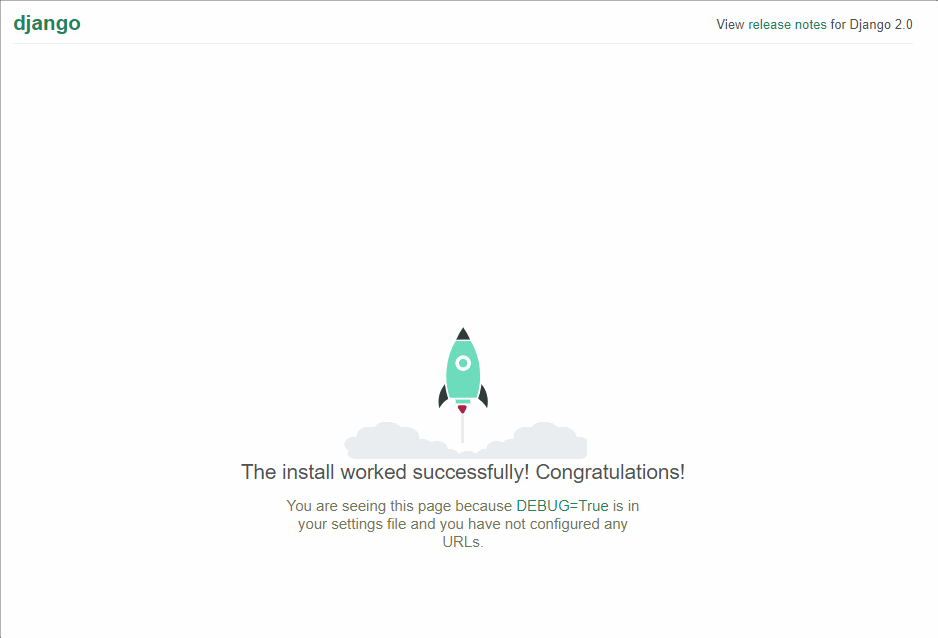
By doing mina deploy domain=myfabulousdomain.com we will execute the deploy task / block. When we visit our domain, we should see the following:
If, during the deployment, we encounter issues with the socket file ( permission & ownership issues, or others ), and we don’t have time to spend fixing it – fastest solution is maybe switching from connecting NGINX to uWSGI socket to connecting it to uWSGI through http – uWSGI has --http and --http-socket options available (we will need to change our upstream django / server connection details in nginx virtual host file – to connect to something likehttp:://127.0.0.1:8080 – and change our uWSGI command appropriately.
More info on --http and --http-socket options here and here. uWSGI is a pretty big topic.
Conclusion
In this article we use mina, which is a rather simple, very flexible and very fast solution for deployment of apps. In the case of more involved setups, that require more comprehensive solutions – we may need to automate wider scope of system and stack configuration details – we may want to look into Alibaba’s Container Service – which aims to provide solutions for streamlining different DevOps scenarios. Container Registry allows for more sophisticated scenarios.
In case our product / service requires multiple ECS instances – we will also want to look into Alibaba’s Server Load Balancer – which allows us to dynamically scale our infrastructure to keep up with traffic. Another Alibaba’s product, or feature to consider here is Auto Scaling – which automatically deploys new instances either according to predetermined schedule, or based on monitoring eg CPU and memory usage of the running instances.
Function Compute allows us, in contrast, to focus on our business logics, while delegating the whole infrastructure and environment worries to the cloud. The service is event driven, can be triggered by other services, and all we do is upload our code (NodeJS, Python, Java). We get charged for actual executed code.
Then there is a whole range of security products / services, CDN and monitoring solutions
Frequently Asked Questions on Automating App Deployment to Alibaba ECS with Mina
What is the main advantage of using Mina for app deployment to Alibaba ECS?
Mina is a fast deployer and server automation tool that provides a streamlined process for app deployment. It creates an entire procedure as a Bash script and runs it remotely in the server. This means it only needs to connect to the server once, reducing the deployment time significantly. It also has a unique feature of wrapping the entire process in a transaction, which ensures that if something goes wrong during the deployment, the transaction is rolled back, leaving your system in a stable state.
How does Mina compare to other deployment tools like Buddy and SpinupWP?
While Buddy and SpinupWP are excellent tools, Mina stands out for its simplicity and speed. Unlike other tools that require multiple connections to the server, Mina only needs one, making it faster. It’s also script-based, which means you have more control over the deployment process. However, it’s worth noting that the best tool for you will depend on your specific needs and the environment you’re working in.
Can I use Mina for WordPress deployments?
Yes, Mina can be used for WordPress deployments. However, it’s important to note that Mina is a general-purpose deployment tool, so you’ll need to write the deployment scripts yourself. This gives you more control over the process, but it also means you’ll need a good understanding of Bash scripting and the WordPress file structure.
How does Mina handle database migrations?
Mina has built-in support for Rails’ database migrations, but it can also handle other types of migrations with a bit of custom scripting. You can include the migration commands in your deploy script, and Mina will run them as part of the deployment process.
What are the prerequisites for using Mina?
To use Mina, you’ll need a server that you have SSH access to, and you’ll need Ruby installed on your local machine. You’ll also need to install the Mina gem. It’s also recommended to have a basic understanding of Bash scripting, as Mina’s deployment scripts are written in Bash.
How does Mina handle rollbacks?
Mina has a built-in rollback command that you can use to revert to a previous release if something goes wrong during the deployment process. This command will revert the symlink to the previous release and run any necessary cleanup tasks.
Can I use Mina with other cloud providers like DigitalOcean?
Yes, Mina is not tied to any specific cloud provider. As long as you have SSH access to your server, you can use Mina to deploy your apps, regardless of where your server is hosted.
How can I troubleshoot problems with Mina deployments?
Mina provides detailed logging of the deployment process, so you can see exactly what commands were run and what their output was. This makes it easier to identify and fix any issues that may arise during deployment.
Can I customize the deployment process with Mina?
Yes, one of the main advantages of Mina is its flexibility. Because the deployment process is defined as a Bash script, you can customize it to fit your specific needs. You can add or remove steps, change the order of steps, and even include conditional logic.
Is Mina suitable for large-scale deployments?
Mina is a lightweight tool designed for simplicity and speed, so it may not have all the features needed for complex, large-scale deployments. However, its flexibility and script-based approach make it a viable option for many scenarios, and it can certainly handle larger deployments with some additional scripting and configuration.
 Tonino Jankov
Tonino is a web developer and IT consultant who's dived through open-source code for over a decade. He's also a crypto enthusiast, Linux fan, and moderate libertarian.