The WordPress Theme Customization API allows developers to easily enable a ‘Customizer Page’ to their themes. The Theme Customizer API is supported from the 3.4 release onwards. The WordPress.org Codex recommends that developers provide theme customisation options in the Theme Customizer page, rather than providing options in a theme options page.
Allowing users to change the appearance of your theme, edit or add settings to your theme via the WordPress Theme Customizer page will make your theme easy to use and appear professional. In this tutorial, I will show you what theme customization is, from a user’s perspective, and how to use the WordPress Theme Customization API to control the Customizer Page.
This article assumes that you are familiar with the fundamentals of WordPress Theme and Plugin Development.
What Is the Theme Customization API?
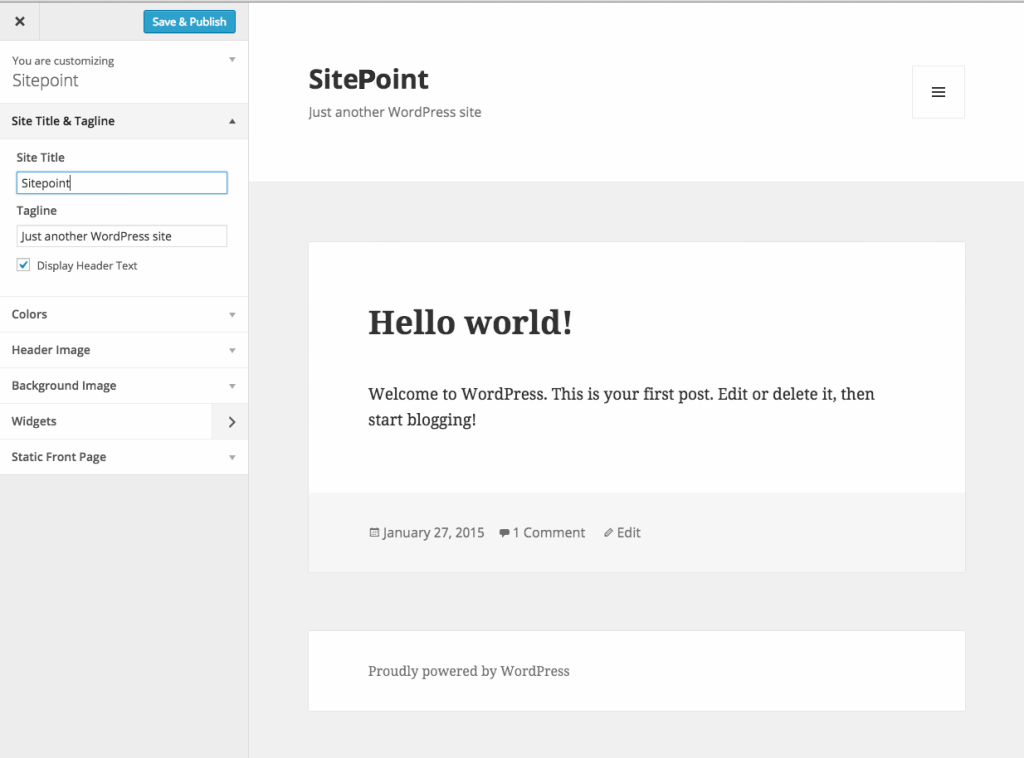
The Theme Customization API allows developers to build controls and settings options in the Customize section found in the Appearance menu in the WordPress Dashboard. The Theme Customization screen (or Theme Customizer Page) allows site administrators to modify a theme’s settings, color schemes, widgets, titles and logos, to name a few of the common examples. It also provides a preview of those changes in real-time.
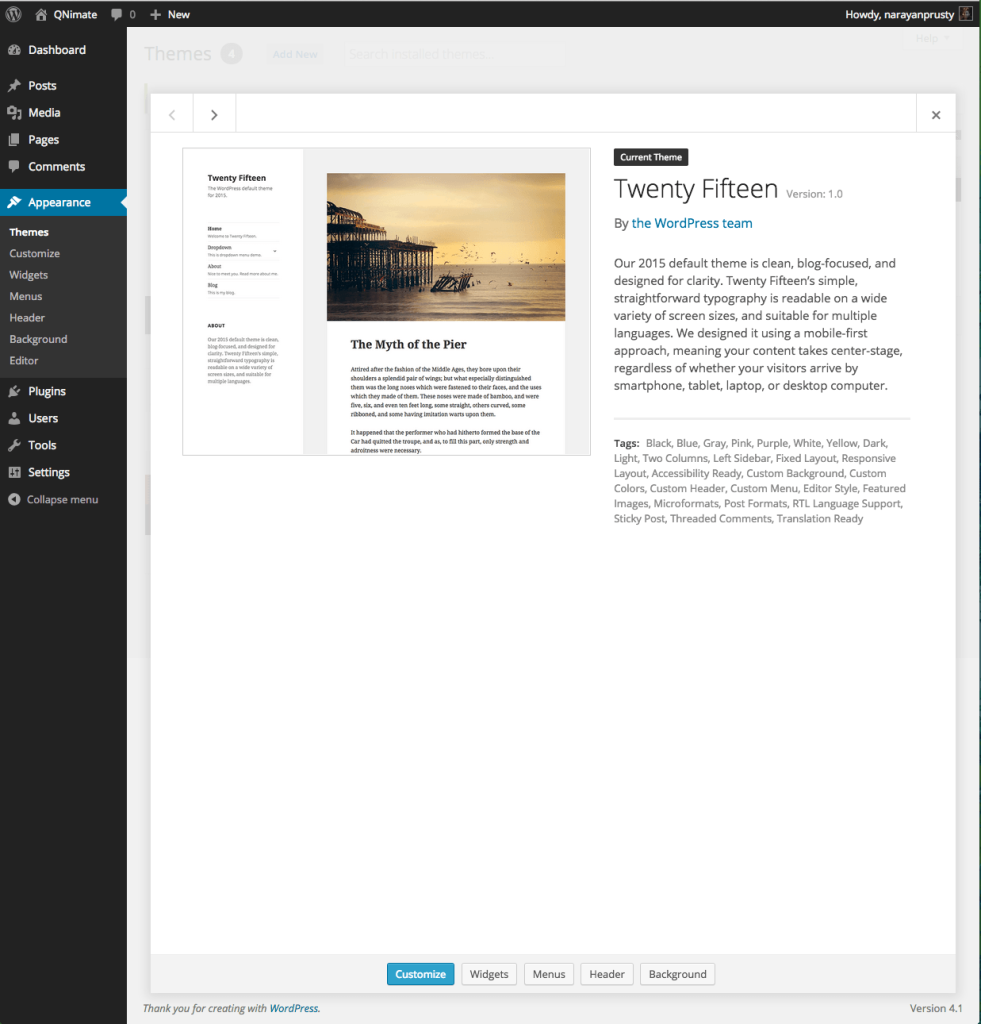
In the above image, the blue ‘Customize’ button takes us to the theme customizer page
Previously, developers would provide a theme options page for users to tweak their theme, which was far less user friendly because users had to refresh their site after making changes to see these them take effect.
Default Controls on the Theme Customizer Page
Every WordPress Theme which is installed in WordPress 3.4 and above is provided with some default settings and controls on the Theme Customizer Page such as Site Title, Tagline, Background Color, Background Image, Widgets and Static Front Page. You don’t have to add any code to support these basic customization settings and controls.
Understanding Sections, Settings and Controls
Sections represent a group of settings. When you define new settings and controls, they must be added to a section. You can also add new settings and controls to default sections.
A Setting represents a customization option of a Theme.
A control is a HTML form element on the Theme Customizer page and it allows admins to change a setting on real time preview. Controls are linked to a single setting, and a single section.
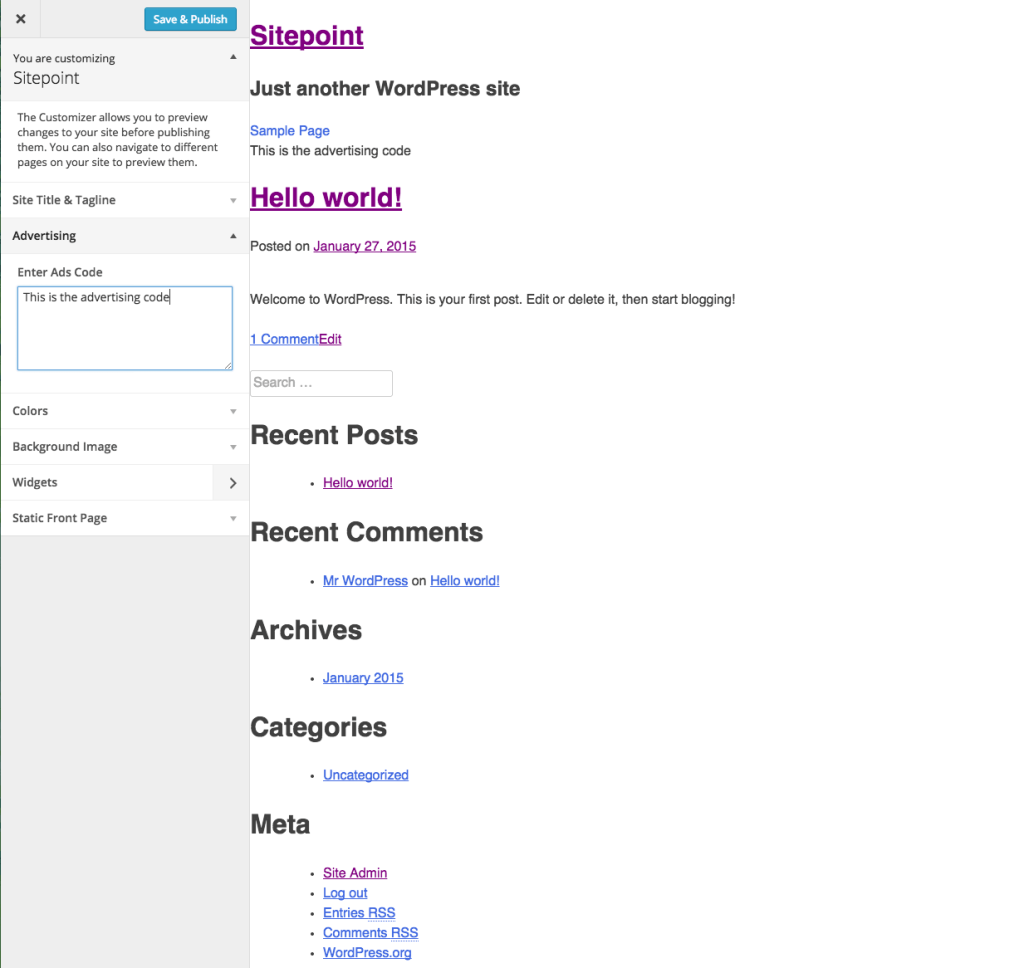
Let’s see how to create a section, setting and control for placing ads on our theme.
Creating a Section
You need to use $customizer_object->add_section method to create a new section.
Here is the code to create a section named ads
function sitepoint_customize_register($wp_customize)
{
	$wp_customize->add_section("ads", array(
		"title" => __("Advertising", "customizer_ads_sections"),
		"priority" => 30,
	));
}

add_action("customize_register","sitepoint_customize_register");
priority defines the position of the section.
Here is the names of the default sections: title_tagline, colors, header_image, background_image, nav and static_front_page.
Creating a Setting
You need to use $customizer_object->add_setting method to create a new setting.
Here is the code to create a setting named ads_code
function sitepoint_customize_register($wp_customize)
{
	$wp_customize->add_setting("ads_code", array(
		"default" => "",
		"transport" => "postMessage",
	));
}

add_action("customize_register","sitepoint_customize_register");
transport argument supports two values refresh and postMessage.
refresh indicates that the changes will take place when the Theme Customizer page is saved by clicking the Save & Publish button and then Refresh.
But postMessage indicates that the changes will take place in real time, as it happens. For real time changes we also need to write some JavaScript. We will see more details on this later on. In this case, site visitors will not be able to see the changes until the site admin clicks the Save & Publish button.
Creating a Control
When you’re creating a control, we would use the $customizer_object->add_control($controller_object) method to create a new setting.
Let’s display a control to display a text area to take advertising code as our input.
function sitepoint_customize_register($wp_customize)
{
	$wp_customize->add_control(new WP_Customize_Control(
		$wp_customize,
		"ads_code",
		array(
			"label" => __("Enter Ads Code", "customizer_ads_code_label"),
			"section" => "ads",
			"settings" => "ads_code",
			"type" => "textarea",
		)
	));
}

add_action("customize_register","sitepoint_customize_register");
There are various controller objects, depending on what kind of control you need. Here we used WP_Customize_Control which is used to display input fields such as text area, text, checkbox, radio and color. The are other controller objects such as WP_Customize_Color_Control, WP_Customize_Upload_Control and WP_Customize_Image_Control for color input, file upload and image input respectively.
Output Settings Values
The way of echoing the settings value depends on the transport argument of the add_settings function.
If the transport argument value is refresh then this is the code to echo ads_code setting value in your theme.
?>
	<div id="ads_box">
		<?php
			echo get_theme_mod("ads_code");
		?>
	</div>
<?php
get_theme_mod is used to retrieve value of a setting of theme customisation API.
If the transport argument is postMessage then you also need to use the above code for echoing. But to implement live preview, you need to write some JavaScript so that you can fetch the new value when admin changes the value of the setting.
Create a JavaScript file in your theme’s directory. I will refer to it as theme-customizer.js
Next, add the following code:
(function($){
	wp.customize("ads_code", function(value) {
		value.bind(function(newval) {
			$("#ads_code").html(newval);
		} );
	});
})(jQuery);
Here is the code to enqueue the above script:
function sitepoint_customizer_live_preview()
{
	wp_enqueue_script("sitepoint-themecustomizer", get_template_directory_uri() . "/theme-customizer.js", array("jquery", "customize-preview"), '',  true);
}

add_action("customize_preview_init", "sitepoint_customizer_live_preview");
Here, we are enqueuing the script in the theme Customizer screen, so that site visitors don’t see the change on the live site while it’s happening.
Final Thoughts
The Theme Customization API is already well developed and all new themes should be implementing it. If you’re creating a premium theme, then there is no way to escape it. You can provide all kinds of settings in the Customizer Page that you used previously using the Settings API.
Feel free to include comments about your experience with this API below.
Frequently Asked Questions about WordPress Theme Customization API
What is the WordPress Theme Customization API?
The WordPress Theme Customization API is a powerful tool that allows developers to customize and control the appearance of a WordPress website. It provides a consistent, user-friendly interface for making changes to a theme, such as changing colors, fonts, and layout settings. This API is built into WordPress and can be accessed through the WordPress admin panel. It’s a great way for developers to provide customization options to their users without requiring them to write any code.
How do I get started with the WordPress Theme Customization API?
To get started with the WordPress Theme Customization API, you first need to understand how it works. The API is based on sections, settings, and controls. Sections are the main categories of customization options, such as ‘Colors’ or ‘Layout’. Settings are the individual options within each section, such as ‘Background Color’ or ‘Header Layout’. Controls are the actual interface elements that users interact with, such as color pickers or dropdown menus. Once you understand these concepts, you can start adding your own sections, settings, and controls to your theme.
Can I use the WordPress Theme Customization API to add new features to my theme?
Yes, the WordPress Theme Customization API can be used to add new features to your theme. This can include anything from new layout options to entirely new functionality. The API provides a range of controls for different types of settings, including text fields, checkboxes, radio buttons, dropdown menus, color pickers, and more. This makes it possible to create a wide range of customization options for your users.
How do I add a new section to the WordPress Theme Customization API?
Adding a new section to the WordPress Theme Customization API involves writing some PHP code in your theme’s functions.php file. You’ll need to use the add_section method of the WP_Customize_Manager class, which is the main class for the Customization API. This method takes two arguments: the ID of the new section, and an array of arguments that define the section’s properties, such as its title and description.
How do I add a new setting to the WordPress Theme Customization API?
Adding a new setting to the WordPress Theme Customization API is similar to adding a new section. You’ll need to use the add_setting method of the WP_Customize_Manager class, and provide an ID and an array of arguments for the new setting. The arguments can include the default value for the setting, the type of data it stores (such as ‘option’ or ‘theme_mod’), and a sanitization callback function to ensure the setting’s value is safe to use.
How do I add a new control to the WordPress Theme Customization API?
Adding a new control to the WordPress Theme Customization API involves using the add_control method of the WP_Customize_Manager class. This method takes two arguments: the ID of the control, and an array of arguments that define the control’s properties. The arguments can include the label for the control, the section it belongs to, and the type of control it is (such as ‘text’, ‘checkbox’, or ‘dropdown’).
How do I use the values of my settings in my theme?
Once you’ve added settings to the WordPress Theme Customization API, you can use their values in your theme by calling the get_theme_mod function. This function takes one argument: the ID of the setting you want to get the value of. You can use this function in your theme’s template files to dynamically change the appearance of your theme based on the user’s customization choices.
How do I add a color picker to the WordPress Theme Customization API?
To add a color picker to the WordPress Theme Customization API, you’ll need to use the WP_Customize_Color_Control class. This class extends the base WP_Customize_Control class and adds a color picker interface. You can add a color picker control by calling the add_control method of the WP_Customize_Manager class and passing an instance of the WP_Customize_Color_Control class as the second argument.
How do I add a image uploader to the WordPress Theme Customization API?
To add an image uploader to the WordPress Theme Customization API, you’ll need to use the WP_Customize_Image_Control class. This class extends the base WP_Customize_Control class and adds an image uploader interface. You can add an image uploader control by calling the add_control method of the WP_Customize_Manager class and passing an instance of the WP_Customize_Image_Control class as the second argument.
Can I create my own custom controls for the WordPress Theme Customization API?
Yes, the WordPress Theme Customization API allows you to create your own custom controls. This involves creating a new class that extends the base WP_Customize_Control class and adding your own methods to it. You can then use this class when adding controls to the API. This allows you to create complex and unique customization options for your users.
 Narayan Prusty
Narayan is a web astronaut. He is the founder of QNimate. He loves teaching. He loves to share ideas. When not coding he enjoys playing football. You will often find him at QScutter classes.