This series is designed to introduce people to the wonderful Ruby programming language. It will cover the basics of programming as well as putting an application on the web.
What is Ruby?
Ruby is a simple, yet powerful, object-oriented programming language. It was developed in the mid-nineties by Yukihiro ‘Matz’ Matsumoto with the aim of making programming more enjoyable and productive. Ruby always had a devoted following in Japan, along with a small but loyal following in the West. After David Heinemeier Hansson released the Ruby on Rails web framework in 2005, Ruby’s popularity soared almost overnight.
One of the key priciples of Ruby is that every part of the language is an object. An object in programming is something that has its own properties and actions. This might not mean much at the moment, but it is something that we will keep coming back to as we delve deeper into learning about the language.
What Will We Be Doing?
In this series we’re going to to start off by installing Ruby and going through the basics of writing a program. We’re going to look at how you can use ‘Interactive Ruby’ to get instant feedback on your programming and also how to save a program to a file and then run it. We will also look at how you can turn your Ruby program into a web application and see it running in a browser. Hopefully, the series will help you to discover what makes so many people love the power and flexibility that Ruby offers.
Command Prompts
I feel that I should mention at this point that the world of Ruby often uses command prompts in a ‘terminal’ to install things and run programs. This can be a bit daunting at first, but it really isn’t anything to worry about and will soon seem like second nature.
If you are using Linux, then I would imagine you’ve already found the command prompt. On a Mac, you need to go into the Applications folder and then into the Utilities folder (see this guide for more help). On Windows, you’ll usually find it in the ‘applications’ menu (this guide has some very useful tips on setting it up to be more user-friendly).
Anything that is supposed to be entered in a command prompt will be prefixed with a $ symbol in the code examples (don’t type the $), for example:
$ this command should be entered in a command promptInstalling Ruby
Installing Ruby is a lot easier now than it used to be, but the process differs depending on which operating system you use. I would recommend using the most up-to-date version of Ruby, which currently at the time of writing is 2.0.0.
If you use Linux, I would recommend using the Ruby Version Manager. This just involves pasting the following line of code into a command prompt:
$ \curl -L https://get.rvm.io | bash -s stable --rubyIf you use Windows then I would recommend using the Ruby Installer. This offers a one-click solution that will install everything you need to get started.
If you use a Mac then you can use the Ruby Version Manager (see instructions for Linux above), or use Homebrew, with the following command:
$ brew install rubyTo check that everything is running fine, open up a terminal window and type the following line at the command prompt:
$ ruby -vThis checks which version of Ruby you are running. You should get something similar to the following:
ruby 2.0.0p247 (2013-06-27 revision 41674) [i686-linux]Getting Started with Interactive Ruby
Interactive Ruby, or IRB to its friends, is a way of entering Ruby into a command line one line at a time and getting instant feedback. It’s a great way of experimenting with Ruby and checking that things work. To get it up and running, all you need to do is type the following at a command line prompt:
$ irbYou should then see something similar to the following:
2.0.0p247 :001 >Now, it’s time to get started writing some Ruby!
It has been a long standing tradition when learning to program to start with the classic “Hello World!” program. We’re going to keep to the spirit of this and say hello to the differnt environments where we will be testing Ruby. At the IRB prompt, simply type the following:
2.0.0p247 :001 > puts "Hello IRB!"You should see the following output:
Hello IRB!
 => nil
Congratulations – you’ve just written your first piece of Ruby code!
What happened there? Well, puts is a ruby command that stands for ‘put string’. A string in Ruby is an object that stores text between quote marks (either ” or ‘). The puts command will display the string that follows it.
The => nil part is simply the return value of the puts command. All actions in Ruby have a return value, even if they don’t explicitly return anything. In those cases, they still have to return nil, which is another object.
Have a go at outputting some more strings to the screen using the puts command. When you get bored, just exit IRB by simply typing exit like so:
2.0.0p247 :001 > exitWriting Our First Ruby File
Now that we’ve written our first bit of Ruby code in IRB, it’s time to save our work to a file. Create a folder to save your work in and call it something suitable such as ‘ruby’ or the like. Ruby files are saved with the extension .rb. To get started, create an empty text file and save it as ‘hello_ruby.rb’. Now write the following code inside the file and save it:
puts "Hello Ruby!"This is very similar to what we typed into IRB – that’s because they are just the same, which is why IRB is so useful for quickly testing things out. The only difference is that IRB evaluates the ruby as soon as you press ENTER. To run this program, you need to execute it using the ruby command.
Open up a command line prompt and navigate to where the file is saved. This can be done using the cd command. On my system, I have saved it in a folder called ‘ruby’ that is in my home folder, so I would type the following:
$ cd rubyThis results in the $ symbol beign prefixed by this path:
daz@crunchbang:~/ruby$Once you are in the correct directory, we can run our program by simply typing ruby followed by the name of the file, like so:
$ ruby hello_ruby.rbThis should produce the following output:
Hello Ruby!The main difference between running the file and running Ruby in IRB is a Ruby file allows you to enter multiple commands that will all be carried out when the program is run. This can be demonstrated by adding a couple more lines to ‘hello_ruby.rb’ like so:
puts "Hello Ruby!"
puts "Hello DAZ!"
puts "Hello SitePoint!"
If you save this and type ruby hello_ruby.rb into a command prompt, the output should now be:
Hello Ruby!
Hello DAZ!
Hello SitePoint!
Well done – you’ve now written and run your first Ruby program! Our next job is to run our program in a web browser, but before we can do that we will have to learn how to install a Ruby gem.
Ruby Gems
Ruby Gems are libraries of code that help to extend the Ruby language by adding extra functionality. They are usually written in Ruby (although other languages, such as C, are sometimes used). There are literally thousands of Ruby gems available that can help to add all sorts of functionality to your programs.
Sinatra Takes to the Stage
Sinatra is a Ruby gem that makes it easy for your Ruby programs to access the HTTP layer that powers the web. This means you can take your Ruby programs and turn them into web applications with relatively litte additional code. In case you don’t know already, I happen to like Sinatra quite a bit.
First of all, we need to install the sinatra gem:
$ gem install sinatra(Note: The gem command is installed with Ruby)
We need to create a new file in our ‘ruby’ folder called hello_sinatra.rb. In this file, place the following code:
require 'sinatra'

get '/hello' do
  "Hello Siantra!"
end
The first require 'sinatra' is used to load the code from the Sinatra gem, adding its functionality to our program.
The next part is what is known as a route handler in Sinatra, and it is an example of what is called a “block” in Ruby. get signifies the HTTP verb that will be used by the browser to ‘get’ the web page. After this, comes the string ‘/hello’. This is the route that will be used to access our bit of code in the browser address bar. Next comes the actual code that we want to run. We don’t need to use the puts command this time because Sinatra automatically outputs a string if it is the last line of code in the route handler.
The file is actually just another ruby program, so we run it in exactly the same way as before:
$ ruby hello_sinatra.rbYou should then see the following message:
[2013-08-07 17:35:33] INFO WEBrick 1.3.1
[2013-08-07 17:35:33] INFO ruby 2.0.0 (2013-06-27) [i686-linux]
== Sinatra/1.4.2 has taken the stage on 4567 for development with backup from WEBrick
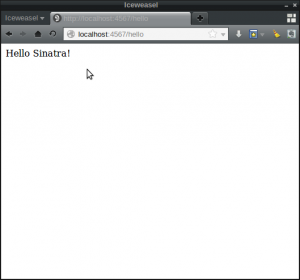
[2013-08-07 17:35:33] INFO WEBrick::HTTPServer#start: pid=2988 port=4567This tells us that Sinatra has started a web server, which means you can access the application in a browser. To see the result of our program, navigate to http://localhost:4567/hello in any browser and you should see the following:

Just to explain the URL that we entered into the browser – localhost is the domain that is used by web servers running on your own computer (the application isn’t available on the Internet, just on your computer) and 4567 is the port that Sinatra uses to present the application.
Resources
If you want to take your learning further then you’re in luck. There’s a plethora of resources for learning Ruby available. Below is just a small selection that I have found particularly useful (and in many cases are free or have free options):
- Try Ruby – An interactive tutorial that gives you a whirlwind wour of Ruby in about 15 minutes
- Pickaxe book – The definitive ruby book, the first edition is available for free online, or you can get the latest version in print or e-book format.
- Learn to Program – A great book that introduces the basics of programming using Ruby. There is a free version online and also a print version
- Ruby Tapas – Avdi Grimm produces these short videos
- Jump Start Sinatra – A book by yours truly that shows you how to build a full web application using Ruby and Sinatra
- Sinatra Up and Running – another book, written by the maintainer of Sinatra that goes into more depth about how Sinatra actually works
- SitePoint – This very site itself is full of articles about Ruby, Sinatra and Ruby on Rails – feel free to browser around
That’s All Folks!
That concludes the first part of this series. We’ve introduced the Ruby programming language, installed it and written our first program in Ruby. We’ve also turned our program into a web application using the Sinatra gem. It’s all been a bit basic to start with, but this is only the beginning – stick with us and things will start to get much more interesting.
In the next part we’ll be taking a more in-depth look all the wonderful things you can do with strings in Ruby.
I hope you’ve found this post useful, please leave any feedback or questions in the comments section below.
 Darren Jones
Darren loves building web apps and coding in JavaScript, Haskell and Ruby. He is the author of Learn to Code using JavaScript, JavaScript: Novice to Ninja and Jump Start Sinatra.He is also the creator of Nanny State, a tiny alternative to React. He can be found on Twitter @daz4126.