It’s become second nature for developers to use Virtual Machines to configure and manage their working environments. Most professionals who use VMs use Vagrant for dealing with their development environments. In this article, we’ll be moving from Vagrant to Docker, and use a small Laravel application to test that everything is working as expected.

Installation
The installation page contains instructions for almost every popular platform. Docker runs natively on Linux OS, but we can use it on Windows and Mac OS by installing the Docker Toolbox utility. If you run into some problems, you can visit this article which highlights the most common issues. You can verify it’s installed and working by running the following command in your terminal.
docker -v# output
Docker version 1.8.1, build d12ea79Docker Machines
A Docker machine is the VM that holds your images and containers (more on those later). Let’s create our first VM.
docker-machine create --driver virtualbox docker-vmYou can change the driver option depending on your preference. See here for the list of available drivers.
You can print the machine’s configuration by running the docker-machine env docker-vm command. This is how you can switch between machines.
# Use the docker-vm
eval "$(docker-machine env docker-vm)"

# Switch to the dev machine
eval "$(docker-machine env dev)"
You can read more about the docker-machine command in the documentation and explanation on why we’re using eval here can be found on this page.
Docker Images
Docker images are OS boxes that contain some pre-installed and configured software. You can browse the list of available images on the Docker Hub. In fact, you can create your own image based on another one and push it to the Docker hub so that other users can use it.
The docker images command lists the available images on your machine, and you can download a new one from the hub using the docker pull <image name> command. For our demo application, we pulled the mysql and nimmis/apache-php5 images.

Docker Containers
Docker containers are separate instances that we create from images. They can also make a good starting point for creating a new personalized image that others can use. You can see the list of available containers using the docker ps command. This only lists running containers, but you can list all available ones by adding the -a flag (docker ps -a).

Now, let’s create an Ubuntu container. First, we need to pull the image from the hub, then we create a new container instance from it.
# Get image from the hub
docker pull nimmis/apache-php5

# Create the container
docker run -tid nimmis/apache-php5

# List running containers
docker ps
The first command may take a while to finish downloading the image from the hub. The first flag (t) we specified on the second command means that we want to allocate a TTY to interact with the container, the second flag (i) means that we want an interactive STDIN/OUT, and the last one (d) means that we want to run it in the background.
Since this container will host our web server documents, you may be thinking, how are we going to access our server from the browser?
The -P option on the run command will automatically expose any ports needed from the container to the host machine, while the -p option lets you specify ports to expose from the container to the host.
# Automatically exposes the container ports to an available host port
docker run -tid -P nimmis/apache-php5
# We can also specify ports manually <host port>:<container port>
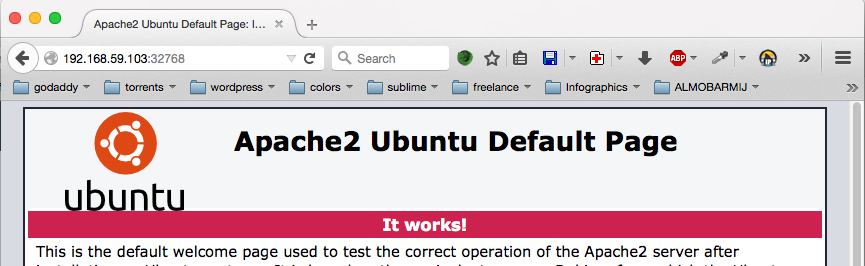
docker run -tid -p 80:80 nimmis/apache-php5Now you can access the container using the docker-machine ip docker-vm address and the specified port. If you don’t know the port, you can run the docker ps command and look at the ports column.
Container Volumes
Volumes are an easy way to share storage between your host machine and the container. They are initialized during the container’s creation and kept synced. In our case we want to mount /var/www to a local directory ~/Desktop/www/laravel_demo.
# Option syntax
docker run -v <local dir>:<container dir>
Our container creation command will thus look like the following.
docker run -tid -p 80:80 -v ~/Desktop/www/laravel_demo:/var/www nimmis/apache-php5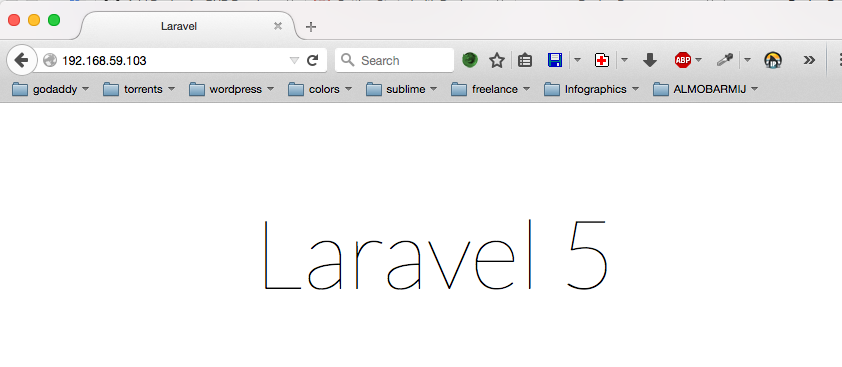
Note: The default Apache DocumentRoot directive points to /var/www/html, so you have to change it to /var/www/public inside the /etc/apache2/sites-enabled/000-default.conf configuration file and restart Apache. You can log into the container using the exec command.
docker exec -it <container> bash# Restart Apache
/etc/init.d/apache2 restartNaming Containers
Even though you can use the container ID for most commands, it’s always a good idea to name the container for what it does or following a naming convention to avoid looking for the ID (using docker ps) every time you want to do something.
# Option syntax
docker run --name <container name>
So, our complete command will look like the following.
docker run -tid -p 80:80 -v ~/Desktop/www/laravel_demo:/var/www --name wazo_server nimmis/apache-php5Now if you want to start, stop, or remove the container, you can use its name instead of the ID. Be sure to check the Docker documentation for more details about containers.
docker start wazo_serverDatabase Container
At this point, we have our Apache server set up and we will use a separate container to host our database(s). If you ever had to run two or more VMs at the same time, you know that your machine can get a bit slower, and it gets worse when you add more. Adding a separate lightweight container to host our databases and another one for managing background jobs will help a lot in keeping things lightweight, separate and manageable.
We create the MySQL container the same way we did above. We mount the /var/lib/mysql folder to a local one on our host machine to keep the data synced between the two machines. In case of data loss, we can mount the same local folder to another container.
docker run -p 3306:3306 --name mysqlserver -e MYSQL_ROOT_PASSWORD=root -d mysqlThe -e option lets you set an environment variable on the container creation. In this case, the MYSQL_ROOT_PASSWORD will tell the MySQL installation process to use the password we specified in the command.
Now if you want to connect to the database from outside, you can use the address returned from the docker-machine ip docker-vm command and the exposed port on the docker run command. My database configuration will look like the following.
// .env

DB_HOST=192.168.59.103
DB_DATABASE=demo
DB_USERNAME=root
DB_PASSWORD=root
You can test that things are working by running the Laravel database migration command, and make sure your mysql container is running.
./artisan migrate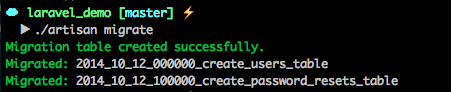
Using Links
Links are a secure way to share connection details between containers through environment variables. The first method to link to a container is to expose it to a specific port and then use the credentials in your application.
The other way is to use Docker links. So, lets do the same thing we did above but using links this time.
# Option syntax
docker run --link <container name or ID>:<alias>
# Create MySQL container first.
docker run -p 3306:3306 --name mysqlserver -e MYSQL_ROOT_PASSWORD=root -d mysql
# Create web server container
docker run -tid -p 80:80 -v ~/Desktop/www/laravel_demo:/var/www --name wazo_server --link mysqlserver:mysqldb nimmis/apache-php5The new option here is --link <container>:<env alias>. The environment alias will prefix your connection environment variables, in our case mysqldb. You can log into the web server’s container and run printenv | grep MYSQLDB to print all MySQL linking variables.
# Log into the web server
docker exec --it wazo_server bash

# Print environment variables
printenv | grep MYSQLDB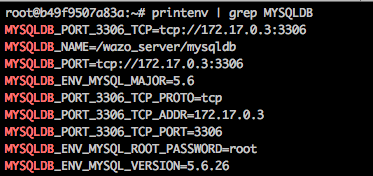
The Dotenv package used by Laravel allows for nesting environment variables. That means we can add our environment variable inside the .env file.
// .env

DB_HOST="{$MYSQLDB_PORT_3306_TCP_ADDR}"
DB_DATABASE=demo
DB_USERNAME=root
DB_PASSWORD="{$MYSQLDB_ENV_MYSQL_ROOT_PASSWORD}"
Running the ./artisan migrate command from the command line gives the following result.

Dockerfiles
Now that we learned how to work with Docker images, containers and how to link them together, we’re going to learn how to use Dockerfiles to create personalized images and Docker compose to manage our containers.
Dockerfiles help you build and share system images similar to Vagrant. We will highlight the main commands used to configure a Docker image. In this example, we’re going to build a Laravel 5 image. You can check out the final code on Github if you want to follow along.
FROM
The FROM instruction lets you choose the base image to start from. We can choose to start from a bare bones image like Ubuntu:14.04 or we can start from an image that already contains Apache/NGINX and PHP installed and configured. We will use the Ubuntu image for our example.
FROM ubuntu:14.04MAINTAINER
Although this is an optional part, it is recommended to specify the image maintainer for reference.
MAINTAINER RAFIE Younes <younes.rafie@gmail.com>ENV
The ENV instruction lets you define an environment variable that you can access through the setup process. In our case, we’ll use it to specify the Laravel version we want to install, and you can also change it and create a different version for Laravel 4.
ENV LARAVEL_VERSION ~5.1.0RUN
The RUN instruction allows us to run commands on the shell (not bash). You can a run command like RUN apt-get update, but if you want to use bash, you should use it as the following RUN ["/bin/bash", "-c", "apt-get update"].
RUN apt-get update && \
    apt-get -y install apache2 php5 libapache2-mod-php5 php5-mcrypt php5-json curl git && \
    apt-get clean && \
    update-rc.d apache2 defaults && \
    php5enmod mcrypt && \
    rm -rf /var/www/html && \
    curl -sS https://getcomposer.org/installer | php && \
    mv composer.phar /usr/local/bin/composer
After installing Apache, PHP, and the other extensions, we’ll need to configure the virtualhost and specify our public folder. Let’s create a file called 000-default.conf containing the needed configuration.
<VirtualHost *:80>
  ServerAdmin webmaster@localhost
  DocumentRoot /var/www/laravel/public

  ErrorLog ${APACHE_LOG_DIR}/error.log
  CustomLog ${APACHE_LOG_DIR}/access.log combined

  <Directory /var/www/laravel>
    Options Indexes FollowSymLinks
    AllowOverride All
    Require all granted
  </Directory>
</VirtualHost>
COPY
The COPY instruction is useful in the case above, we only need to specify the sources file(s) and the destination.
COPY 000-default.conf /etc/apache2/sites-available/000-default.confYou can also use wildcards if you have multiple files that you want to copy over to your image. We may move multiple hosts configuration as the following.
COPY *.conf /etc/apache2/sites-available/WORKDIR
You can use WORKDIR to move to another directory to continue the image creation. We use it to move to the /var/www directory to install Laravel using Composer.
WORKDIR /var/www

RUN composer create-project laravel/laravel laravel $LARAVEL_VERSION --prefer-dist --no-interaction && \
    php laravel/artisan key:generate && \
    chown www-data:www-data -R laravel/storage
After moving to /var/www we install Laravel and make the necessary folders writable by the Apache user www-data. If you noticed, we used the --no-interaction flag on Composer to avoid any installation questions.
EXPOSE
Because we’re creating small service containers, it makes sense that we expose those containers through a specific port to allow other services to consume it.
EXPOSE 80
EXPOSE 443
We expose our server through the standard HTTP port 80, and we also allow HTTPS connections through port 443.
CMD
The CMD instruction can be used to init the container. In our case, we’ll use it to run our Apache server in the background.
CMD ["/usr/sbin/apache2ctl", "-D", "FOREGROUND"]Although our image is now ready for building, we’ll go through some other useful instructions.
ENTRYPOINT
The ENTRYPOINT instruction lets you specify a command to execute when the user runs the Docker image. We can use it to update our Composer dependencies.
// setup-laravel.sh

#!/bin/bash
cd /var/www/laravel
composer update
COPY setup-laravel.sh /setup-laravel.sh # Copy the local file to the image
RUN ["chmod", "+x", "/setup-laravel.sh"] # Make sure it's executable
ENTRYPOINT ["/setup-laravel.sh"]You can go through all the available instructions in the documentation. In the next section, we’ll see how to use Docker Compose to manage our containers.
Docker Compose
If you’ve been following along from the first part of this post, we went through the installation process and we already have the environment ready. If not, you can check the documentation for more installation details.
We start by creating a docker-compose.yml file that will hold our configuration. Docker Compose uses YAML for configuration files, you can check the official documentation if you’re not familiar with it.
The first node defines the service name; this could be anything. In this case, it’s called web. The build child node specifies the image source, and you may choose an image from the Docker hub or a Dockerfile path to build the image from.
web:
  build: .
The next part is to expose the container ports to make it accessible through the host machine.
web:
  build: .
  ports:
    - "80:80"
    - "443:443"
We talked about mounting volumes in the first part; we can specify that inside our docker-compose file as well.
web:
  build: .
  ports:
    - "80:80"
    - "443:443"
  volumes:
    - ./laravel:/var/www/laravel
Because most applications need some database interaction, we can use links as mentioned before to help containers communicate with each other.
web:
  build: .
  ports:
    - "80:80"
    - "443:443"
  volumes:
    - ./laravel:/var/www/laravel
  links:
    - mysqldb:mysqldb
You specify links in the form of <container name>:<env alias>. The last part is to create the mysqldb container.
mysqldb:
  image: mysql
  environment:
    - MYSQL_ROOT_PASSWORD=root
Notice that we used the environment to send the MYSQL_ROOT_PASSWORD to the image. You can use this option to make a generic Laravel image that can install any Laravel version.
If you already have an existing container that you want to link, you can use the external_links configuration.
Now, we are ready to build our image and create the containers to test that everything works as expected. Run the docker-compose up command inside the project folder to build the image and create the containers. This may take a while before everything is installed. You can see the running containers by running docker ps and the build image using docker images from the terminal.
Conclusion
This article was a brief introduction to moving from your usual Vagrant development environment to Docker, and how you can benefit from using lightweight containers instead of creating full VMs for small services.
Docker Compose is a new tool that’s still being developed and improved to remove the pain of managing and porting development environments. You can check the documentation for more details, and the Docker Compose YML file reference to see the list of supported properties. For general Docker docs, see here.
If you’ve already tried Docker and Docker Compose we would love to know what you think about them! If you have any questions or comments, please post them below!
Frequently Asked Questions (FAQs) about Docker and Dockerfiles
What is the difference between Docker and Dockerfiles?
Docker is an open-source platform that automates the deployment, scaling, and management of applications. It uses containerization technology to bundle an application and its dependencies into a single object. On the other hand, Dockerfiles are text documents that contain all the commands a user could call on the command line to assemble an image. Using docker build, users can create an automated build that executes several command-line instructions in succession.
How can I create a Dockerfile?
Creating a Dockerfile involves writing a text file that contains all the commands needed to build a Docker image. These commands include specifying the base image, defining the working directory, copying files, installing dependencies, exposing ports, and specifying the command to run the application. Once the Dockerfile is written, you can use the docker build command to create the Docker image.
How can I use Docker for my web development projects?
Docker can be incredibly useful for web development projects. It allows developers to create a container for their application, which includes all the dependencies needed to run the application. This means that the application will run the same way regardless of the environment it’s in. Docker also allows developers to work in the same environment, reducing the “it works on my machine” problem.
What are the benefits of using Docker?
Docker offers several benefits. It allows for consistent environments from development to production, which can significantly reduce bugs and improve productivity. Docker also isolates applications in separate containers, improving security. Additionally, Docker containers are lightweight and start quickly, making them ideal for deploying applications.
How can I troubleshoot common Docker errors?
Troubleshooting Docker errors often involves checking the Docker daemon, inspecting Docker images and containers, and checking network connectivity. Docker provides several commands for troubleshooting, including docker ps to list containers, docker inspect to view detailed information about containers, and docker logs to view the logs of a container.
How can I optimize my Dockerfiles for better caching?
Docker builds images by stepping through the instructions in your Dockerfile, caching the results for future builds. To take advantage of this caching, structure your Dockerfile to maximize the likelihood that the most frequently changed elements are as far down in the file as possible. This way, Docker can reuse the cached results from previous steps that haven’t changed, speeding up the build process.
How can I manage data in Docker?
Docker provides several options for managing data, including Docker volumes, bind mounts, and tmpfs mounts. Docker volumes are the preferred method, as they are easy to use and can be used across multiple containers. Bind mounts can be used to access data from the host machine, while tmpfs mounts are used for storing non-persistent data.
How can I secure my Docker containers?
Securing Docker containers involves several best practices, including using the least privilege principle, regularly updating and patching Docker images, limiting the use of root privileges, and using security profiles and namespaces. Additionally, you should scan your Docker images for vulnerabilities and use trusted images from Docker Hub.
How can I network Docker containers?
Docker provides several networking options for containers, including bridge networks, host networks, and overlay networks. Bridge networks are the default, and allow containers to communicate with each other and with the host machine. Host networks allow containers to share the network stack of the host machine, while overlay networks allow containers across multiple Docker hosts to communicate.
How can I use Docker Compose?
Docker Compose is a tool for defining and running multi-container Docker applications. With Compose, you can use a YAML file to configure your application’s services, and then start all the services with a single command. Compose is great for development, testing, and staging environments, as well as CI workflows.
 Younes Rafie
Younes is a freelance web developer, technical writer and a blogger from Morocco. He's worked with JAVA, J2EE, JavaScript, etc., but his language of choice is PHP. You can learn more about him on his website.