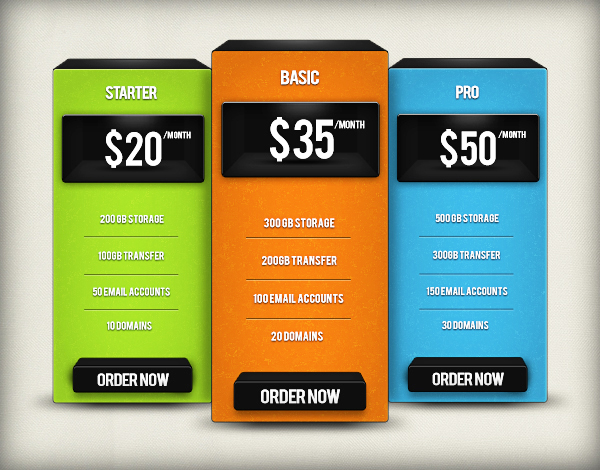
Pricing tables are typically one of the last steps in a carefully-designed sales funnel. Often, entire websites are built for the purpose of offering a value proposition, directing viewers to sales pages, and finally, securing sales. After carefully refining ever other facet of your sales website, you do not want to lose your viewer’s interest at the final stage — choosing a flavor of your product or a price point that suits their needs. This is why having a sharp-looking, informative, and persuasive pricing table is so critical. Without a well-designed final step in your sales process, you’ll likely suffer from lower sales indefinitely.
In this tutorial, I’ll walk you through the process of designing an appealing pricing table in Photoshop. We’ll make everything from scratch. Along the way, you will learn the use of few shape tools, various layer styling techniques, and filters to achieve the final outcome. So, let’s get started!
Resources:
Bebas font
Final result: (Download the finished, layered PSD file.)
Step 1
Create a new document in Photoshop with a 900px width and a 720px height.

Step 2
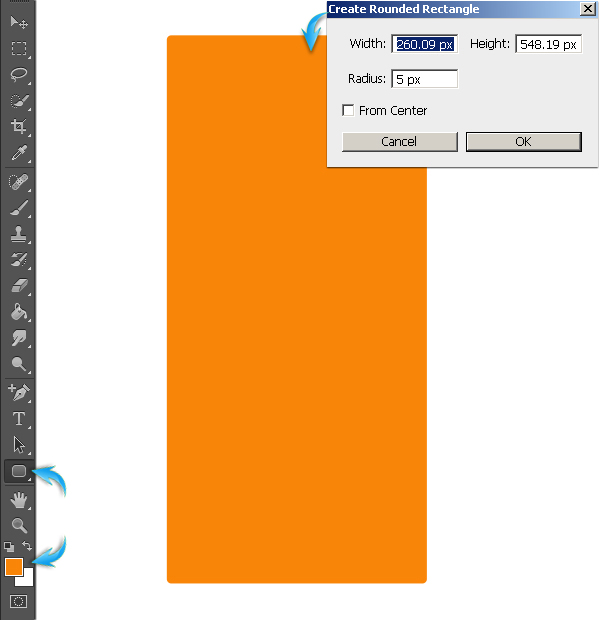
Set #f98508 as your foreground color. Select the rounded rectangle tool, and draw a rectangle with the following settings. Label this layer as “Base.”
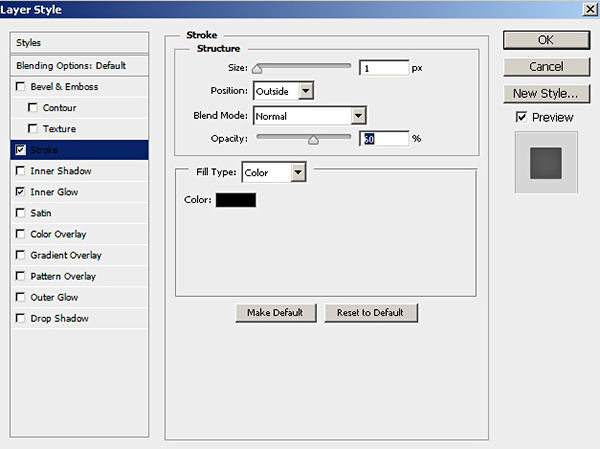
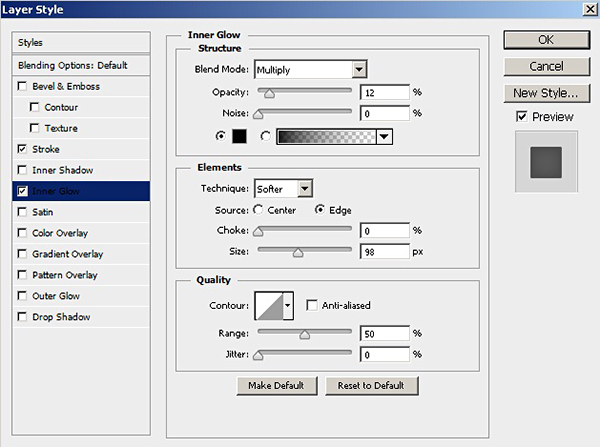
Step 3
Double-click the base layer to open the “Layer Style” window and apply the following settings for stroke and inner glow.

Step 4
Next, we’ll add a subtle texture to the base. To do so, duplicate the base layer, and label this new duplicate as “texture.” Right-click the new texture layer and choose the option to “Convert to Smart Object.” Now, you can easily edit the filters that we are going to apply on this layer. Go to “Filter” > “Noise” > “Add Noise.” Use the following settings.

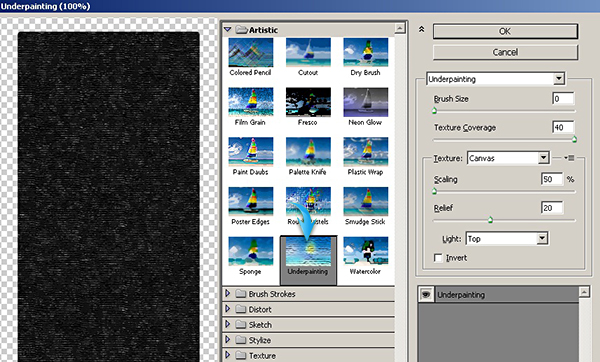
Step 5
Now, go to “Filter” > “Filter Gallery” > “Artistic” > “Underpainting.” Apply the following settings here.
Click on the new effect layer icon present in the bottom of the gallery panel, apply the following “Spatter” settings, and press “OK.”

Change the blending mode of texture layer to “Soft Light” and reduce its opacity to “40%” to get the effect shown below.

Step 6
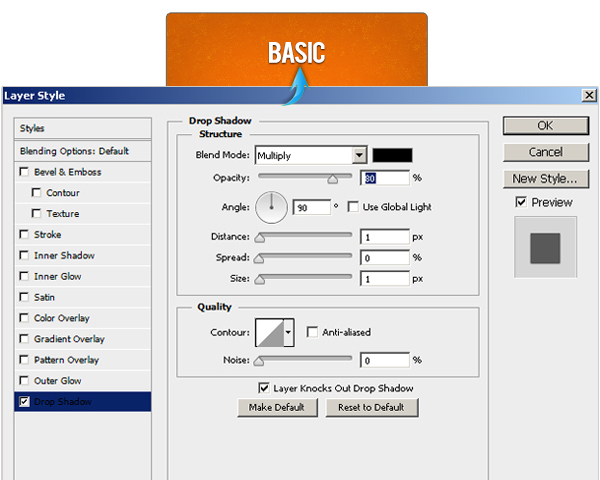
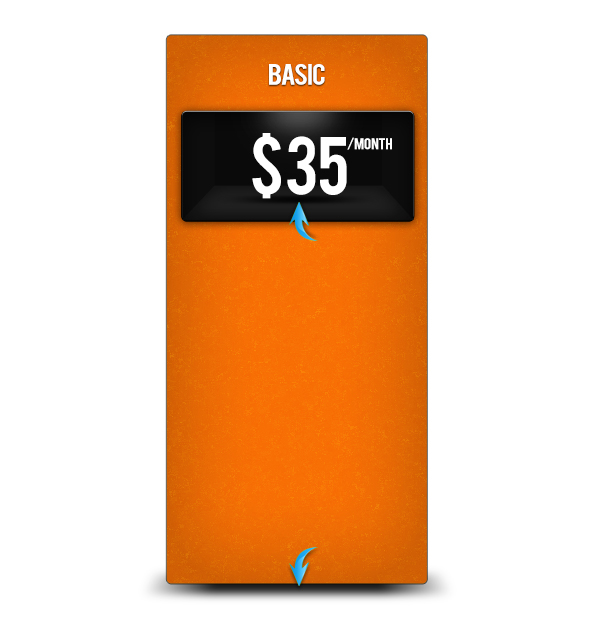
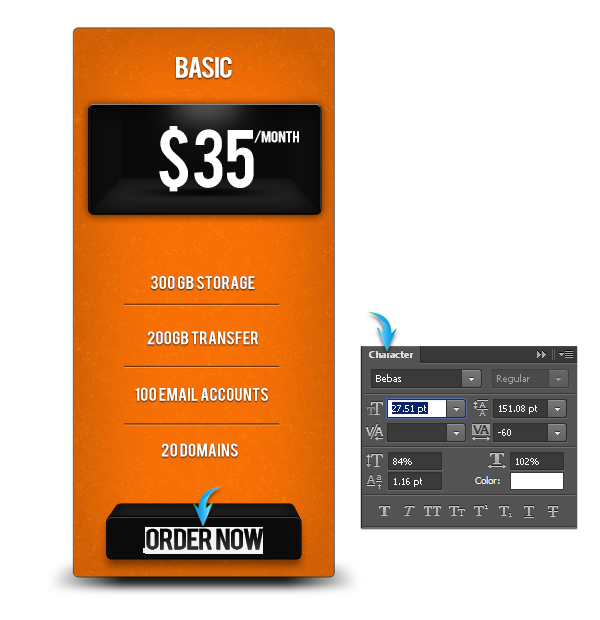
Next, we’ll add the title. Select the type tool to type in the desired text. I’ve use “Bebas” font with the following settings.

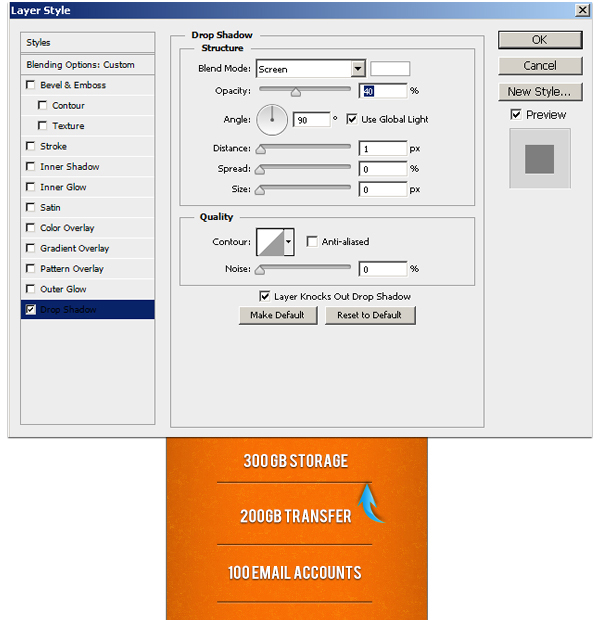
Double-click the title layer and apply the following values for drop shadow.
Step 7
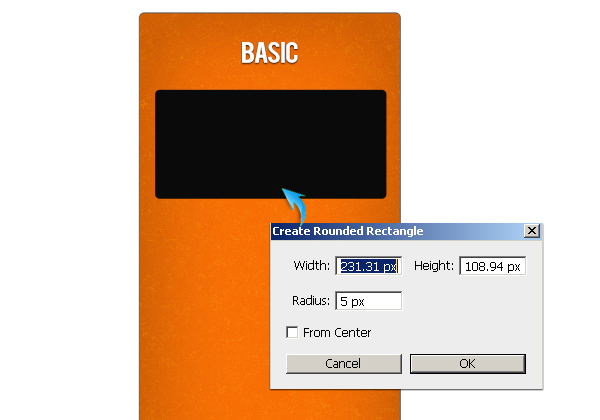
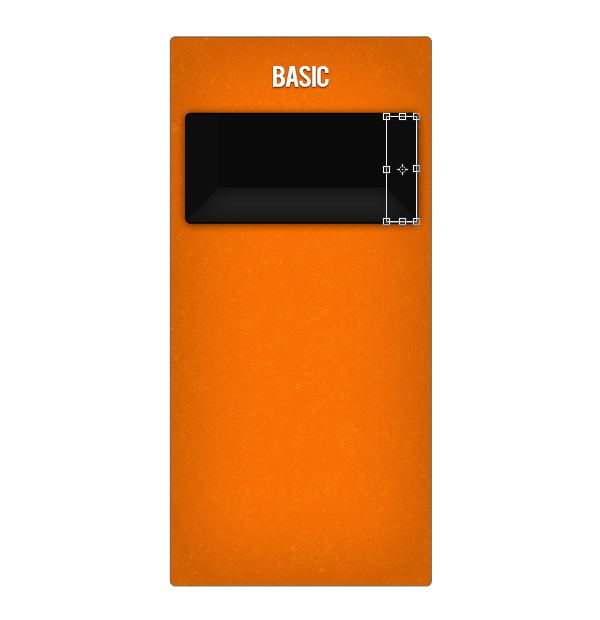
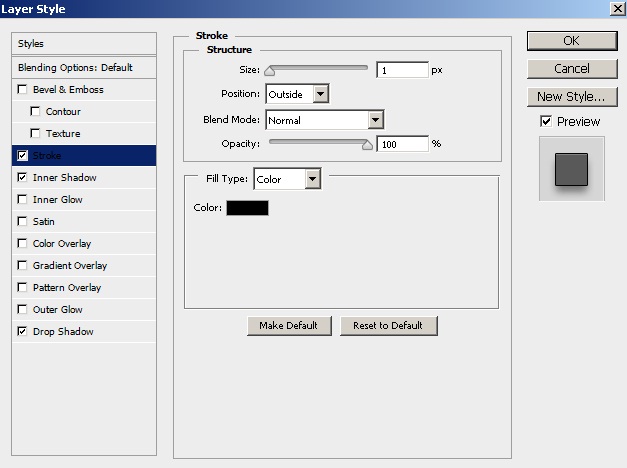
Set #0a0a0a as the foreground color. Select the rounded rectangle tool to draw a rectangle with the following settings. Label it as “box.”
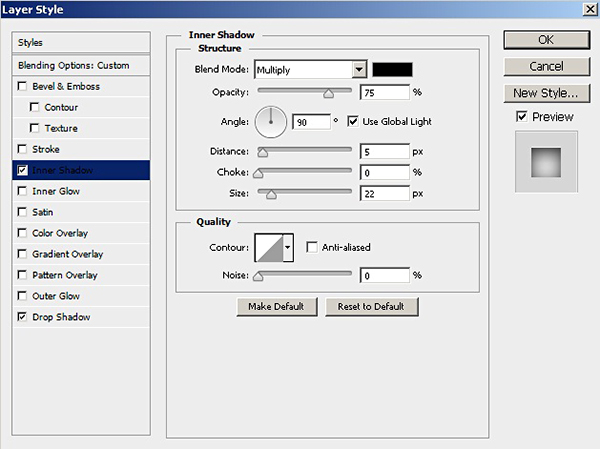
Step 8
Apply the following layer style settings on the box layer.


Step 9
Now pick color #222222 and draw a rectangle using the rectangle tool inside the box. Label this new layer as “floor.” After that, go to “Edit” > “Transform” > “Perspective” and use it to drag the top corners of the rectangle towards each other as shown below.

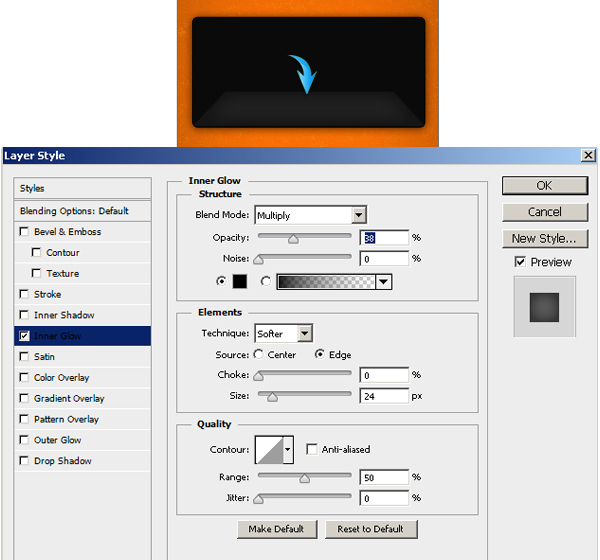
Step 10
Apply the following settings for inner glow on the floor.
Draw a vertical rectangle below the floor layer in color #0d0d0d. Position it along the right border of the box. Duplicate it and place it along the left border as well.
Step 11
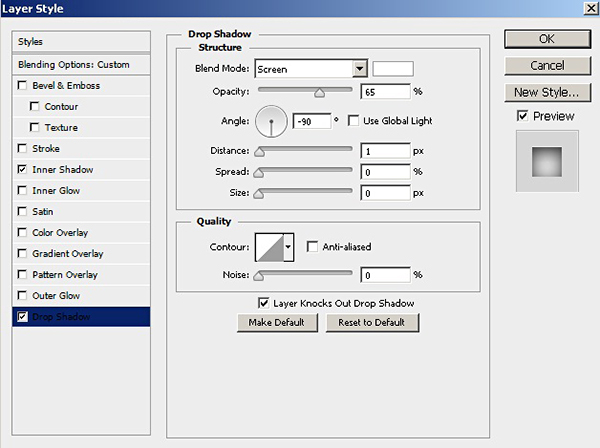
Duplicate the box layer, bring it above the rest of the layers, set its fill color to 0% and apply the following layer style settings to it.

Step 12
Next, we’ll create a light glow inside the box. Press Ctrl + <click on the box layer> to make selection around it. Now, create a new layer at the top of rest of the layers and apply a soft round brush in white color as shown below. Reduce the opacity of this new layer to 50%.

Step 13
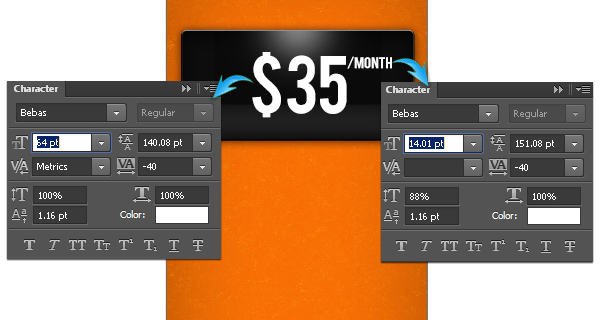
Now, we’ll add text inside the box.
Step 14
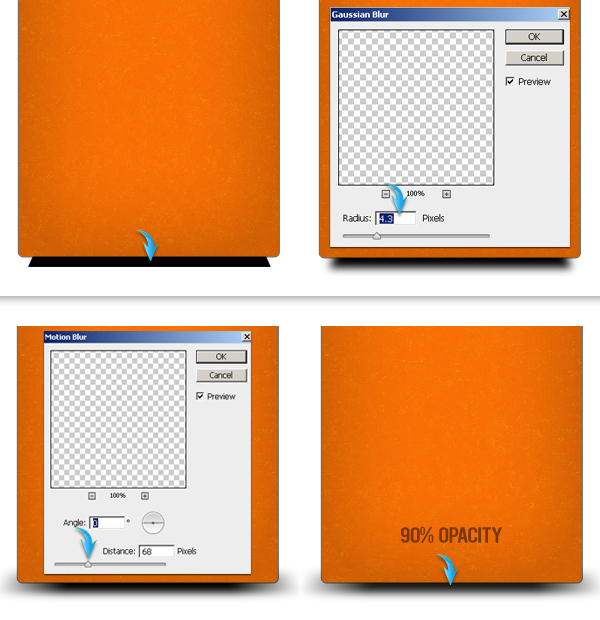
We’ll make the shadow of the pricing table now. Draw a rectangle just above the background layer in pure black. Shape it as shown below using the perspective tool. After that, convert it into smart object and apply the following values for Gaussian and motion blur. Once you are done, reduce the opacity of this layer to 90%.
Duplicate the shadow layer, decrease its size using the free transform tool (Ctrl + “T”), and position it below the text inside the box.
Step 15
Now you can add more text. Right-click the title text layer and select the option to “Copy layer style.” After that, right-click the new text layers one by one and choose “Paste layer style” to apply the same drop shadow settings to them.

Step 16
Select the line tool and draw a straight black line as the separator between the text elements.

Reduce line layer fill to 70% and apply the following drop shadow settings to it. Duplicate this line few times and position them as shown below.
Step 17
Next, we’ll make a button. Draw a rectangle in color #0b0b0b using the rounded rectangle tool.

Apply the following layer style settings on the rectangle.


Step 18
Duplicate the button rectangle layer, and change its color to #282828. Place it below the original layer and drag it upwards. Now, move its top corners towards each other using the perspective tool.

Now, apply the same settings for stroke that we applied to the button, and use the following values to add an inner glow.

Step 19
Add text over the button.
Step 20
Make the top portion of the pricing table using the same techniques that we used for the button in step 18, and apply the same layer style settings to it.
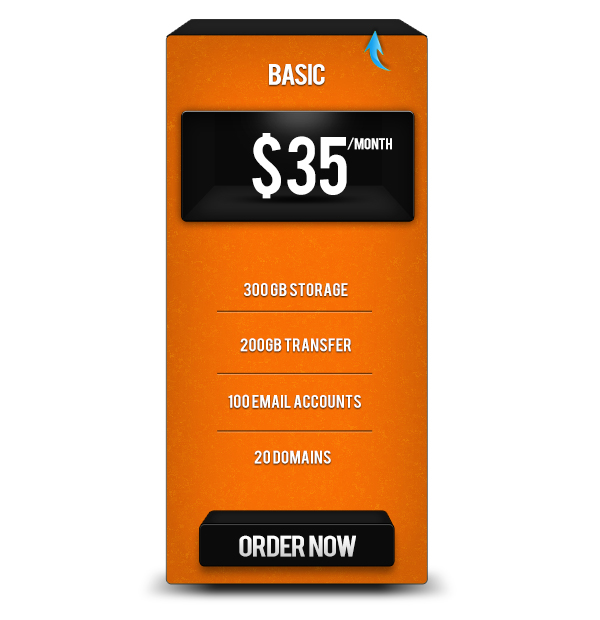
Highlight the central part using soft round brush the same way that we created a light glow in step 12. Reduce the opacity of this new highlight to 30-40%.

Step 21
Our pricing table is ready. Collect all the layers into a single group. Duplicate it twice and decrease their size a bit. Place them below the original group. You can change their color to make them more appealing.

Step 22
Draw two black rectangles along the sides of the central pricing table.

Apply the following Gaussian blur settings to the new rectangles.
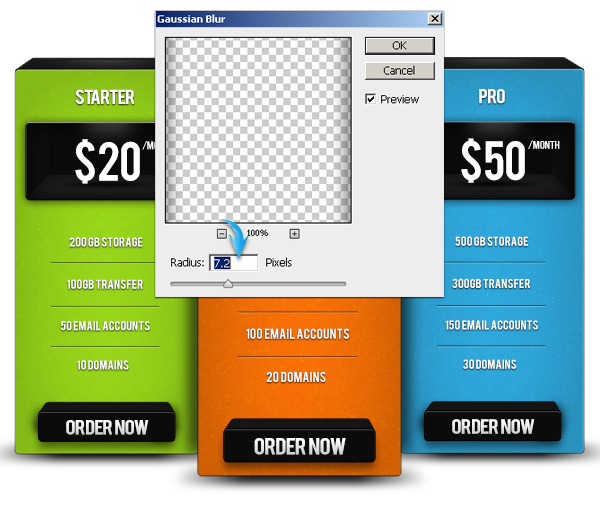
Reduce the shadow opacity to 60%.
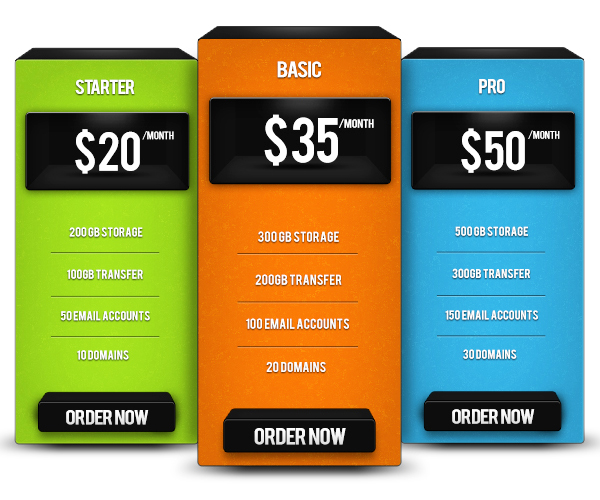
That’s it! I hope you enjoyed the tutorial and learned something useful. Do share your thoughts!
 Anum Khan
Anum is Web and Graphic designer. Addicted to Photoshop and crazy for pixel perfection. She is also an active blogger, sharing her passions, skills and creative details on her blog Websoulz. She loves to connect with the community, sharing the latest design gossips and rolling her eyes on boring trends.