We all know that WordPress is an amazingly rich, extendable and simple platform. That’s probably one of the reasons it powers so much of the web today. But in some cases this richness can be the downfall of your site. If you load too many plugins, for example, or alternatively – select that one theme that is too complex for your application, you might end up seeing heavy database queries and prolonged execution.
This means you need an easy, safe and reliable way to profile your WordPress app that will help you identify the bottlenecks slowing it down.

This article demonstrates a simple way to do just this. It describes how to debug a WordPress application deployed on Microsoft Azure’s web app service, using Z-Ray for Azure – a new technology that was announced a few months ago and is now in preview mode. While Z-Ray as a standlone tool for Azure developers is a new offering, Z-Ray in itself is not. Zend introduced it over a year ago as part of Zend Server. There are plenty of resources available on the web for understanding what Z-Ray is, but just so we’re all on the same page – here is a very short description.
Z-Ray is a debugging tool for PHP developers that provides information on what’s going on under the hood of your PHP apps, in your browser, and without having to change a thing in your code. Using Z-Ray Live!, developers can also profile non-browser based requests coming into the server as well, such as mobile and API requests. In addition to generic PHP information, Z-Ray also provides detailed information for specific apps and frameworks, such as WordPress, Magento, Drupal, Symfony, Laravel and Zend Framework. For more information on these features, this article provides a great overview.
Note: Before we begin, please note that to follow the steps below, you’ll need an active Microsoft Azure account (Free Trial).
Step 1 : Creating a WordPress Web App
Our first step is to create a new WordPress web app on Azure.
Azure offers a number of easy ways to get up and running with WordPress. In this case, we will be deploying a WordPress package called Scalable WordPress, that already contains a basic WordPress setup, including database configurations.
-
After logging into the Azure Portal, click the New button in the top-left corner.
-
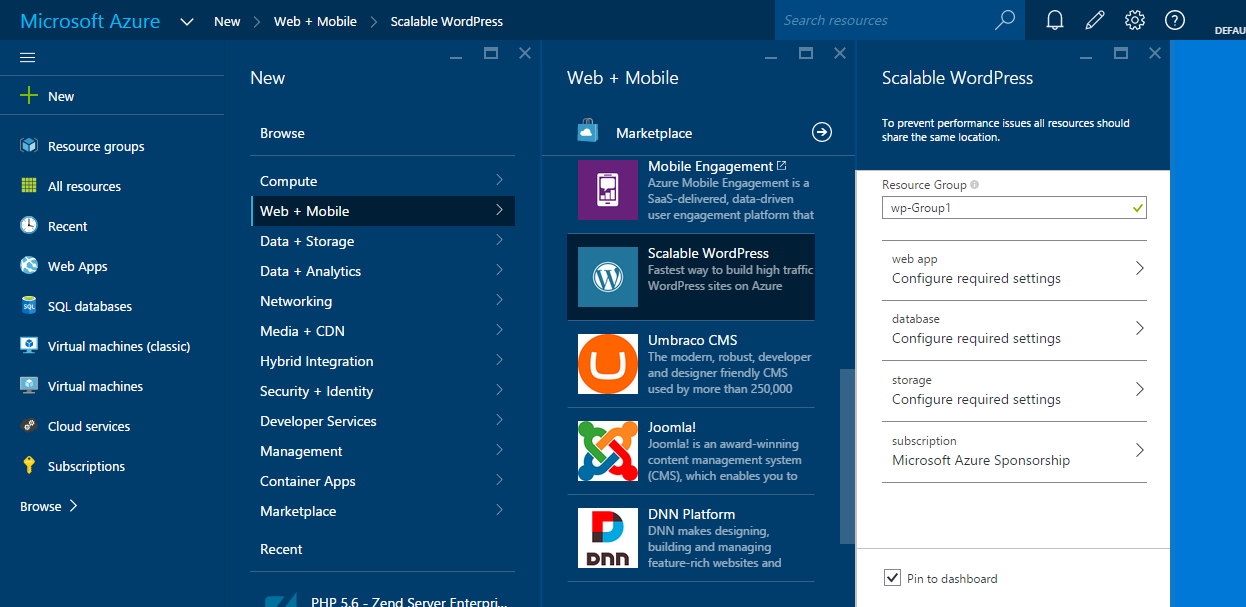
In the Create blade, select Web + Mobile and then Scalable WordPress.
-
In the Scalable WordPress blade that slides open, you will now need to configure the WordPress web app you are about to deploy on Azure.
Start by selecting a name for the web app’s resource group. In Azure, a resource group contains resources related to a specific application. For example, the application itself, a database and a storage account. You can either use the suggested name for the web app’s resource group or enter a new one. -
Next, select the web app settings section, and in the Web App blade that slides open, configure the following:
- URL – enter the URL of your website
- App Service Plan – enter a new name for a service plan. A service plan is basically a set of features that you can share on all your Azure web apps.
- Pricing Tier – select the pricing tier that suits your requirements
- Location – select a location for hosting your web

-
Click OK.
-
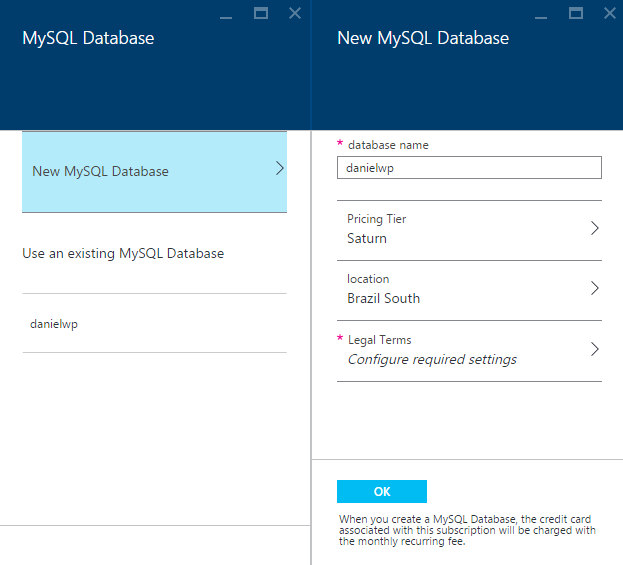
Select the database settings section, and select whether to use an existing MySQL database or create a new one (in which case you will need to define a new name, select a pricing tier and location, and accept the legal terms).
-
Next, select the storage settings section, and and select whether to use an existing storage account or create a new one (in which case you will need to define a new storage account name).
- The last section in the blade displays the subscription that will be used. If you would like to use a different subscription, select this section.
-
That’s it. You’ve finished configuring the new web app settings and don’t worry – if you forgot one of the configuration steps, or if you got it wrong the first time, Azure will make sure you know about it.
Click Create to deploy your new WordPress web app.
Now we are taken to the Startboard where we can see that our web app is being created. This may take a minute or two, and once our WordPress app is ready, its blade will open automatically.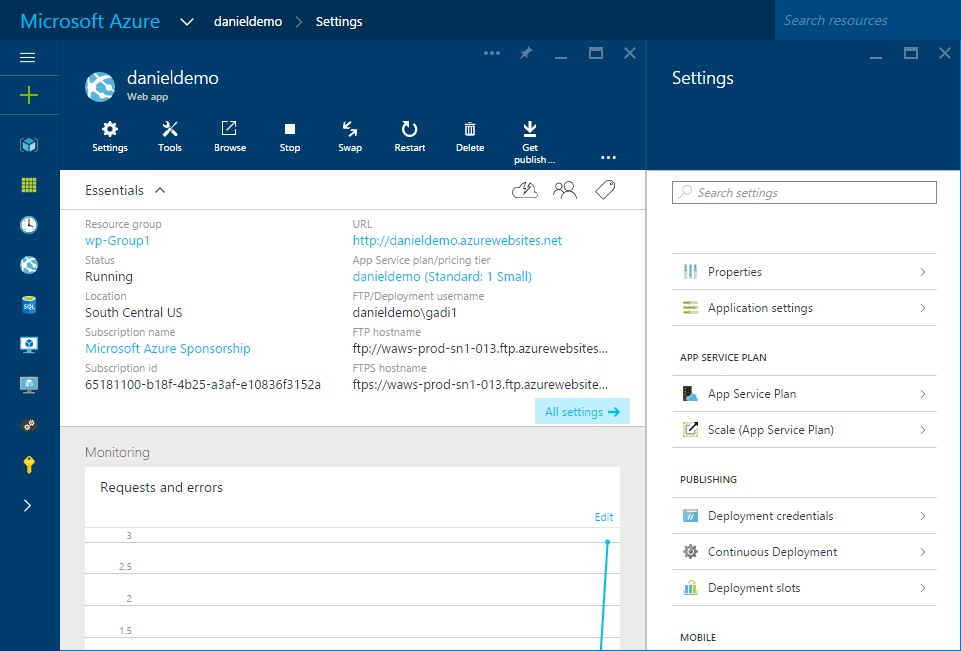
-
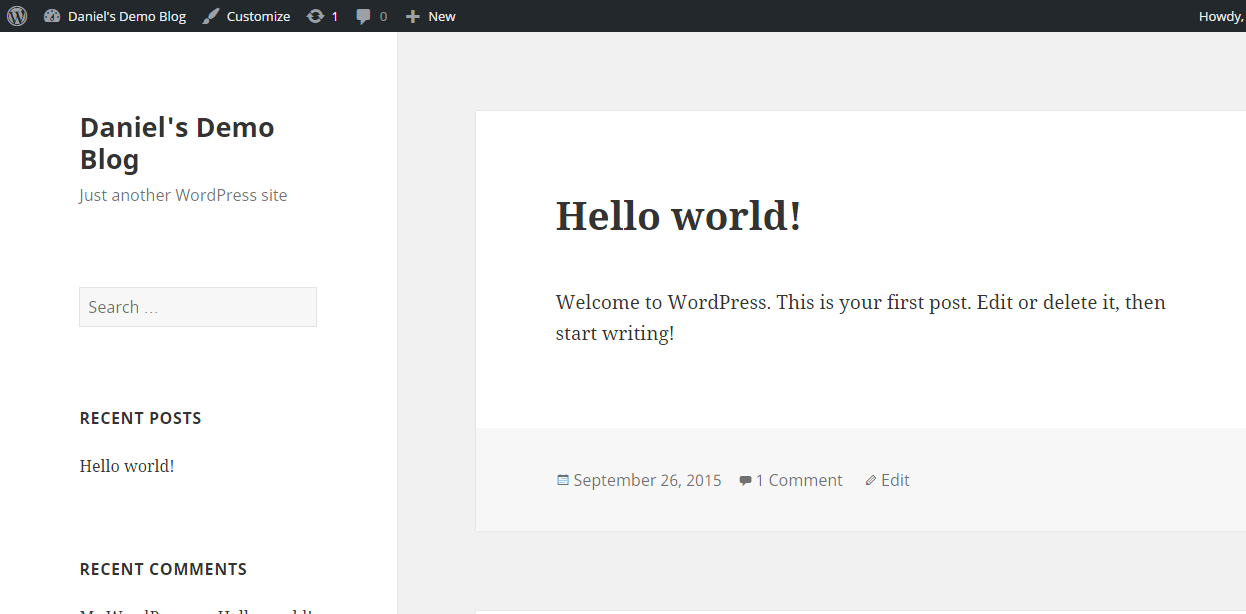
Click the Browse button at the top of the blade to open your WordPress app.
The famous WordPress “five-step” configuration wizard is displayed.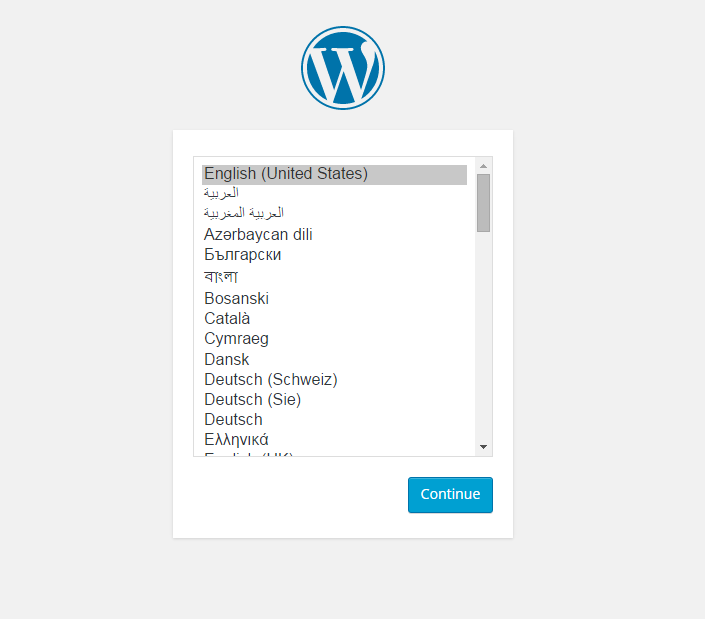
-
Complete the installation steps, and launch WordPress (be sure to make note of the password you define to enter your admin panel).
Step 2 : Enabling Z-Ray
Great! We’ve successfully deployed a WordPress web app on Azure. Now, how do we get Z-Ray working?
-
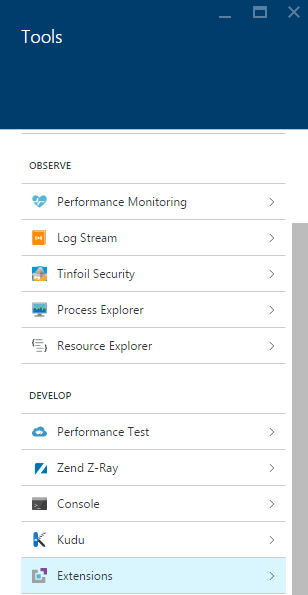
In the web app blade, open the Tools menu. To do this, click the Tools icon at the top of the blade.
-
Under the Develop section of the Tools blade, you’ll see a variety of development tools and features available. Select Zend Z-Ray, and then Enable Z-Ray for Azure.
-
Next, you get a list of the available pricing tiers, including a monthly estimate of the costs. Decide which tier best suits you, and click Select.
Note: Z-Ray on Microsoft Azure is currently in preview, so prices may change in the future without notice.
-
Have a read through the legal terms that are then displayed. If you accept them, click Purchase.
-
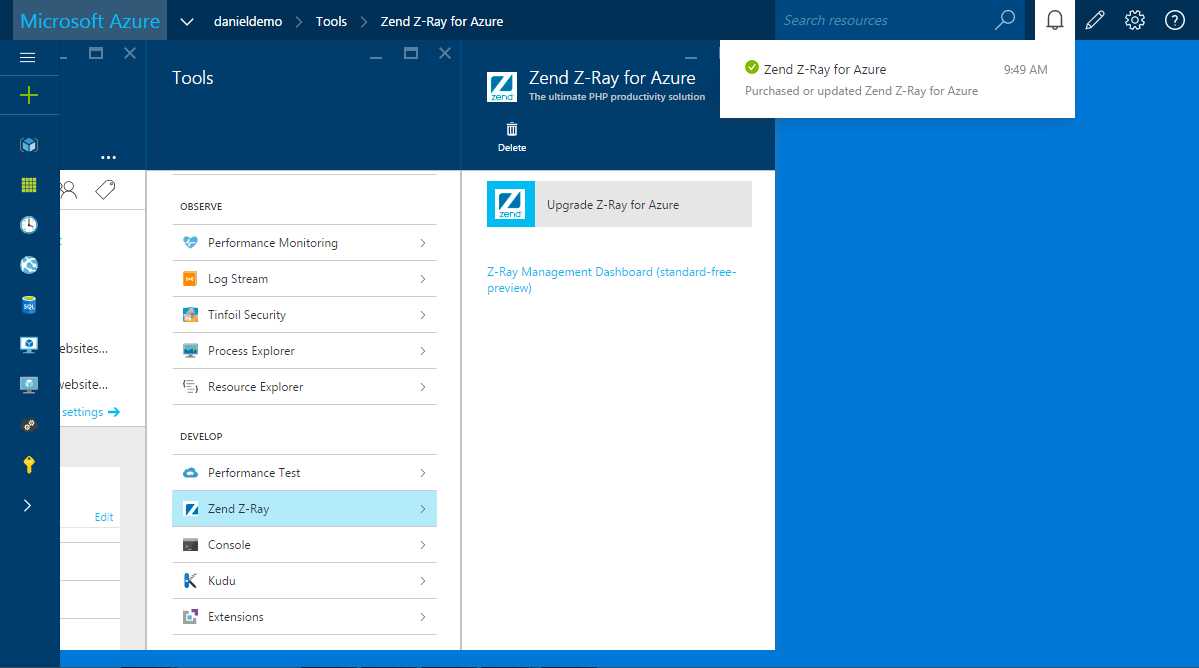
After a short while you’ll get a notification informing you that Z-Ray was successfully enabled. This means that Z-Ray is now enabled for your WordPress web app.
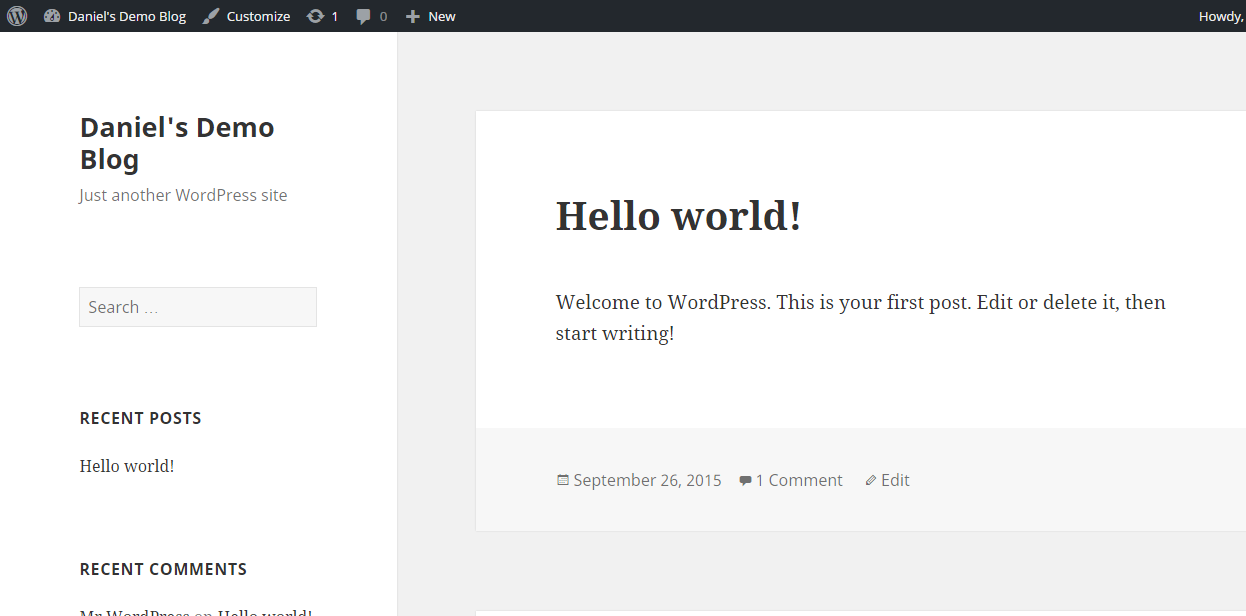
Well done! To start working with Z-Ray, simply refresh your web app in the browser. Z-Ray is displayed at the bottom of the page.
Step 3 : Developing WordPress with Z-Ray
Congratulations! You’ve successfully deployed your WordPress web app and enabled Z-Ray. What’s next?
To start using Z-Ray, simply select the various panels on Z-Ray and begin drilling down into your code.
Out of the box, Z-Ray tracks and displays detailed info on: the functions triggered by your app, executed SQL queries (including the query’s bound value, the result of the query, how long the query took and the amount of rows in the code affected by the query), errors and warnings, thrown exceptions, and more (for a nice detailed overview of Z-Ray’s main features, read this article).
For WordPress developers, Z-Ray displays additional information on WordPress elements and code constructs. This information can be accessed by opening the WordPress panel on the right hand side of Z-Ray.
Let’s take a closer look.
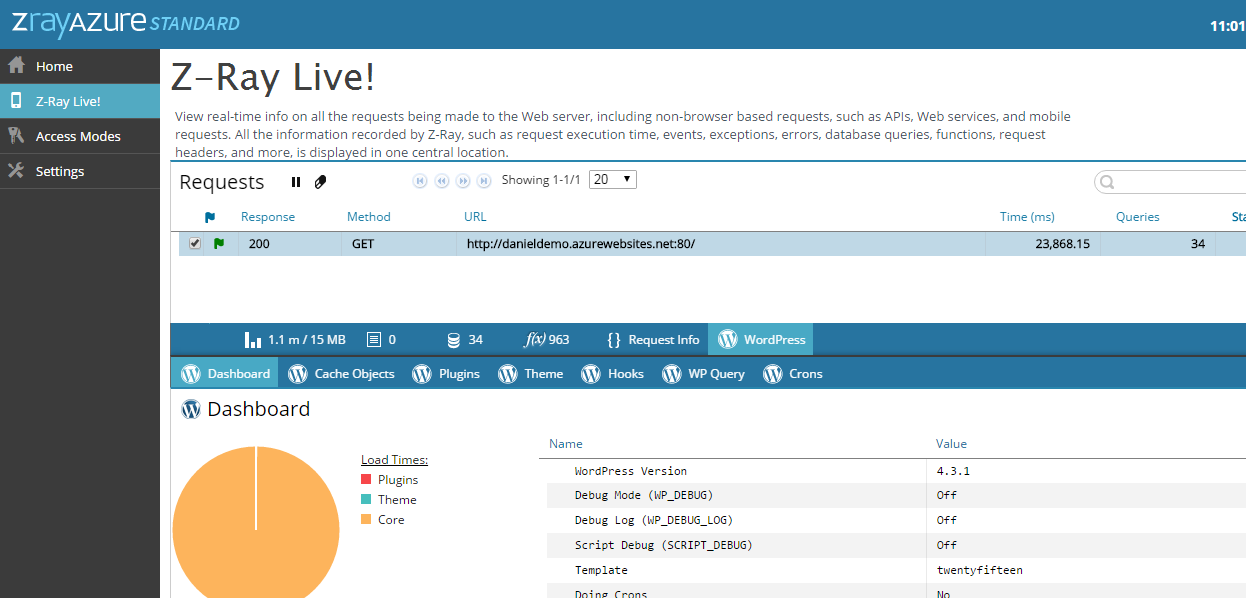
Dashboard
The Dashboard panel gives you a great overview of your WordPress application – with a chart showing the load time for plugins, themes and core, and additional general details about the app’s configuration, including the version, number of plugins, number of DB queries, and more.

Cache Objects
The Cache Objects panel gives you a precise picture on cached objects for the page. This includes a chart depicting the largest cached objects and their size, and a full detailed breakdown of the objects with size and number of hits.

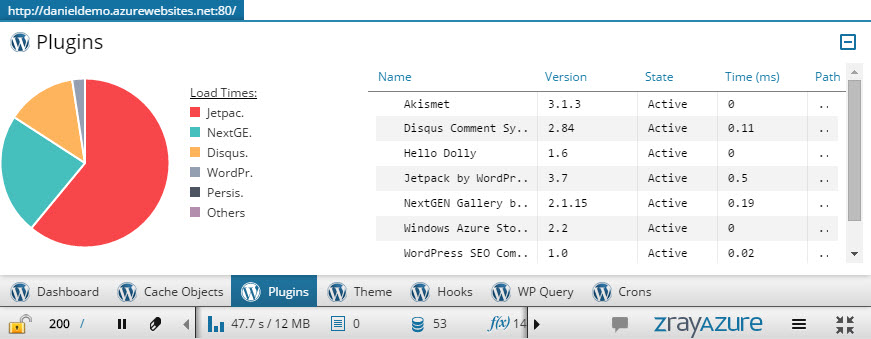
Plugins
The Plugins panel is extremely useful because it can give you a great view on loaded plugins and the resources they are consuming. The panel shows you a chart depicting the relative load times for plugins, together with a table showing the name, version, state, load time and path for each plugin.
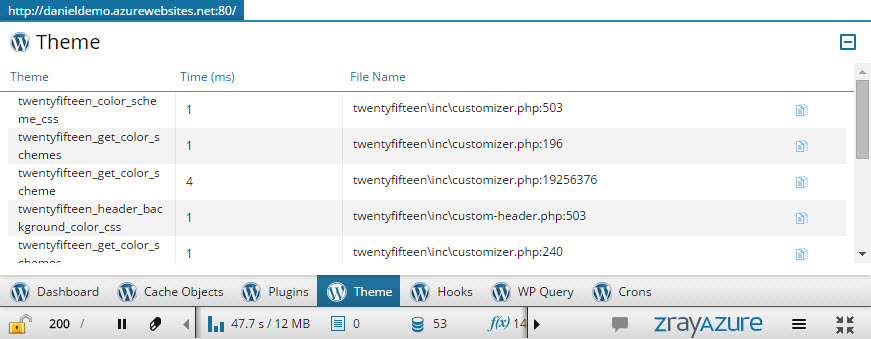
Theme
Z-Ray also helps you profile the theme your app is using. In the Theme panel, you can see info on the CSS used, execution time, and the file used.
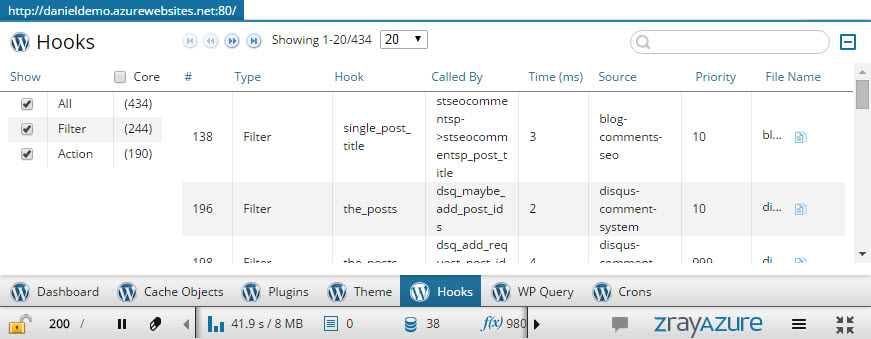
Hooks
The Hooks panel enables you to see all the WordPress hooks triggered during execution, including Core hooks (to see Core hooks, simply select the Core check-box in the filters area on the left). You can view the name of the hook, its type (action/filter), who called the hook, the time it took to execute, the hook priority, and the name of the file.
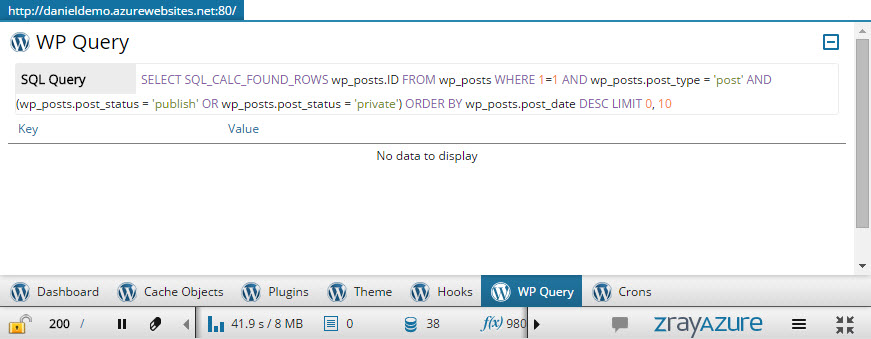
WP Query
The WP Query panel displays information on the current main WordPress query.
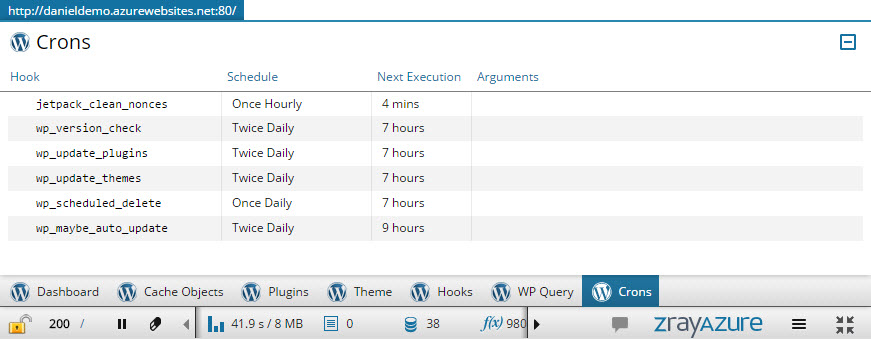
Crons
Last but not least, in the Crons panel you’ll get insight into the WordPress cron system. View the hooked functions, their schedule, any defined arguments for the cron event, and the time of the next execution.
Step 4: Debugging Mobile and API Requests
Z-Ray also supports debugging non-browser based requests with Z-Ray Live! – a tool that provides real-time monitoring of all requests made to the server, including those made by APIs, web services, and mobile requests.
Note: Z-Ray Live! is only supported on the Standard edition of Z-Ray for Azure.
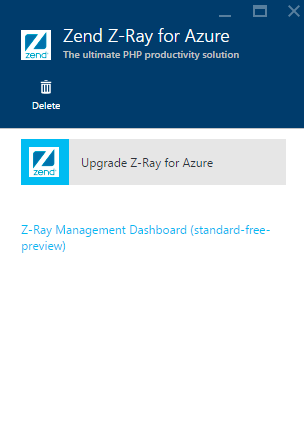
To use Z-Ray Live! you will need to open the Z-Ray for Azure Management Dashboard which is a user interface for managing and configuring Z-Ray.
To do this, click the Z-Ray Management Dashboard link in the Zend Z-Ray for Azure blade.
Once the Z-Ray Management Dashboard is displayed, simply select the Z-Ray Live! page. Tracking for requests is commenced as soon as the page loads, so simply wait for the requests to come pouring in! For a quick test, reload your WordPress app in the browser.
Step 5: Using Z-Ray in Production
Before we part ways, this final step will explain how to safely use Z-Ray in production as well.
The Z-Ray Secured Mode allows you to enable Z-Ray for specific IPs or URLs, and for a specific time duration, by passing an access token to the URL as a GET parameter. Only URLs using this token will then be able to use Z-Ray.
So, how do you create a new access token?
- Open the Access Modes | Mode page in the Z-Ray Management Dashboard.
- Select the Secured mode, and click Save. When prompted, verify your selection. Z-Ray is now in Secured mode, and if you refresh your WordPress application, Z-Ray will not be displayed.
-
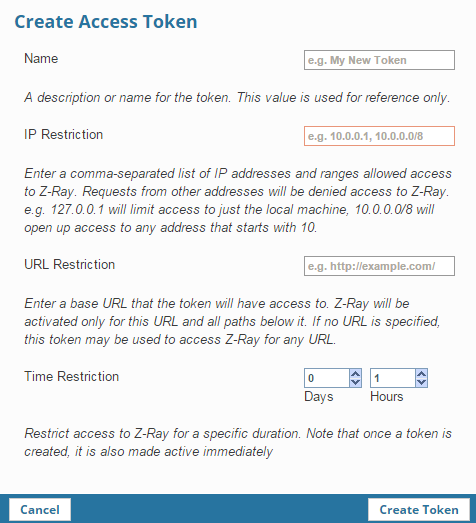
Next, open the Access Mode | Tokens page, and click Create Token. The Create Access Token dialog is displayed.
-
Configure the new access token:
- Name – Enter a description for the new token for reference purposes only.
- IP Restriction – Enter a comma-separated list of IPs representing the machines you wish to enable Z-Ray on, either as a masked range or in CIDR. Example: 127.0.0.1 will limit access to just the local machine, 10.0.0.0/8 will open up access to any address that starts with 10.
- URL Restriction (Optional) – Enter the URL of a page you wish to enable access to Z-Ray for. Note: This token setting option is not mandatory. However, leaving this field empty will allow access to Z-Ray for all pages on the server.
- Time Restriction – Set a time limit for the access token, after which access to Z-Ray will no longer be enabled.
-
Click Create Token. A token is created you will be informed on how to access Z-Ray.
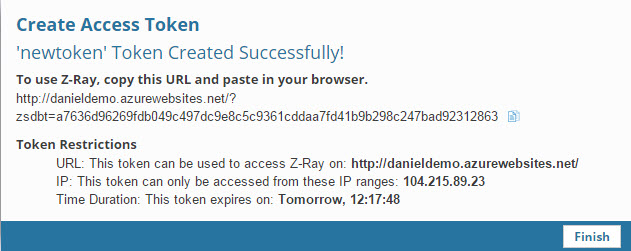
-
To use the token, all you have to do is add it as a GET parameter to the page URL.
Summary
The combination of Z-Ray and Azure means WordPress developers, and indeed PHP developers as a whole, get to benefit from both Microsoft Azure’s web app service, and Z-Ray’s introspection capabilities. Being able to easily get deep insight into all the various elements constructing the page will help developers cut development time and ultimately produce better code.
Hope you enjoyed the read!
Zend and Microsoft are always looking for feedback, so if you have any ideas for improving Z-Ray for Azure, feel free to reach out to zrayazure-feedback@zend.com!
 Daniel Berman
Product Evangelist at Logz.io. Author and blogger. Write about PHP, ELK, Log Analytics and BigData. Family man, runner and Liverpool FC fan.