If you get into a daily design routine with all of your projects, chances are that you’ve already developed your own custom workflow. You likely have repetitive tasks that you need to perform each day. It could be website maintenance, adding images, resizing them, adding certain filters or settings to photos, etc. If you are constantly doing the same repetitive tasks over and over again, you should save time and record repetitive tasks as Photoshop actions. Then, all you have to do is run that action and with one click, an image is instantly transformed. This will save you a huge amount of time, because Photoshop can process these common tasks much more quickly as automated actions.
Recording Your Photoshop Actions
It isn’t difficult to record your own Photoshop action. I suggest that you write down the steps ahead of time to get the results that you want. This will make it less likely that you’ll make a mistake and have to start over again. The beautiful thing about creating your own actions is that it records each step that you perform and not the time that it takes you to do each one. This is great for recording actions because you can take your time and concentrate on doing each step in the right order.
Practical Uses For Photoshop Actions
For my blog, I need my images and screenshots to be 600px wide. This is fairly common for most blogs. However, the list of articles on the homepage needs to be proportionally 450px tall. I use actions to resize my images quickly. Portrait (vertical) images can be any height, because I don’t use those as my feature images, so the action that I have recorded for portrait images simply resizes the width to 600px, and that is it. However, I had to record a separate action for landscape (horizontal) images. I still have the width set to 600px, but the height is set to 450px via the canvas size setting, so if the image isn’t tall enough, Photoshop adds white canvas space at the top and bottom. I haven’t had to manually resize my photos since.Creating Photoshop Actions
Download the example image here. The image is of an office, which is something that I might use for one of my articles. The image is 3348px wide, which is way too big for an average blog’s content area. Normally, we would just go to “Image” > “Image Size” and set the width to 600px. This is fine to do, but what if you had 15, 20, or 500 images? Having an action for this is much easier, and you can even assign a hotkey to the action to make it even more automated. Go to “Window” > “Actions” and the Actions panel will come up.


CS6: Photoshop Conditional Actions
Just when you thought that actions couldn’t get any better, Adobe sets the bar another step higher. Now in Photoshop CS6, you can set conditional Photoshop actions. In my example, I created an action for setting the width to 600px and then setting the canvas size to 450px. Well, what if my image is portrait? I’d have to use a different Action for that one. Since it doesn’t matter what the height of the image is, as long as it is 600px wide, we’ll use the same method used above to record this action without adjusting the canvas size. Next, click the flyout menu. Make sure the Action that you’d just created for the width being 600px wide (without the canvas height adjustment) is selected. Click on “Insert Conditional.”
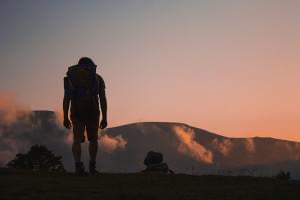
 I downloaded the image below here. I ran the conditional Action via its hotkey, and this portrait image was resized without being chopped down to a 450px height. After checking to make sure it worked, I renamed the Action as “Width 600px Conditional.” To rename an Action, just double-click its name within the Actions Panel.

The Beauty of Conditional Photoshop Actions
Now it is possible to run conditional Photoshop Actions as batches, too. Instead of having to run a separate batch for portrait and landscape images, they can all be dumped into a folder and resized via a Photoshop Batch. To run a batch, go to “File” > “Automate” > “Batch.” Choose the set that your Action belongs to and choose the conditional Photoshop Action that you just created. Choose the source folder where your collection of images are located. Then, choose a destination folder for your processed files to go into. I usually just create a folder inside of the original folder called “processed.” At the bottom, it says “stop for errors”. When I ran this batch, I kept getting a message that the if condition wasn’t available, but it still ran the batch anyway. I just had to click the button telling it to proceed. If you want to avoid this, tell Photoshop to log errors to a file. If you do this, the files that had errors will have to be saved manually to the destination folder. To me, it is much less of a headache to hit Enter/Return a few times than to have to manually save multiple images.
Conclusion
Photoshop Actions are an incredible tool for creating time-saving shortcuts for repetitive tasks. If you have a repetitive task that takes multiple steps, it is easy to just record it once and then have it available as a hotkey. If you have a folder full of images you can run a batch, taking a half an hour of manual work and tuning it into just a minute or two of work can save you tremendous amounts of time in the long term. With the addition of conditional Photoshop Actions, we can now save even more time by telling Photoshop to look for certain parameters. There are other conditions besides the landscape format, such as being square, RGB, being an unsaved document, and more. What do you use Photoshop Actions for? Have you tried out the new conditional Photoshop Actions feature? How much time do you think it could save you?Frequently Asked Questions about Creating Photoshop Actions
What are Photoshop Actions and why are they important?
Photoshop Actions are a series of tasks that you can record and apply to a single file or a batch of files. They can save you a significant amount of time if you find yourself performing the same tasks repeatedly. For instance, if you’re a photographer who needs to resize, sharpen, and add a specific color tone to hundreds of images, you can record these steps as an action and apply them to all your images with just a click.
How can I create a new Photoshop Action?
To create a new Photoshop Action, first, go to the Actions panel and click on the ‘Create New Action’ button. Name your action and set other properties like the action set, function key, and color. Then, click ‘Record’. Now, every step you take in Photoshop will be recorded until you hit the ‘Stop’ button in the Actions panel.
Can I edit an existing Photoshop Action?
Yes, you can edit an existing Photoshop Action. To do this, select the action in the Actions panel and click on the ‘Begin Recording’ button. Then, perform the steps you want to add. When you’re done, click the ‘Stop’ button. The new steps will be added to the existing action.
How can I apply a Photoshop Action to multiple files?
To apply a Photoshop Action to multiple files, you can use the ‘Batch’ command in the ‘File’ > ‘Automate’ menu. In the Batch dialog box, choose the action you want to apply, select the source and destination folders, and set other options as needed. Then, click ‘OK’ to start the batch processing.
Can I share my Photoshop Actions with others?
Yes, you can share your Photoshop Actions with others. To do this, select the action or action set in the Actions panel, click on the panel menu, and choose ‘Save Actions’. This will save the action or action set as an .atn file, which you can share with others.
Why are my Photoshop Actions not working?
There could be several reasons why your Photoshop Actions are not working. One common reason is that the action includes steps that refer to specific layers or tools that are not available in the file you’re applying the action to. To avoid this issue, try to make your actions as generic as possible.
Can I use Photoshop Actions in other Adobe applications?
No, Photoshop Actions are specific to Adobe Photoshop and cannot be used in other Adobe applications. However, some Adobe applications like Illustrator and InDesign have their own versions of actions.
How can I organize my Photoshop Actions?
You can organize your Photoshop Actions by creating action sets. An action set is a folder that can contain multiple actions. To create a new action set, click on the ‘Create New Set’ button in the Actions panel.
Can I undo a Photoshop Action?
Yes, you can undo a Photoshop Action by using the ‘Undo’ command in the ‘Edit’ menu or by pressing Ctrl+Z (Windows) or Command+Z (Mac). However, keep in mind that this will undo the entire action, not just the last step.
Can I automate Photoshop Actions?
Yes, you can automate Photoshop Actions by using the ‘Batch’ command or by creating a droplet, which is a small application that applies an action when you drag files onto its icon.
 James George
James George is a professional web developer and graphic designer. James is an expert in design, and a professional web developer, with a special interest in WordPress. Founder of Design Crawl, James has been a professional designer since 2005.