In the previous part of this series, I showed several other functions of the functions.js file, highlighting their key points. In this sixth and final part, I’ll describe the last function left and the Cordova configuration file that we will use to set properties for our project and define several directives for the Adobe PhoneGap Build service.
Initializing the Application
First, within theindex.html file, I’ll attach the function, initApplication()—which I’ll describe in a few moments—to the deviceready event, which is fired when Cordova is fully loaded.
$(document).one('deviceready', initApplication);translateMainPage() function if the user’s preferred spoken language is available. Then, it calls the openLinksInApp() function to manage external links, as described in part 5. These two actions are independent from the rest of the application, even if the device doesn’t satisfy the requirements.
translateMainPage();
openLinksInApp();if (checkRequirements() === false)
{
$('#submit-button').button('disable');
return;
}fillCurrenciesSelection(), the function to update the rates, updateExchangeRates(), and the final function that updates the labels by reading the date and time of the last currency exchange rate update, updateLastUpdate().
$.mobile.loading('show');

fillCurrenciesSelection();
updateExchangeRates();
updateLastUpdate();online event is fired. The latter, as you may guess, fires when a Cordova application detects that it’s connected to the Internet.
$(document).on('online', updateExchangeRates);convert() method of the Currency class to made the conversion calculation. Then, it calls the numberToString() to localize the result based on the user preferences and injects the end result into the page. Finally, it updates the app settings with the last currencies chosen by the user.
$('#submit-button').click(function(event) {
  event.preventDefault();

  // Convert the value
  var result = Currency.convert(
    $('#from-value').val(),
    $('#from-type').val(),
    $('#to-type').val()
  );

   // Localize the result
   navigator.globalization.numberToString(
    result,
    function(number)
    {
      $('#result').text(number.value);
    },
    function()
    {
      $('#result').text(result);
    }
  );

  // Update settings
  var settings = Settings.getSettings();
  if ($.isEmptyObject(settings))
    settings = new Settings();
  settings.fromCurrency = $('#from-type').val();
  settings.toCurrency = $('#to-type').val();
  settings.save();
});$('#reset-button').click(function(event) {
event.preventDefault();
$('#from-value').val(0);
$('#form-converter select').prop('selectedIndex', 0).selectmenu('refresh');
$('#result').text(0);
});updateExchangeRates() function. Otherwise it notifies the user that it’s not connected to the Internet.
$('#update-button').click(function(event) {
  event.preventDefault();

  if (navigator.network.connection.type === Connection.NONE)
  {
    console.log('The connection is off. Can't update exchange rates.');
    navigator.notification.alert(
      'Your device has the connections disabled. Can't update exchange rates.',
      function(){},
      'Error'
    );
  }
  else
    updateExchangeRates();
});$.mobile.loading('hide');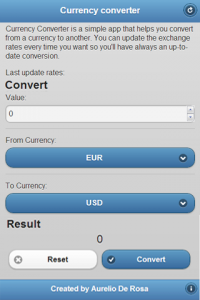
Create the Cordova Configuration
Since we’ll use the Adobe PhoneGap Build service to package our project, in order to set its metadata (the version, the name, the author, and so on), we’ll use a configuration file calledconfig.xml. Explaining the format in detail is outside the scope of this article, but I’ll highlight the main concepts and focus on the important <access> tag. To have an in-depth look of what you can do with this file, you can read the official documentation page.
The cited file follows the W3C widget specification and must reside in the root of the project files, at the same level as the index.html file. The root of the whole document is a <widget> tag that has several attributes, but the mains ones are id (the unique identifier of the app) and version (that specifies the version of the app). Inside the <widget> tag, you can include several elements:
- name (required): Specify the name of the application. It doesn’t have to be unique.
- description (required): Specify the description of your work. This will be shown in the app’s marketplace listing.
- author (optional): The app’s author. Unfortunately, you can only specify one author, so you can’t have details for multiple authors.
- icon (optional): The icon to display on the devices that will install your app. If you do not specify it, the Cordova logo will be used.
- feature (optional): Specify the features you want to use. Some operating systems, before installing the app, ask the user to provide permissions for those features. In “Currency Converter”, the only required feature is access to the Internet connection.
- preference (optional): A set of preferences you want to apply, such as the Cordova version, to use when packaging the project.
- splash (optional): This tag sets the splash screen of the application—the image to show while it’s loading.
<access> tag is very important because, citing the documentation, it provides your app with access to resources on other domains—in particular, it allows your app to load pages from external domains that can take over your entire webview.Recalling what we discussed in the section “Managing External Links” of the previous part, in order to open the external links in the Cordova WebView, we must add them to the app whitelist. Using the
<access> tag, you have several ways to add links. In fact, you can specify each link you want to add individually. Consider the following example:
<access origin="https://www.audero.it" />
<access origin="https://www.buildmobile.com" />
For each of the above approved domains, you can also include all the subdomains using the subdomains attribute:
<access origin="https://www.audero.it" subdomains="true" />
Since our app won’t retrieve links from external and unsafe sources, we can shorten the process allowing for any external resource using the * special character like the following example:
<access origin="*" />
Now that I’ve pointed out the key points of the format, you can understand the source of the configuration file of our project. The complete file is below.
<?xml version="1.0" encoding="UTF-8"?>
<widget xmlns     = "https://www.w3.org/ns/widgets"
        xmlns:gap	= "http://phonegap.com/ns/1.0"
        id        = "com.audero.free.utility.currencyconverter"
        version   = "1.0.0">

   <name>Currency converter</name>

   <description>Currency converter is a simple app that helps you convert from a currency to another. You can update the exchange rates anytime you want so you'll have always an up-to-date conversion.</description>

   <author href="http://www.audero.it" email="aurelioderosa@gmail.com">Aurelio De Rosa</author>

   <feature name="http://api.phonegap.com/1.0/network"/>

   <preference name="phonegap-version" value="2.3.0" />
   <preference name="target-device" value="universal" />

   <access origin="*" />

   <!-- Icons -->
   <icon src="icon.png" width="64" height="64" gap:role="default" />
   <icon src="images/icon-72x72.png" width="72" height="72" gap:platform="android" gap:density="hdpi" />
   <icon src="images/icon-96x96.png" width="96" height="96" gap:platform="android" gap:density="xhdpi" />
   <icon src="images/icon-72x72.png" width="72" height="72" gap:platform="ios" />

   <!-- Splash Screens -->
   <gap:splash src="splash.png" />
   <gap:splash src="images/splash-160x220.png" gap:platform="android" gap:density="ldpi" />
   <gap:splash src="splash.png" gap:platform="android" gap:density="mdpi" />
   <gap:splash src="images/splash-450x650.png" gap:platform="android" gap:density="hdpi" />
</widget>
Conclusion
I have to compliment those of you who completed the whole series. The growing number of hybrid apps released, including the one we just built, prove that you can build amazing games and utilities using web technologies that you’ve already mastered. There are pros and cons in choosing to develop a hybrid app, but this is definitively one additional tool in your development tool belt. My last contribution is giving you the link to the Currency Converter repository. Here you’ll find and download the full and ready-to-work package. For those of you that are too lazy to build the app, I have also created a public page where you can download the installer for every platform supported by the Adobe Build PhoneGap service. As a final note, Currency Converter is released under the CC BY 3.0 (“Creative Commons Attribution 3.0”) license. I hope you enjoyed the series and have more comfort and confidence with hybrid apps. Thanks for following!Frequently Asked Questions (FAQs) about Building a Currency Converter with jQuery Mobile and Cordova
How can I update my Cordova jQuery mobile app to a more modern version?
Updating your Cordova jQuery mobile app to a more modern version involves several steps. First, you need to ensure that your system meets the requirements for the latest version of Cordova. This may involve updating your Node.js and npm. Next, you can update Cordova using the npm install command. After updating Cordova, you need to update your project’s platforms to the latest versions. Finally, you should update your plugins to their latest versions. Remember to test your app thoroughly after updating to ensure everything works as expected.
What are the benefits of using Cordova with jQuery Mobile for building a currency converter app?
Cordova and jQuery Mobile are both powerful tools for building mobile apps. Cordova allows you to use standard web technologies – HTML5, CSS3, and JavaScript for cross-platform development. This means you can create a single app that works on multiple platforms, saving time and effort. jQuery Mobile, on the other hand, is a touch-optimized web framework for smartphones and tablets. It provides a unified user interface system that works across all popular mobile device platforms. When used together, they provide a robust and efficient way to build a currency converter app.
How can I add a contacts plugin to my Cordova project with jQuery?
Adding a contacts plugin to your Cordova project with jQuery involves several steps. First, you need to add the plugin to your project using the Cordova plugin add command. Next, you need to call the plugin’s functions from your JavaScript code. Remember to wrap your code in the deviceready event to ensure the Cordova APIs have fully loaded before you try to use them.
How can I troubleshoot issues with my Cordova jQuery mobile app?
Troubleshooting issues with your Cordova jQuery mobile app can be done in several ways. First, you can use the browser’s developer tools to debug your app. This allows you to inspect the DOM, view console logs, and debug JavaScript. You can also use the Cordova CLI’s commands to build and run your app, which can help identify any issues. Additionally, you can use plugins like cordova-plugin-console to redirect console logs to the native console.
How can I optimize the performance of my Cordova jQuery mobile app?
Optimizing the performance of your Cordova jQuery mobile app involves several strategies. First, you should minimize the use of DOM manipulations as they can be expensive. Instead, use CSS transitions and transforms for animations. Second, you should minimize the use of JavaScript and jQuery selectors. Instead, cache your selectors and use IDs instead of classes for faster selection. Finally, you should use the Page events provided by jQuery Mobile to properly manage your app’s resources.
How can I ensure the security of my Cordova jQuery mobile app?
Ensuring the security of your Cordova jQuery mobile app involves several best practices. First, you should use SSL for all network communication to prevent data interception. Second, you should sanitize all user input to prevent cross-site scripting (XSS) attacks. Third, you should use the Content Security Policy (CSP) to control the resources your app can access.
How can I add internationalization to my Cordova jQuery mobile app?
Adding internationalization to your Cordova jQuery mobile app involves using the Globalization plugin provided by Cordova. This plugin obtains information about the user’s locale, language, and timezone. You can use this information to format and display content in the user’s preferred language and format.
How can I test my Cordova jQuery mobile app on different devices?
Testing your Cordova jQuery mobile app on different devices can be done using emulators and real devices. Cordova provides commands to run your app on emulators and real devices. Additionally, you can use cloud-based testing services to test your app on a wide range of devices and platforms.
How can I handle different screen sizes and resolutions in my Cordova jQuery mobile app?
Handling different screen sizes and resolutions in your Cordova jQuery mobile app involves using responsive design techniques. jQuery Mobile provides a grid system that you can use to create responsive layouts. Additionally, you can use CSS media queries to apply different styles based on the device’s screen size and resolution.
How can I add offline capabilities to my Cordova jQuery mobile app?
Adding offline capabilities to your Cordova jQuery mobile app involves using the Network Information plugin provided by Cordova. This plugin provides information about the device’s network connection. You can use this information to adjust your app’s behavior based on the network status. Additionally, you can use HTML5’s local storage and offline cache features to store data locally on the device.
 Aurelio De Rosa
I'm a (full-stack) web and app developer with more than 5 years' experience programming for the web using HTML, CSS, Sass, JavaScript, and PHP. I'm an expert of JavaScript and HTML5 APIs but my interests include web security, accessibility, performance, and SEO. I'm also a regular writer for several networks, speaker, and author of the books jQuery in Action, third edition and Instant jQuery Selectors.


