Creating a Video Calling App in Android with CrossWalk and PeerJS
In this tutorial I’m going to show how to create a video calling app in Android. It will be implemented using Ionic, Cordova, Crosswalk and PeerJS.
What We’ll Build
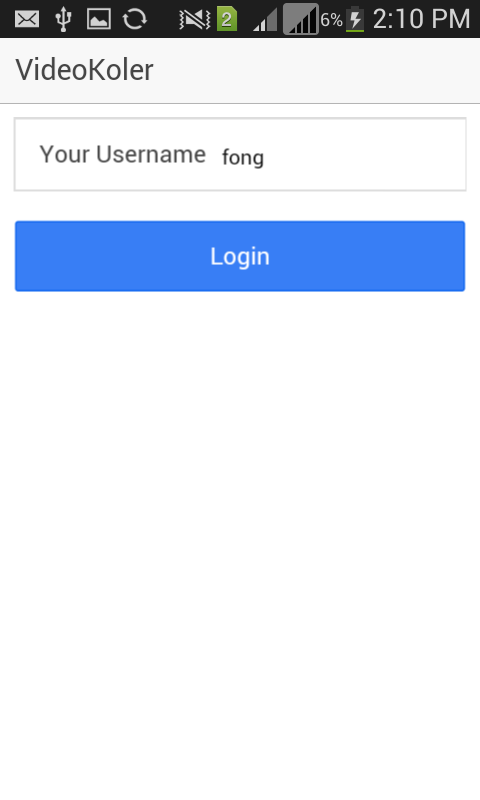
Here are a few screenshots on what we’re going to build in this tutorial. The default page is the login page.
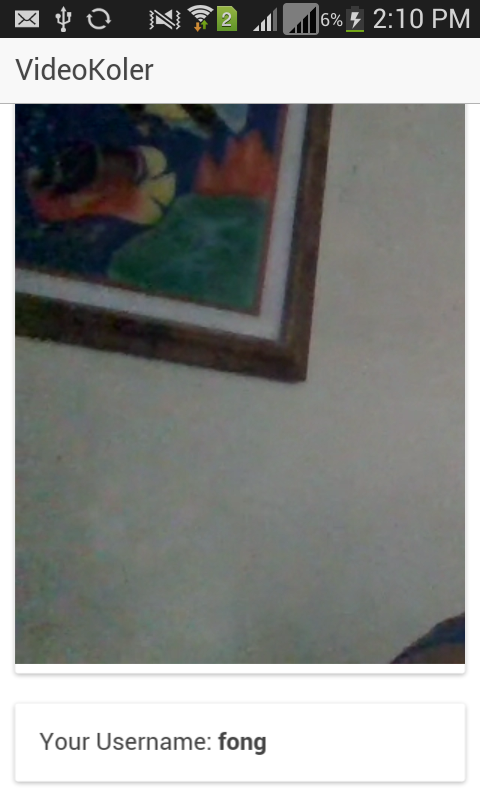
And once the call has started, the app will display a live video feed of the other user.
Set Up
I’m going to assume that you have already developed hybrid mobile apps using Cordova before. If you’re new to Cordova, I suggest you read the Cordova Platform Guide first. Return here once you’ve setup the Android SDK and Cordova on your machine.
If you haven’t used Ionic for projects before, install it with npm.
npm install -g ionicCreate a new Ionic app.
ionic start VideoKoler blankInstalling Front-end Assets
Install bower if you don’t already have it on your machine. It will be used for installing front-end packages needed for this project.
npm install -g bowerNext, navigate to the VideoKoler directory and install Angular Localstorage and PeerJS.
bower install angular-local-storage peerjs --saveAngular Localstorage is used for saving data into the the browser or WebView local storage. PeerJS is a JavaScript library that makes implementation of WebRTC easier.
Installing Crosswalk
By default Ionic uses the WebView of the default Android browser. WebRTC isn’t supported in that browser so we’re using Crosswalk to give it superpowers. Crosswalk installs a more recent version of Chrome into your app so that you can use JavaScript APIs that are not commonly available in the default Android browser. This makes the WebView in which the app is rendered the same for all devices. This means you won’t have to lose sleep worrying if a specific feature you’ve used in your app isn’t implemented.
You can list available browsers using the following command.
ionic browser listThis should result in an output like the following.

I always stick with the latest version that is not Canary. This is because Canary is the bleeding edge version of Chrome and it’s not stable yet. You can then add the version by using ionic browser add.
ionic browser add crosswalk@12.41.296.5Finally, add Android as a platform.
ionic platform add androidPeerServer
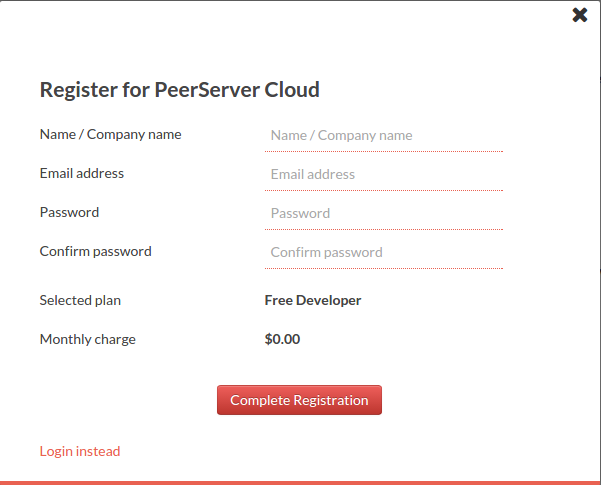
The app is going to use the PeerServer Cloud Service. At the time of writing, it’s free for up to 50 concurrent connections.

Click on Developer – Free, this will open a modal that allows you to sign up to the service.
Once your account is created, you will be redirected to the dashboard. Click the Create new API key button to generate a new key.
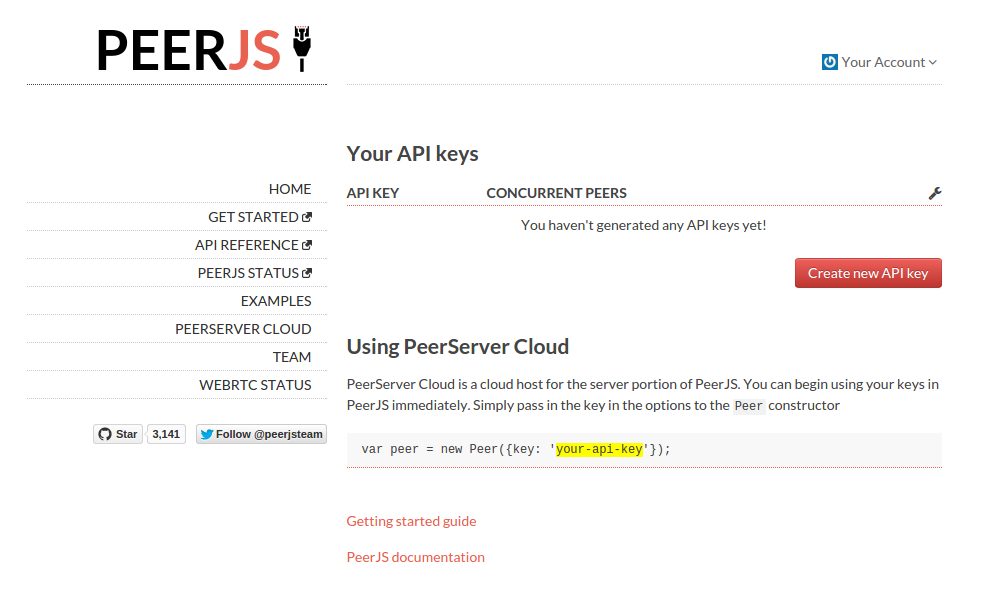
You will then be asked for the ‘Max concurrent peers’ and ‘Max concurrent peers per IP’, the defaults are fine, you can update the values later if need be.

If you want to run the PeerServer on your own server, you can follow the following steps. Note that the limitations of the PeerServer Cloud Service doesn’t apply when you run your own server.
First, create a new folder outside the www directory and name it videokoler-server. Navigate to that directory and install the PeerServer and Express.
npm install peer express --saveCreate a server.js file and add the following.
var express = require('express');
var express_peer_server = require('peer').ExpressPeerServer;
var peer_options = {
    debug: true
};

var app = express();
var port = 3000;
var server = app.listen(port);

app.use('/peerjs', express_peer_server(server, peer_options));
The code above creates a new PeerServer from express server. You can run the server via node.
node server.jsTo check if the peerserver is running properly, access the following URL in your browser, replacing localhost with the domain name.
The output should be something like:
{"name":"PeerJS Server","description":"A server side element to broker connections between PeerJS clients.","website":"http://peerjs.com/"}If you don’t have a server to test on, you can use ngrok to expose localhost to the internet. Download ngrok and execute it using the following command.
ngrok http 3000Ngrok will assign a URL which we can use for the peer configuration later.
Building the App
You can find all the code used in this app on Github repo.
Navigate to the VideoKoler directory and open index.html. Add the following after the script tag that includes the cordova.js file. These are the paths to Angular Localstorage and PeerJS library installed earlier.
<script src="lib/angular-local-storage/dist/angular-local-storage.js"></script>
<script src="lib/peerjs/peer.min.js"></script>
Add the controllers we will need after the script tag that links to the app.js file. There are 2 controllers, one for handling login and one for calls.
<script src="js/controllers/IndexController.js"></script>
<script src="js/controllers/CallController.js"></script>
Inside the body tag, add the ion-nav-view directive. This allows the showing of different templates based on the current state. Replace the current content of the body tag with the below.
<body ng-app="starter">

    <ion-nav-view></ion-nav-view>

</body>
Create a templates folder inside of www and add an index.html file and videocall.html file.
The index.html file contains the template for the home page of the app. It has a text field for inputting a username and a login button. Take note of the name of the controller, the name of the model that’s assigned to the text field, and the function called when the login button is clicked. These will be declared and used later in the controller.
<ion-header-bar class="bar-stable">
  <h1 class="title">VideoKoler</h1>
</ion-header-bar>
<ion-content class="padding has-header" ng-controller="IndexController">

  <div class="list">
    <label class="item item-input">
      <span class="input-label">Your Username</span>
      <input type="text" ng-model="username">
    </label>
  </div>

  <button class="button button-positive button-block" ng-click="login()">
    Login
  </button>
</ion-content>
videocall.html contains the template for calling another user. It has the video container at the top of the layout, which is empty by default. The video will be added once a call begins. It displays the username selected by the user and asks for the username of the user to call.
At the bottom of the layout is a button for initiating a call. Just like the previous template, take note of the values given to the ng-controller, ng-model and ng-click attributes.
<ion-header-bar class="bar-stable">
  <h1 class="title">VideoKoler</h1>
</ion-header-bar>
<ion-content class="padding has-header" ng-controller="CallController">

  <div class="card">
    <video id="contact-video" autoplay></video>
  </div>

  <div class="card">
    <div class="item item-text-wrap">
      Your Username: <strong>{{ username }}</strong>
    </div>
  </div>

  <div class="list">
    <label class="item item-input">
      <span class="input-label">Contact Username</span>
      <input type="text" ng-model="contact_username">
    </label>
  </div>

  <button class="button button-positive button-block" ng-click="startCall()">
    Call
  </button>
</ion-content>
Moving to the JavaScript side of the app. Open js/app.js and add Angular Localstorage as a dependency. ionic is added by default so add LocalStorageModule after it.
angular.module('starter', ['ionic', 'LocalStorageModule'])Add the state configuration. For this app there are 2 states. login which is the default page and app which is the main app page where video calls take place.
A state is set using the state method provided by $stateProvider. This method accepts the name of the state as its first argument and an object containing the options as its second.
For the options, url and templateUrl are all that’s needed. Where url is the url accessed for the state activated. templateUrl is the filesystem path of the template used by this state.
.config(function ($stateProvider, $urlRouterProvider) {
  $stateProvider
    .state('login', {
      url: '/login',
      templateUrl: 'templates/index.html'
    })

    .state('app', {
      url: '/app',
      templateUrl: 'templates/videocall.html'
    });

    $urlRouterProvider.otherwise('/login'); //set default page
});
Next create an IndexController.js file inside a js/controllers directory and add the following.
(function(){
    angular.module('starter')
    .controller('IndexController', ['localStorageService', '$scope', '$state', IndexController]);

    function IndexController(localStorageService, $scope, $state){

        $scope.login = function(){

            var username = $scope.username;
            localStorageService.set('username', username);
            $state.go('app');

        };

    }

})();
Breaking this code down. Everything is wrapped in an immediately invoked function expression.
(function(){

})()
Attach a controller to the starter module. This module was created earlier in the js/app.js file. The controller uses localStorageService which is made available by the Angular Localstorage module. Aside from that, there’s $scope which is used in this controller to set and get variables and functions into the current scope. Finally there is $state which is used to navigate to a different state.
 angular.module('starter')
    .controller('IndexController', ['localStorageService', '$scope', '$state', IndexController]);
The controller does one thing. It’s where the login function is attached to the $scope. Once the login button is clicked, this function is executed.
It gets the current value of the username variable in the $scope, saves it in localstorage and redirects to the main app page.
function IndexController(localStorageService, $scope, $state){

    $scope.login = function(){

        var username = $scope.username;
        if(username){
            localStorageService.set('username', username);
            $state.go('app');
        }

    };

}
While still inside the js/controllers directory, create a CallController.js file and add the following.
(function(){
    angular.module('starter')
    .controller('CallController', ['localStorageService', '$scope', '$ionicPopup', CallController]);

    function CallController(localStorageService, $scope, $ionicPopup){

            $scope.username = localStorageService.get('username');

            var peer = new Peer($scope.username, {
              key: 'your peerserver cloud key',
              config: {'iceServers': [
                { url: 'stun:stun1.l.google.com:19302' },
                { url: 'turn:numb.viagenie.ca', credential: 'muazkh', username: 'webrtc@live.com' }
              ]}
            });

            /* if you run your own peerserver
            var peer = new Peer($scope.username, {
              host: 'your-peerjs-server.com', port: 3000, path: '/peerjs',
              config: {'iceServers': [
                { url: 'stun:stun1.l.google.com:19302' },
                { url: 'turn:numb.viagenie.ca', credential: 'muazkh', username: 'webrtc@live.com' }
              ]}
            });
          */

            function getVideo(successCallback, errorCallback){
                navigator.webkitGetUserMedia({audio: true, video: true}, successCallback, errorCallback);
            }


            function onReceiveCall(call){

                $ionicPopup.alert({
                    title: 'Incoming Call',
                    template: 'Someone is calling you. Connecting now..'
                });

                getVideo(
                    function(MediaStream){
                        call.answer(MediaStream);
                    },
                    function(err){
                        $ionicPopup.alert({
                            title: 'Error',
                            template: 'An error occurred while try to connect to the device mic and camera'
                        });
                    }
                );

                call.on('stream', onReceiveStream);
            }


            function onReceiveStream(stream){
                var video = document.getElementById('contact-video');
                video.src = window.URL.createObjectURL(stream);
                video.onloadedmetadata = function(){
                    $ionicPopup.alert({
                        title: 'Call Ongoing',
                        template: 'Call has started. You can speak now'
                    });
                };

            }

            $scope.startCall = function(){
                var contact_username = $scope.contact_username;

                getVideo(
                    function(MediaStream){

                        var call = peer.call(contact_username, MediaStream);
                        call.on('stream', onReceiveStream);
                    },
                    function(err){
                        $ionicPopup.alert({
                            title: 'Error',
                            template: 'An error occurred while try to connect to the device mic and camera'
                        });
                    }
                );

            };

            peer.on('call', onReceiveCall);


    }

})();
Breaking the code down. We first retrieve the username from the localstorage.
$scope.username = localStorageService.get('username');Create a new peer that uses the username as the peer ID. Then supply the peerserver cloud key as the value for the key option. (You can find your key on the PeerJS Dashboard.)
Next, add the ICE (Interactive Connectivity Establishment) server configuration using the config option. This is important since peerserver cloud only serves as a signaling server. This means it’s only used for exchanging data between peers. An ICE server is needed to traverse NATs (Network) and firewalls. You can find a list of freely available ICE servers here.
var peer = new Peer($scope.username, {
    key: 'your peerserver cloud key',
    config: {'iceServers': [
        { url: 'stun:stun1.l.google.com:19302' },
        { url: 'turn:numb.viagenie.ca', credential: 'muazkh', username: 'webrtc@live.com' }
    ]}
});
If you’re using your own server, you have to supply the host, port and path instead of the key. Then you can use the same values for the config.
var peer = new Peer($scope.username, {
        host: 'your-peerjs-server.com', port: 3000, path: '/peerjs',
        config: {'iceServers': [
            { url: 'stun:stun1.l.google.com:19302' },
            { url: 'turn:numb.viagenie.ca', credential: 'muazkh', username: 'webrtc@live.com' }
        ]}
    }
);
Create the function for requesting the mic and camera from the browser. This uses the Media Capture API. It can be used in Chrome using navigator.webkitGetUserMedia. This accepts an object containing the constraints as it’s first argument. In the example below, both audio and video are set to true. This tells the browser to request access to both the mic and camera. The second and third arguments are the success and error callbacks. These are passed to the function once it’s called.
function getVideo(successCallback, errorCallback){
    navigator.webkitGetUserMedia({audio: true, video: true}, successCallback, errorCallback);
}
Create the function to be executed when a call is received from another peer. An object containing the current call is passed as an argument. Inside the function, it informs the user that a call is received by using an ionic alert. Then it proceeds with calling the getVideo function. When the success callback is executed, it returns a MediaStream which can then be used to give an answer to the call. If the error callback is executed, it informs the user that there was an error. Finally, listen for the stream event on the call. When this event happens, the onReceiveStream function is called.
function onReceiveCall(call){

    $ionicPopup.alert({
        title: 'Incoming Call',
        template: 'Someone is calling you. Connecting now..'
    });

    getVideo(
        function(MediaStream){
            call.answer(MediaStream);
        },
        function(err){
            $ionicPopup.alert({
                title: 'Error',
                template: 'An error occurred while try to connect to the device mic and camera'
            });
        }
    );

    call.on('stream', onReceiveStream);
}
The onReceiveStream function is executed when the media stream is received from the other peer. The stream can then be used as a source to the video element. Once all the meta data has loaded, inform the user that the call has started.
function onReceiveStream(stream){
    var video = document.getElementById('contact-video');
    video.src = window.URL.createObjectURL(stream);
    video.onloadedmetadata = function(){
        $ionicPopup.alert({
            title: 'Call Ongoing',
            template: 'Call has started. You can speak now'
        });
    };

}
Declare the function for initiating the call. This takes the current value of the contact_username in the $scope. This is the username used by the other user when they logged in. Then the getVideo function is executed and it returns the media stream which is used to initiate the call to the other peer. This is done via the call method in the peer. This accepts the username of the other peer as the first argument and the media stream as the second. It then returns an object which you can use for listening for the stream event. Just like on the onReceiveCall function, the onReceiveStream is called once this event happens. This allows the initiator of the call to receive the stream from the other peer.
$scope.startCall = function(){
    var contact_username = $scope.contact_username;

    getVideo(
        function(MediaStream){

            var call = peer.call(contact_username, MediaStream);
            call.on('stream', onReceiveStream);
        },
        function(err){
            $ionicPopup.alert({
                title: 'Error',
                template: 'An error occurred while try to connect to the device mic and camera'
            });
        }
    );

};
Deployment
Now we’re ready to deploy the app on an Android device. Navigate to the platforms/android directory and open the AndroidManifest.xml file. Add the following as children of the manifest tag if they don’t already exist.
<uses-permission android:name="android.permission.INTERNET" />
<uses-permission android:name="android.permission.ACCESS_NETWORK_STATE" />
<uses-permission android:name="android.permission.ACCESS_WIFI_STATE" />

<uses-permission android:name="android.permission.MODIFY_AUDIO_SETTINGS" />
<uses-permission android:name="android.permission.CAMERA" />
<uses-permission android:name="android.permission.RECORD_AUDIO" />
Execute the following to build the app.
ionic build androidOnce building is complete, you can get the apk file inside the platforms/android/build/outputs/apk directory. Since Crosswalk is used, separate apk’s are generated for ARM and x86 processors. You already know that Crosswalk installs the web view of a recent version of Chrome. This means that the apk becomes larger in size than the usual (default Android WebView). This is the reason why a separate apk is generated for each architecture. Because if it’s merged into a single apk file which works on both processors, it will be even larger. You can pick either of the following files depending on your device. – android-armv7-debug.apk – android-x86-debug.apk
Conclusion
That’s it! In this tutorial, you have learned how to build a video calling app for Android using Ionic, Crosswalk and PeerJS. Please let me know if you have any questions, comments or problems in the comments below.
Frequently Asked Questions (FAQs) about Android Video Calling with Crosswalk and PeerJS
How can I troubleshoot connection issues with PeerJS?
Connection issues with PeerJS can be due to several reasons. Firstly, ensure that your internet connection is stable. Secondly, check if the PeerJS server is running correctly. If you’re running your own server, make sure it’s properly configured and that the necessary ports are open. If you’re using the PeerJS cloud server, check their status page for any ongoing issues. Lastly, ensure that your PeerJS client code is correct. Check for any errors in the console and try to resolve them.
Can I use PeerJS with other web technologies?
Yes, PeerJS is highly versatile and can be used with a variety of web technologies. It’s compatible with HTML5, CSS3, and JavaScript, and can be used alongside libraries and frameworks like jQuery, React, Angular, and Vue.js. It can also be used with Node.js for server-side applications.
How secure is video calling with PeerJS?
PeerJS uses WebRTC for video calling, which is a secure protocol. It uses Secure Real-time Transport Protocol (SRTP) for encryption and authentication of video and audio data. However, the security of your application also depends on how you implement PeerJS and manage user data. Always follow best practices for web security, such as using HTTPS and protecting against common web vulnerabilities.
Can I use PeerJS for group video calls?
PeerJS primarily supports one-to-one video calls. However, you can implement group video calls by creating a mesh network where each participant is connected to every other participant. This can be complex and may not scale well for large groups. Alternatively, you can use a Selective Forwarding Unit (SFU) server to manage group calls, but this requires additional server-side programming.
Why is my video quality poor with PeerJS?
Video quality in PeerJS depends on several factors, including the quality of the devices’ cameras, the speed and stability of the internet connection, and the performance of the devices themselves. If you’re experiencing poor video quality, try reducing the video resolution or frame rate in your PeerJS client code. Also, ensure that your devices have enough processing power and memory to handle video calling.
How can I improve the performance of my PeerJS application?
Performance in PeerJS can be improved in several ways. Firstly, optimize your code to minimize CPU and memory usage. Secondly, use efficient data structures and algorithms. Thirdly, reduce network latency by choosing a PeerJS server close to your users or by using a Content Delivery Network (CDN). Lastly, consider using Web Workers or OffscreenCanvas to offload processing to a separate thread.
Can I use PeerJS with Crosswalk on older Android devices?
Yes, Crosswalk allows you to use modern web technologies like PeerJS on older Android devices that don’t support them natively. However, Crosswalk is no longer maintained, so it may not work with the latest versions of Android or with future updates to PeerJS or other web technologies.
How can I handle network interruptions in PeerJS?
PeerJS provides events for detecting and handling network interruptions. You can listen for the ‘disconnected’ and ‘close’ events on the Peer object to detect when the connection is lost, and use the ‘reconnect’ method to attempt to reestablish the connection. You should also provide feedback to the user when the connection is interrupted and when it’s restored.
Can I record video calls with PeerJS?
PeerJS doesn’t provide built-in support for recording video calls. However, you can use the MediaRecorder API to record video and audio streams in the browser. This requires additional programming and may not be supported on all devices or browsers.
How can I test my PeerJS application?
You can test your PeerJS application in several ways. Firstly, use automated testing tools like Jest or Mocha to test your JavaScript code. Secondly, use manual testing to check the user interface and user experience. Thirdly, use network simulation tools to test how your application handles different network conditions. Lastly, consider using A/B testing to compare different versions of your application and improve its design and performance.
 Wern Ancheta
Wern is a web developer from the Philippines. He loves building things for the web and sharing the things he has learned by writing in his blog. When he's not coding or learning something new, he enjoys watching anime and playing video games.