
Since the beginning of Android development working with UI has been an XML thing. Though theoretically, UI could be programmed using Java, it has not been of much use. Not long ago, JetBrains introduced Kotlin, a modern language targeting the JVM, which could serve this purpose for Android.
Jetbrains announced Anko as a faster and easier style of development in Android. Kotlin offers the Anko library as a DSL(Domain Specific Language) to design an Android screen. A quick example:
Following is a plain Android UI consisting of an imageView and a Button.
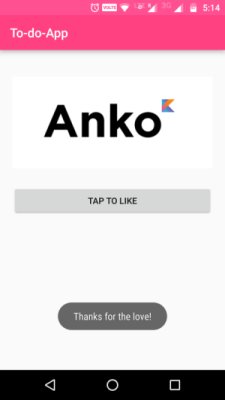
Here’s its Anko code:
verticalLayout{
        imageView(R.drawable.anko_logo).
                lparams(width= matchParent) {
                    padding = dip(20)
                    margin = dip(15)
        }
        button("Tap to Like") {
                onClick { toast("Thanks for the love!") }
        }
    }
Here we have defined a Vertical Linear layout which acts a container for the image and button. The positioning of the views within a layout has been defined using lparams(). And, what happens on the button click is also defined inside the UI definition, thanks to Kotlin inline function.
Advantages of using Anko
- We can embed UI layouts inside the source code, thus making it type-safe.
- Since we are not writing in XML, it adds to the efficiency as there is no need to waste CPU time in parsing the XML.
- After the programmatic transformation of UI, we can put an Anko DSL fragment into a function. Thus facilitating code reuse.
- And clearly, the code is more succinct, readable and graspable.
Now, let’s build a to-do app that lists tasks using Anko Layout and Kotlin.
You can find the repository to this To-do App on GitHub
Adding Anko Library to Android Studio
Take a look at Streamline Android Java Code with Kotlin to learn how to add Kotlin to your Android project. Along with Kotlin, we need to add Anko dependencies in app/build.gradle so that we are able to compile the project:
compile 'org.jetbrains.anko:anko-sdk15:0.8.3'
//sdk19, 21 and 23 are also available
This dependency can be added based on which minSdkVersion you target your application for. The above example describes that it targets 15 <=minSdkVersion< 19. You can check which other Anko libraries are available that you may need on Anko’s GitHub repository.
We are going to be using the following libraries as well:
compile 'org.jetbrains.anko:anko-design:0.8.3'
compile 'org.jetbrains.anko:anko-appcompat-v7:0.8.3'
Calling Anko Layout in Activity
We are not writing XML layouts anymore, so we don’t need to call XML Views nor use findViewById() method. Suppose our Anko UI class is MainUI, then we can set our activity’s content with MainUI as:
var ui = MainUI()           //MainUI class replaces the XML layout
ui.setContentView(this)     //this refers to the Activity class
Now create a new Kotlin file MainActivity.kt and add the following code to it:
import android.os.Bundle;
import android.support.v7.app.AppCompatActivity;
import org.jetbrains.anko.*;
import java.util.*

class MainActivity : AppCompatActivity() {

    val task_list = ArrayList<String>()         //list consisting of tasks

    override fun onCreate(savedInstanceState: Bundle?) {
        super.onCreate(savedInstanceState)
        savedInstanceState?.let {
            val arrayList = savedInstanceState.get("ToDoList")
            task_list.addAll(arrayList as List<String>)
        }
        var adapter=TodoAdapter(task_list)      //define adapter
        var ui = MainUI(adapter)                //define Anko UI Layout to be used
        ui.setContentView(this)                 //Set Anko UI to this Activity

    }
    override fun onSaveInstanceState(outState: Bundle?) {
        outState?.putStringArrayList("ToDoList", task_list)
        super.onSaveInstanceState(outState)
    }
}
task_list is the ArrayList which will populate the TodoAdapter of Listview in our to-do app. MainUI(adapter) is our Anko UI file which takes an adapter of TodoAdapter class as argument. So, let’s create the TodoAdapter class next.
Building Adapter for ListView
TodoAdapter class has a member field list of type ArrayList<String> and extends the BaseAdapter. So, we need to override following 4 member functions:
public int getCount()
public Object getItem(int i)
public long getItemId(int i)
public View getView(int i, View view, ViewGroup viewGroup)
In the getView() method we will design the layout of a list item using Anko.
override fun getView(i : Int, v : View?, parent : ViewGroup?) : View {
    return with(parent!!.context) {
        //taskNum will serve as the S.No. of the list starting from 1
        var taskNum: Int = i +1

        //Layout for a list view item
        linearLayout {
            lparams(width = matchParent, height = wrapContent)
            padding = dip(10)
            orientation = HORIZONTAL

            //Task Number
            textView {
                id = R.id.taskNum
                text=""+taskNum
                textSize = 16f
                typeface = Typeface.MONOSPACE
                padding =dip(5)
            }

            //Task Name
            textView {
                id = R.id.taskName
                text=list.get(i)
                textSize = 16f
                typeface = DEFAULT_BOLD
                padding =dip(5)
            }
        }
    }
}
- In this function, we are returning a view containing a List item which is a
horizontalListViewlayout. This is accomplished using Kotlin’swithsyntax, which allows us to call many methods on an object instance at a time. - Each List Item contains two
textviewfor displaying task number and task name. linearLayout,textVieware extension functions. Extensions give us the power to enable any class with a new functionality.text,textSize,typefacehave their getter and setter methods defined in theandroid.widget.TextViewclass.paddingis an extension property defined in Anko.
Moving ahead, we need to define manipulation functions for the list. So, we have add(String) and delete(Int) functions in the TodoAdapter class. add(String) takes the Task Name to be added as an argument. The position of the item serves as the argument in delete(Int) function as shown below:
//function to add an item to the list
fun add(text: String) {
    list.add(list.size, text)
    notifyDataSetChanged()          //refreshes the underlying dataset
}

//function to delete an item from list
fun delete(i:Int) {
    list.removeAt(i)
    notifyDataSetChanged()          //refreshes the underlying dataset
}
So, now we have designed the list and we can add and delete items to our list as well. This completes the code for this adapter class:
import android.graphics.Typeface
import android.graphics.Typeface.DEFAULT_BOLD
import android.view.View
import android.view.ViewGroup
import android.widget.BaseAdapter
import android.widget.LinearLayout.HORIZONTAL
import org.jetbrains.anko.*
import java.util.*

class TodoAdapter(val list: ArrayList<String> = ArrayList<String>()) : BaseAdapter() {
    override fun getView(i : Int, v : View?, parent : ViewGroup?) : View {
        return with(parent!!.context) {
            //taskNum will serve as the S.No. of the list starting from 1
            var taskNum: Int = i +1

            //Layout for a list view item
            linearLayout {
                id = R.id.listItemContainer
                lparams(width = matchParent, height = wrapContent)
                padding = dip(10)
                orientation = HORIZONTAL

                textView {
                    id = R.id.taskNum
                    text=""+taskNum
                    textSize = 16f
                    typeface = Typeface.MONOSPACE
                    padding =dip(5)
                }

                textView {
                    id = R.id.taskName
                    text=list.get(i)
                    textSize = 16f
                    typeface = DEFAULT_BOLD
                    padding =dip(5)
                }
            }
        }
    }

    override fun getItem(position : Int) : String {
        return list[position]
    }

    override fun getCount() : Int {
        return list.size
    }

    override fun getItemId(position : Int) : Long {
        //can be used to return the item's ID column of table
        return 0L
    }

    //function to add an item to the list
    fun add(text: String) {
        list.add(list.size, text)
        notifyDataSetChanged()
    }

    //function to delete an item from list
    fun delete(i:Int) {
        list.removeAt(i)
        notifyDataSetChanged()
    }

}
Note that we must import org.jetbrains.anko.* to use Anko DSL in our Class files.
Designing To-Do Screen
Anko provides us the convenience of having the UI for the Activity in a separate Kotlin class. Thus, each screen can be thought of as a UI-Activity pair of Kotlin classes. This UI class is developed by extending the capabilities of the AnkoComponent<T> interface defined in org.jetbrains.anko package. Along with this interface, JetBrains offers a DSL layout preview feature for free. This is how Anko DSL Layout Preview looks like in Android Studio:
(Source: blog.jetbrains.com)

The corresponding plugin for Anko Preview can be downloaded from here. Please note that at the time of writing this article, Anko DSL Preview for Android Studio 2.2 was listed as an open issue.
Coming back to the To-do-App, We’ll now design the MainUI class which hosts the list of all the tasks. MainUI class extends the interface AnkoComponent<T>, where T refers to the owner of the UI i.e. the activity whose content would be this UI. In our case, the owner is MainActivity that we have already defined above. Next, at the time of initialization, we must pass the TodAadapter object to this class as this adapter will be used to populate the list. So, the MainUI class declaration becomes:
class MainUI(val todoAdapter : TodoAdapter) : AnkoComponent<MainActivity>
Now, we need to override the function createView() which will take AnkoContext object as an argument and return a View type:
override fun createView(ui: AnkoContext<MainActivity>): View = with(ui) {}
The UI definition that we provide inside the createView() function is returned to the owner activity, which in this case is MainActivity. So, let’s get down coding the createView() method.
Step1- Designing Home screen
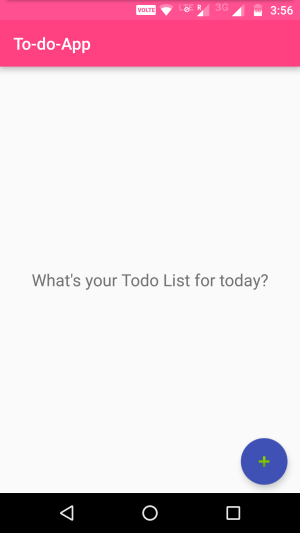
Initially, the home screen has an empty list of tasks. So, we have a textView that asks the user to create a Todo List for the day:
    return relativeLayout {
        //declaring the ListView
        var todoList : ListView? =null

        //textView displayed when there is no task
        val hintListView = textView("What's your Todo List for today?") {
            textSize = 20f
        }.lparams {
            centerInParent()
        }
}
centerInParent() is the helper method to define the layout of the view to be relatively center vertically and horizontally.
As it is a todo app, its essence lies in a list displaying the tasks. So, here we define our listView:
//listView
verticalLayout {
    todoList=listView {
    //assign adapter
        adapter = todoAdapter
        }
}.lparams {
        margin = dip(5)
}
todoAdapter is the member variable of MainUI class that we have defined in the class declaration. We initiate the adapter of the listView with the value of todoAdapter which is a TodoAdpater class object and will populate the list.
To help the user to add a task we have provided a floatingActionButton at the bottom right of the home screen following the Material design principles. So, in Anko we program the floatingActionButton as:
floatingActionButton {
            imageResource = android.R.drawable.ic_input_add
        }.lparams {
            //setting button to bottom right of the screen
            margin = dip(10)
            alignParentBottom()
            alignParentEnd()
            alignParentRight()
            gravity = Gravity.BOTTOM or Gravity.END
        }
Step2- Displaying the AddTask alert dialog
Anko provides an easy manner to set onClickListener for View. So, we can add an onClickListener to the floatingActionButton by adding the onClick() method inside it. Let’s create a custom dialog box appearing on click of the floatingActionButton, that will ask the user to enter the task and add it to the list:
floatingActionButton {
            imageResource = android.R.drawable.ic_input_add
            onClick {
                val adapter = todoList?.adapter as TodoAdapter
                alert {
                    customView {
                        verticalLayout {
                        //Dialog Title
                            toolbar {
                                id = R.id.dialog_toolbar
                                lparams(width = matchParent, height = wrapContent)
                                backgroundColor = ContextCompat.getColor(ctx, R.color.colorAccent)
                                title = "What's your next milestone?"
                                setTitleTextColor(ContextCompat.getColor(ctx, android.R.color.white))
                            }
                            val task = editText {
                                hint = "To do task "
                                padding = dip(20)
                            }
                            positiveButton("Add") {
                                if(task.text.toString().isEmpty()) {
                                    toast("Oops!! Your task says nothing!")
                                }
                                else {
                                    adapter.add(task.text.toString())
                                    showHideHintListView(todoList!!)
                                }
                            }
                        }
                    }
                }.show()
            }
        }.lparams {
            //setting button to bottom right of the screen
            margin = dip(10)
            alignParentBottom()
            alignParentEnd()
            alignParentRight()
            gravity = Gravity.BOTTOM or Gravity.END
        }
alert{}is the inline function to create an Anko dialog box. By default in an Anko dialog box, we can set a text message and provide apostiveButtonandnegativeButton. We can customize the alert dialog usingcustomView.verticalLayoutis alinearLayoutwith orientation as vertical.- We have added the title to the dialog using
toolbar, thus customizing it. Note that how do we assign a color to a view in the dialog:backgroundColor = ContextCompat.getColor(ctx, R.color.colorAccent)
Herectxrefers toContextdefined in theAlertDialogBuilderclass in the packageorg.jetbrains.anko, that we need to pass as an argument so that we let Android know the context we are referring to. postiveButton()is an Anko Helper method that lets us define what happens when the user submits the dialog. Here we are checking if thetaskis not empty then we are adding the task to the list adapter using theaddmethod we have defined inTodoAdapterclass.-
What is
showHideHintListView(todoList!!)? Well, it’s a method that we have defined to hide the textViewhintListViewthat comes on the home screen so as to make space for our list. When the listView is empty we show thehintListViewelse we hide it.//function to show or hide above textView
fun showHideHintListView(listView: ListView) {
if (getTotalListItems(listView)>0) {
hintListView.visibility = View.GONE
} else {
hintListView.visibility = View.VISIBLE
}
}
Here the getTotalListItems(listView) is the member method of MainUI class that returns the count of number of items in listView passed. Its a normal Kotlin function:
//function to get total number of items in list
fun getTotalListItems(list: ListView?) = list?.adapter?.count ?: 0
Finally on clicking on floatingActionButton we see the dialog:

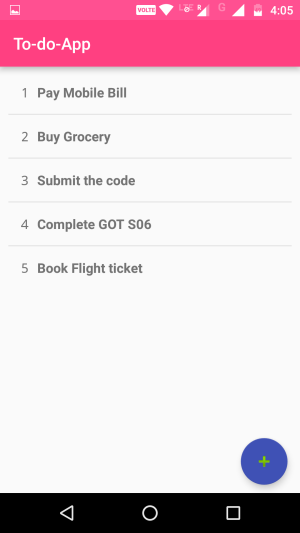
And once we add a few tasks we can see the list of tasks:
Step3- Deleting a task
Remember, we have defined the delete(Int) method in TodoAdapter class that deletes an item from the list. Now’s the time to design the UI that will in turn call this
method. Following the Android design patterns, we can present the task options on tap and hold of a task. So, let’s define what happens onLongClick of a list item. Go back to the listView definition and add the following:
onItemLongClick { adapterView, view, i, l ->
val options = listOf("Delete")
    selector("Task Options", options) { j ->
            var task=adapter.getItem(i)
            todoAdapter?.delete(i)
            //check if list is empty then show hint
            showHideHintListView(this@listView)
            longToast("Task ${task} has been deleted")
    }
    true
}
- Here
todoAdapteris the object ofTodoAdapterclass. Calling thedeletemethod onadaptergives an error saying it might have changed by the time. So, we must calldeletemethod ontodoAdapter. Another option is to typecastadaptertoTodoAdapter. And the kotlin way to do it is:
(adapter as TodoAdapter)?.delete(i)
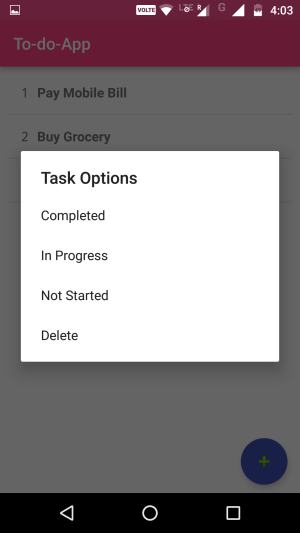
irefers to the item position that is being clicked. selectoris a kind of Ankodialogthat gives us option to define a list of clickable items. Here we have taken only one option i.e. Delete. We can provide user with other options to choose from. Below is an example:
verticalLayout {
    todoList=listView {
        adapter = todoAdapter
        onItemLongClick { adapterView, view, i, l ->
            val options = listOf("Completed","In Progress","Not Started","Delete")
            selector("Task Options", options) { j ->
                if (j == 3) {
                    var task=adapter.getItem(i)
                    todoAdapter?.delete(i)
                    showHideHintListView(this@listView)
                    longToast("Task ${task} has been deleted")
                }else{
                    longToast("Task ${adapter.getItem(i).toString()} has been marked as \"${options[j]}\"")
                }
            }
            true
        }
    }
}.lparams {
        margin = dip(5)
}
Database updating, notifying the user, or any other code can be executed in place of the toast to enhance the functionality of the To-do App. This is how selecter dialog looks like on screen:
Thus, the complete code for MainUI class is:
import android.support.v4.content.ContextCompat
import android.view.Gravity
import android.view.View
import android.widget.FrameLayout
import android.widget.ListView
import org.jetbrains.anko.*
import org.jetbrains.anko.appcompat.v7.toolbar
import org.jetbrains.anko.design.floatingActionButton

class MainUI(val todoAdapter: TodoAdapter) : AnkoComponent<MainActivity> {
    override fun createView(ui: AnkoContext<MainActivity>): View = with(ui) {
        return relativeLayout {
            var todoList : ListView? =null

            //textView displayed when there is no task
            val hintListView = textView("What's your Todo List for today?") {
                textSize = 20f
            }.lparams {
                centerInParent()
            }

            //function to show or hide above textView
            fun showHideHintListView(listView: ListView) {
                if (getTotalListItems(listView)>0) {
                    hintListView.visibility = View.GONE
                } else {
                    hintListView.visibility = View.VISIBLE
                }
            }

            //layout to display ListView
            verticalLayout {
                todoList=listView {
                    adapter = todoAdapter
                    onItemLongClick { adapterView, view, i, l ->
                        val options = listOf("Completed","In Progress","Not Started","Delete")
                        selector("Task Options", options) { j ->
                            if (j == 3) {
                                var task=adapter.getItem(i)
                                todoAdapter?.delete(i)
                                showHideHintListView(this@listView)
                                longToast("Task ${task} has been deleted")
                            }else{
                                longToast("Task ${adapter.getItem(i).toString()} has been marked as \"${options[j]}\"")
                            }
                        }
                        true
                    }
                }
            }.lparams {
                    margin = dip(5)
            }

            //Add task FloatingActionButton at bottom right
            floatingActionButton {
                imageResource = android.R.drawable.ic_input_add
                onClick {
                    val adapter = todoList?.adapter as TodoAdapter
                    alert {
                        customView {
                            verticalLayout {
                                toolbar {
                                    id = R.id.dialog_toolbar
                                    lparams(width = matchParent, height = wrapContent)
                                    backgroundColor = ContextCompat.getColor(ctx, R.color.colorAccent)
                                    title = "What's your next milestone?"
                                    setTitleTextColor(ContextCompat.getColor(ctx, android.R.color.white))
                                }
                                val task = editText {
                                    hint = "To do task "
                                    padding = dip(20)
                                }
                                positiveButton("Add") {
                                    if(task.text.toString().isEmpty()) {
                                        toast("Oops!! Your task says nothing!")
                                    }
                                    else {
                                        adapter.add(task.text.toString())
                                        showHideHintListView(todoList!!)
                                    }
                                }
                            }
                        }
                    }.show()
                }
            }.lparams {
                //setting button to bottom right of the screen
                margin = dip(10)
                alignParentBottom()
                alignParentEnd()
                alignParentRight()
                gravity = Gravity.BOTTOM or Gravity.END
            }
        }.apply {
            layoutParams = FrameLayout.LayoutParams(matchParent, matchParent)
                    .apply {
                        leftMargin = dip(5)
                        rightMargin = dip(5)
                    }
        }

    }

    //function to get total number of items in list
    fun getTotalListItems(list: ListView?) = list?.adapter?.count ?: 0
}
Final Thoughts
We haven’t used any XML layout resource in developing this To-do app, yet we are able to design the app in a similar style. Anko removes the burden of presenting the data, responding to user interaction, connecting to databases, and much more, from activity or fragments in an app. Also, isolating the UI and Activity classes brings the app closer to MVP(Model-View-Presenter) architecture. You can learn about advanced features of Anko from here.
Though it has a few drawbacks like slower compilation and heavy app size, it packs a great punch when it comes to reusing, maintaining and testing the code. Thus, Kotlin-Anko is all set for Android production apps.
Let me know your views about Anko in the comments section.
Frequently Asked Questions (FAQs) about Building a UI with Kotlin and Anko
What are the advantages of using Kotlin and Anko for UI development?
Kotlin and Anko offer several advantages for UI development. Firstly, Kotlin is a statically typed programming language that is fully interoperable with Java. This means you can use all existing Java libraries and frameworks while enjoying Kotlin’s more expressive and concise syntax. Secondly, Anko is a Kotlin library that makes Android application development faster and easier. It eliminates the need for writing tedious and error-prone XML layouts by providing a DSL for writing dynamic layouts directly in Kotlin code. This results in cleaner and more maintainable code.
How does Anko simplify Android development?
Anko simplifies Android development in several ways. It provides a DSL for creating layouts, which eliminates the need for XML. This results in cleaner and more maintainable code. Anko also provides helper functions for database operations, making it easier to work with SQLite databases. Furthermore, Anko includes functions for common tasks such as starting activities, creating intents, and displaying toasts, which reduces boilerplate code.
Can I use Anko with Java?
Anko is a Kotlin library and is designed to be used with Kotlin. While it’s technically possible to call Kotlin code from Java, it’s not recommended as you won’t be able to take full advantage of Anko’s features. If you’re currently using Java for Android development, consider migrating to Kotlin to take advantage of libraries like Anko.
How does Kotlin compare to Java for Android development?
Kotlin offers several advantages over Java for Android development. It has a more expressive and concise syntax, which can make your code easier to read and write. Kotlin also includes several modern features that Java lacks, such as lambda expressions, null safety, and extension functions. Furthermore, Kotlin is fully interoperable with Java, so you can use all existing Java libraries and frameworks.
Is it difficult to learn Kotlin if I’m already familiar with Java?
If you’re already familiar with Java, you’ll find many similarities in Kotlin, which should make the learning process easier. Kotlin was designed to be a better version of Java, so it includes many of the same concepts and structures. However, Kotlin also includes several new features and improvements over Java, so there will still be new things to learn.
How can I start using Anko in my Android project?
To start using Anko in your Android project, you need to add the Anko dependencies to your build.gradle file. Once the dependencies are added, you can start using Anko’s features in your Kotlin code.
Can I use Anko for non-UI related tasks?
Yes, Anko is not just for UI development. It also includes several helper functions for common Android tasks, such as working with databases, networking, and threading. This makes Anko a versatile library that can simplify many aspects of Android development.
How does Anko handle screen rotation?
Anko does not directly handle screen rotation. Screen rotation is typically handled in the Android framework by saving and restoring the activity’s state. However, because Anko allows you to write dynamic layouts in Kotlin code, you can easily adjust your layout based on the current screen orientation.
Can I use Anko with other Android libraries and frameworks?
Yes, Anko is fully interoperable with other Android libraries and frameworks. This means you can use Anko alongside other libraries such as Android Jetpack, Dagger, and RxJava.
Is Anko still maintained and updated?
As of 2019, the Anko library is no longer actively maintained by JetBrains. However, the library is still available and can be used in projects. It’s also open-source, so the community can contribute to its development.
 Ankul Jain
Ankul is a freelancer, technical writer, and developer from India. He loves to explore new opportunities and technologies with Android and other mobile platforms being his present muse. He is a co-founder and developer at scheduLAWyer, an Android app.